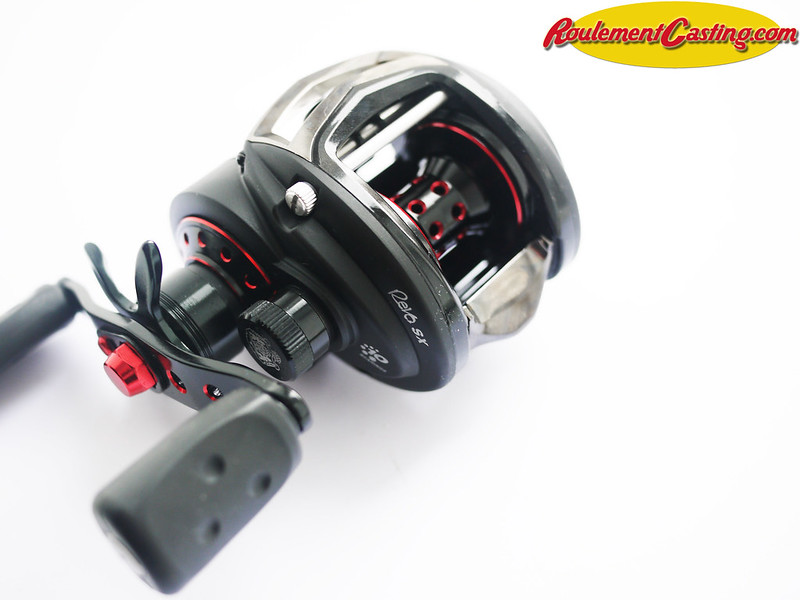
We’re going to look at how to quickly and easily replace the original ball bearings on an Abu Garcia Revo G3 SX with hybrid ceramic bearings to significantly improve its performance.
You can find our selection of parts for your Abu Garcia REV3 SX on the following page: Abu Garcia REV3 SX Upgrade
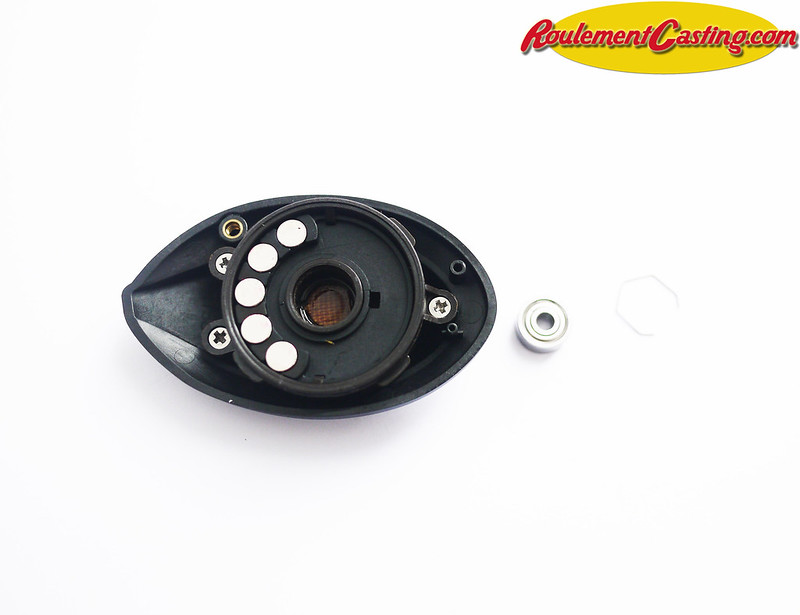
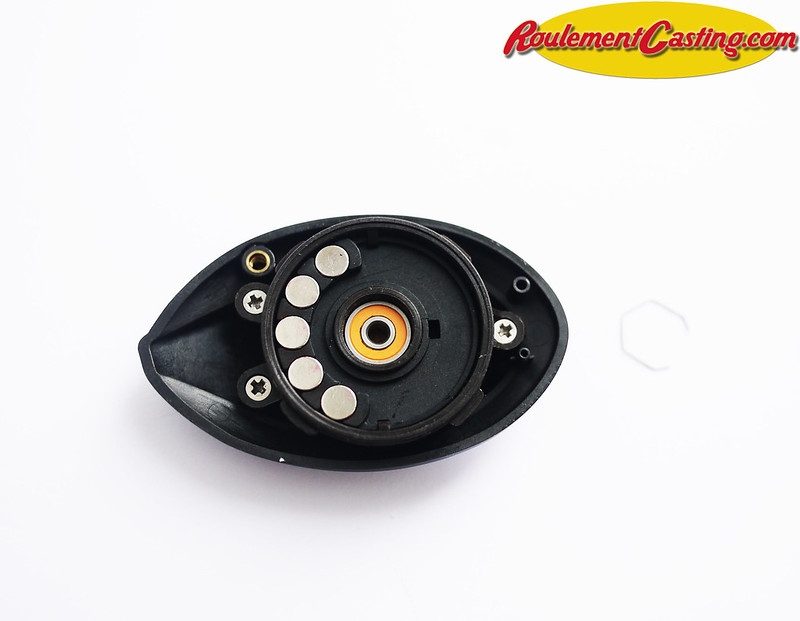
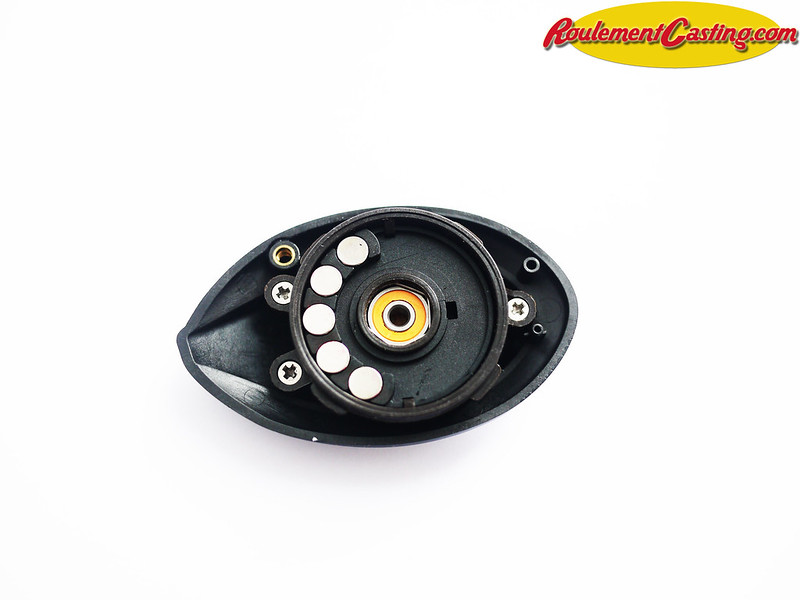
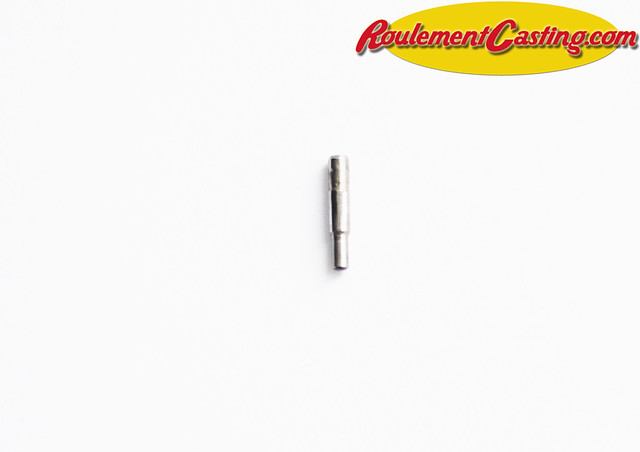
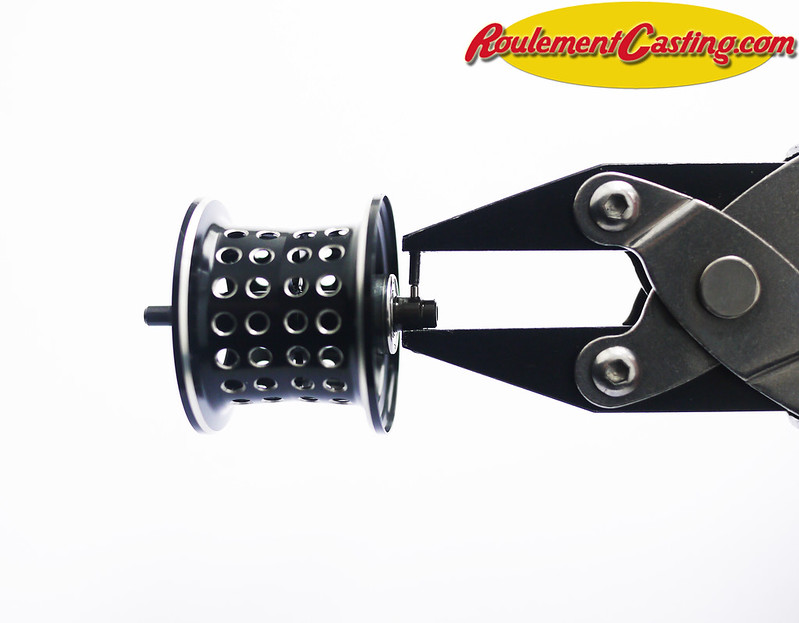
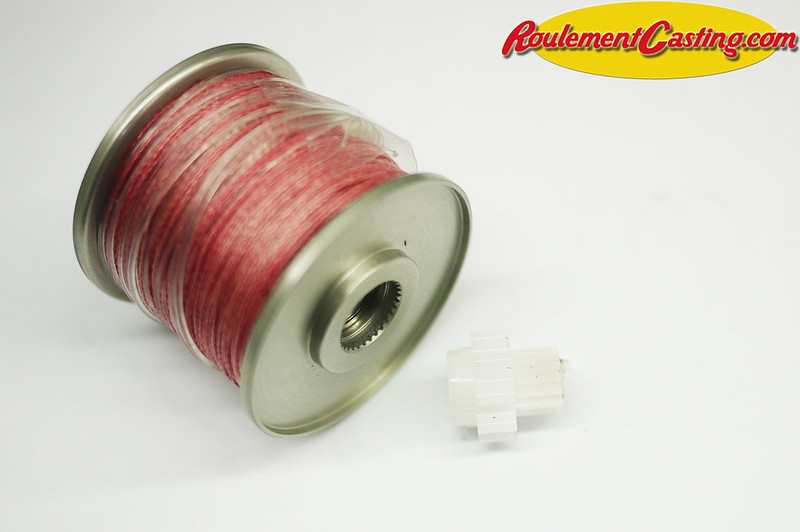
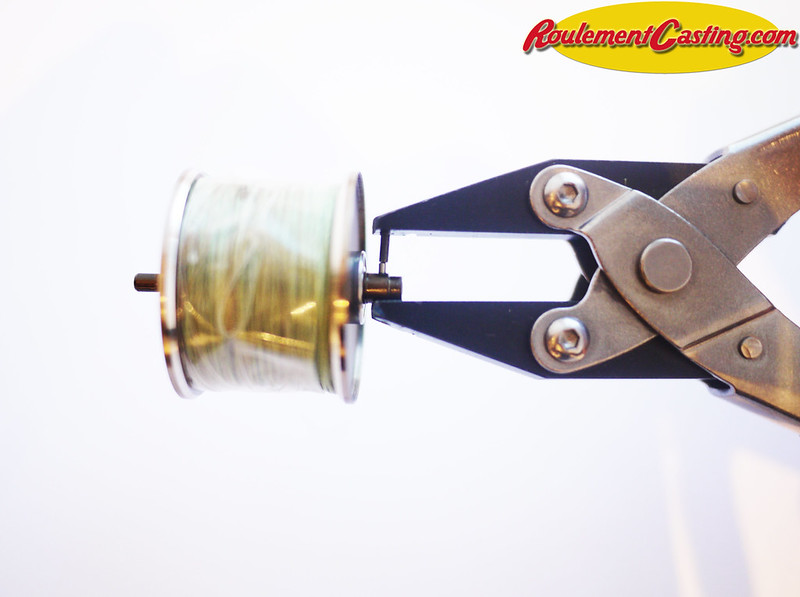
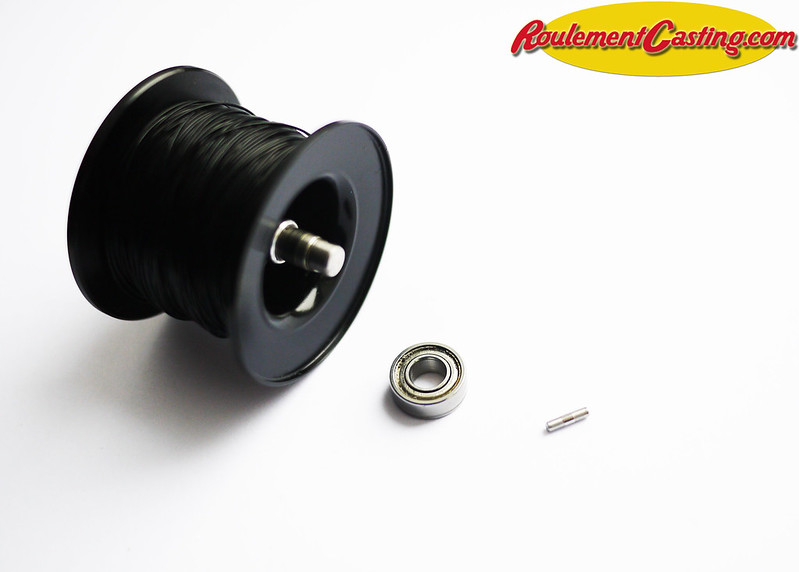
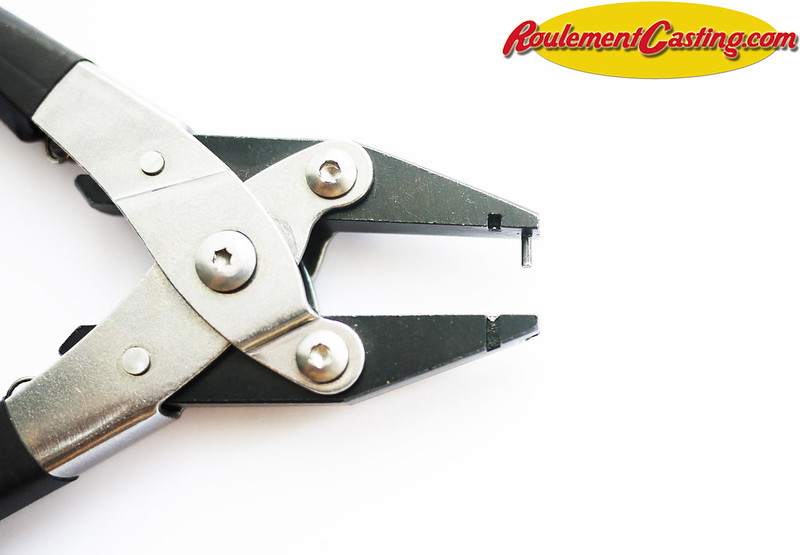
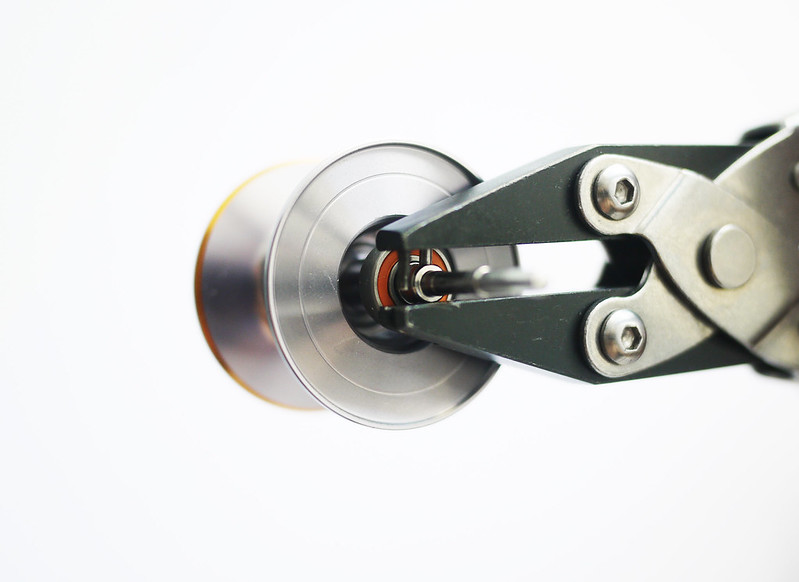
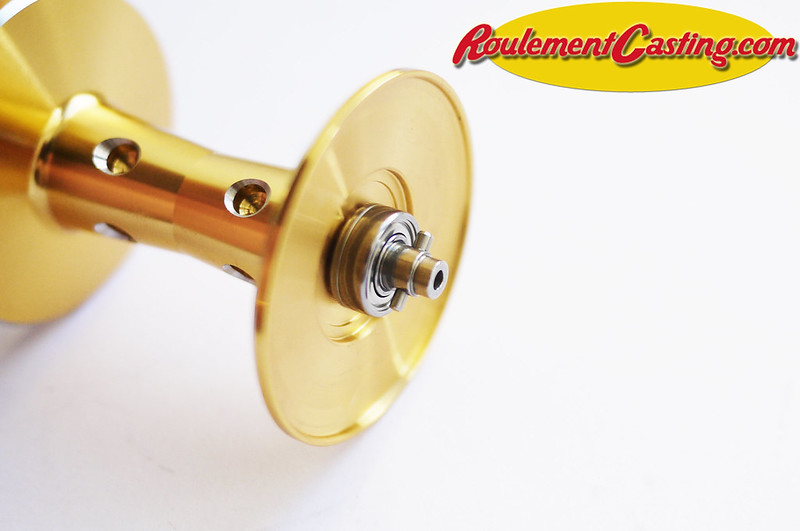
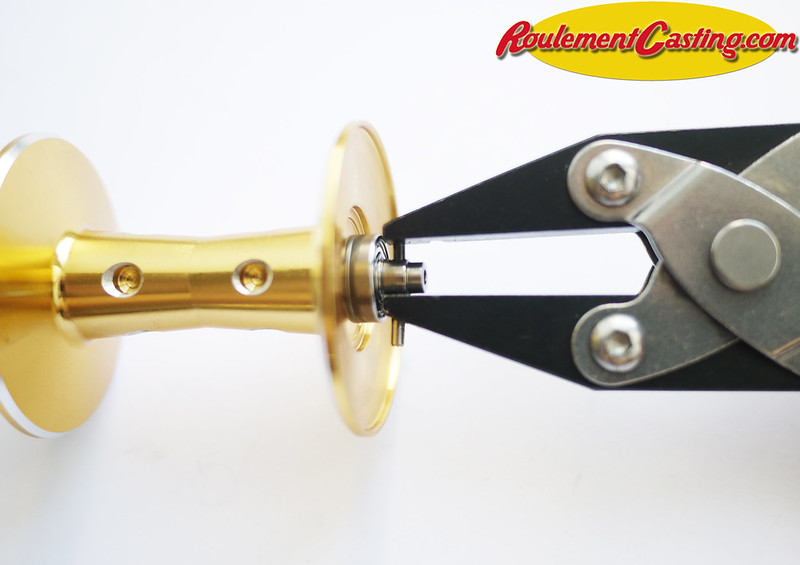
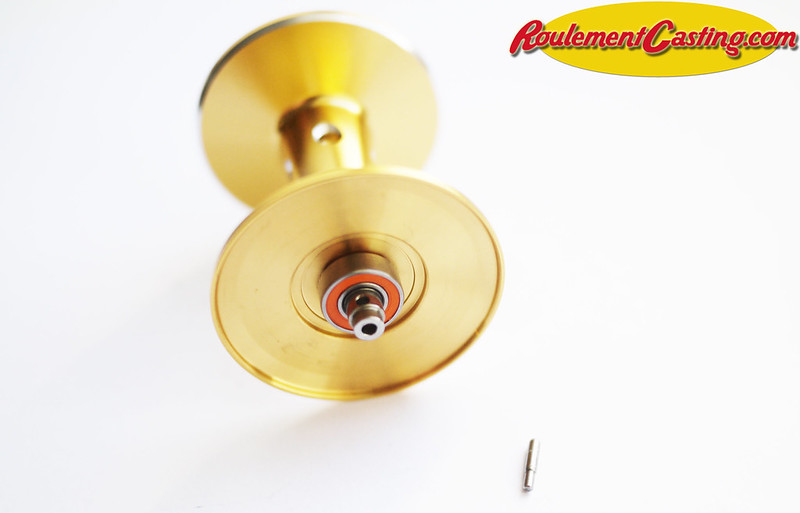
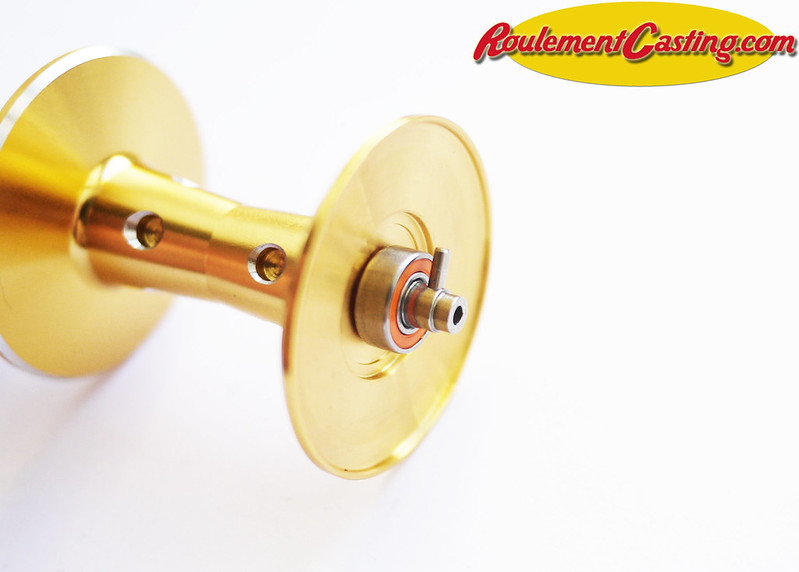
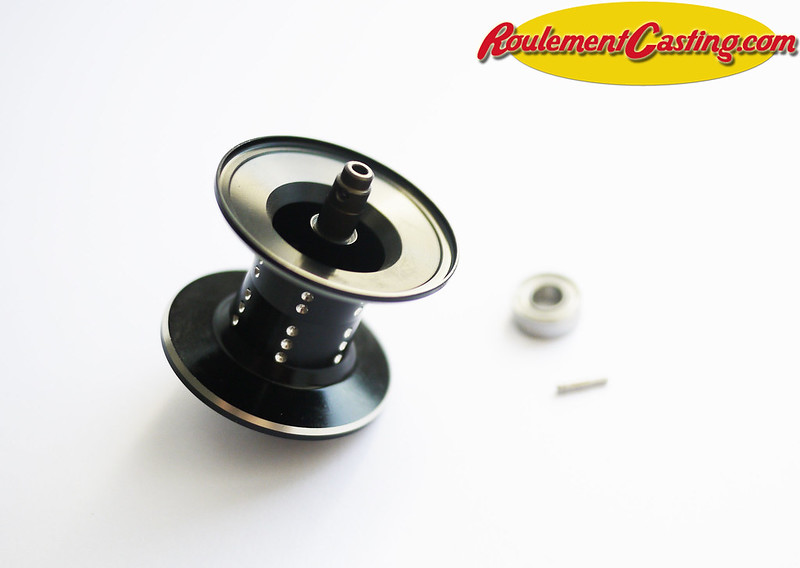
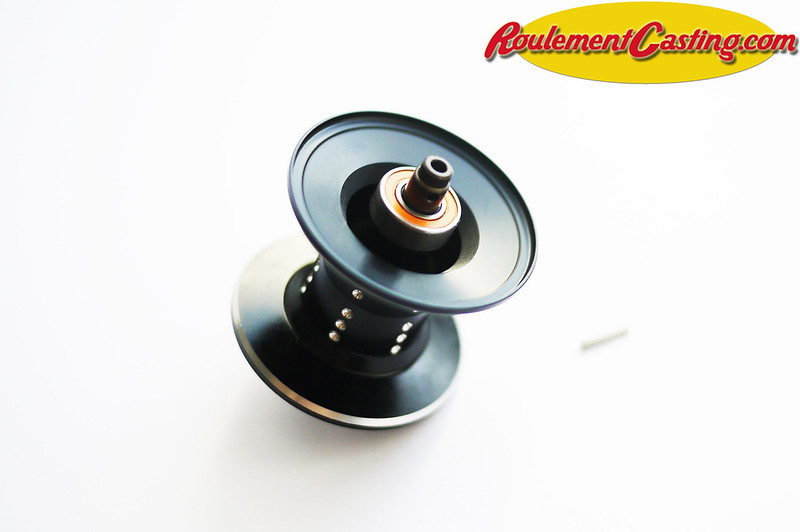
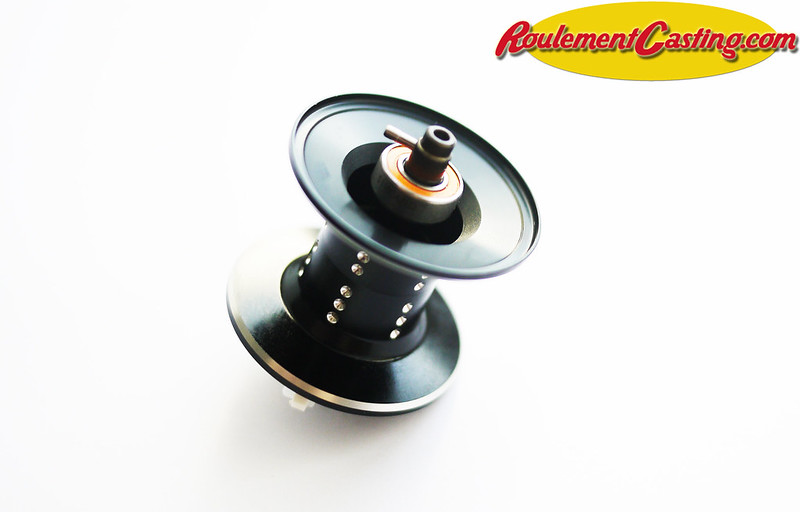
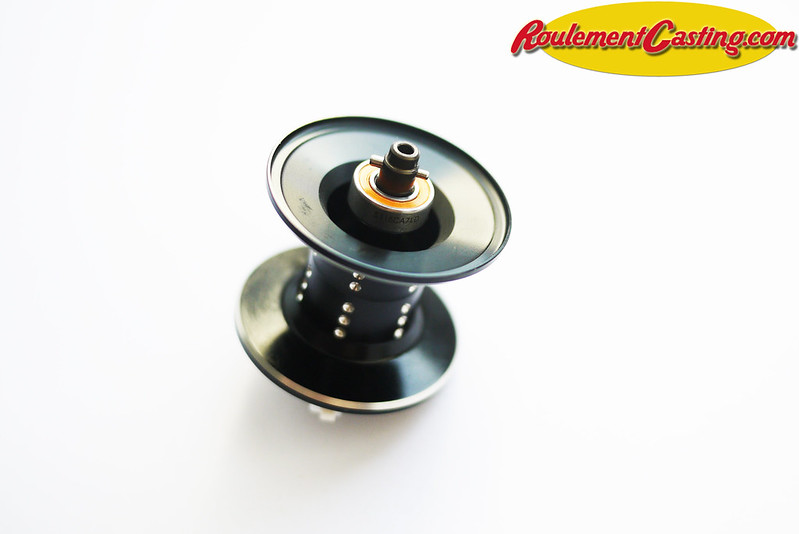
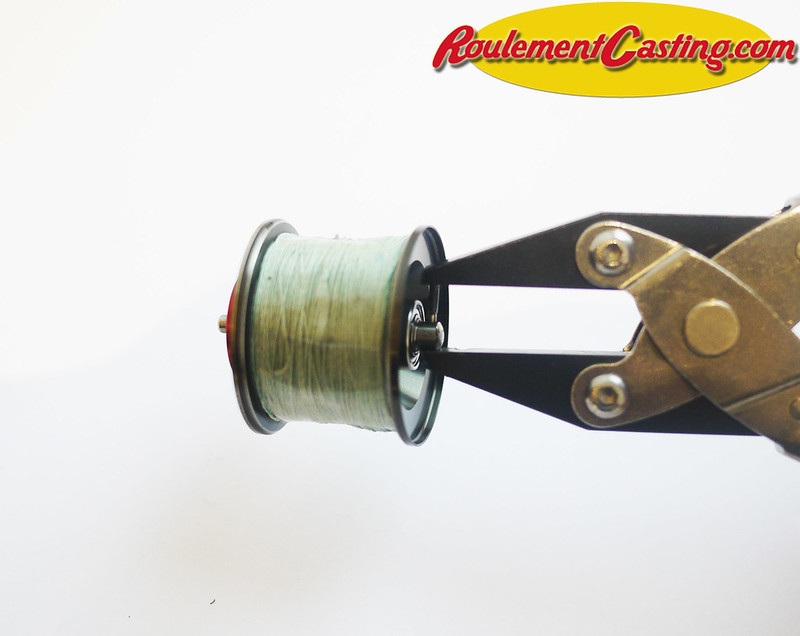
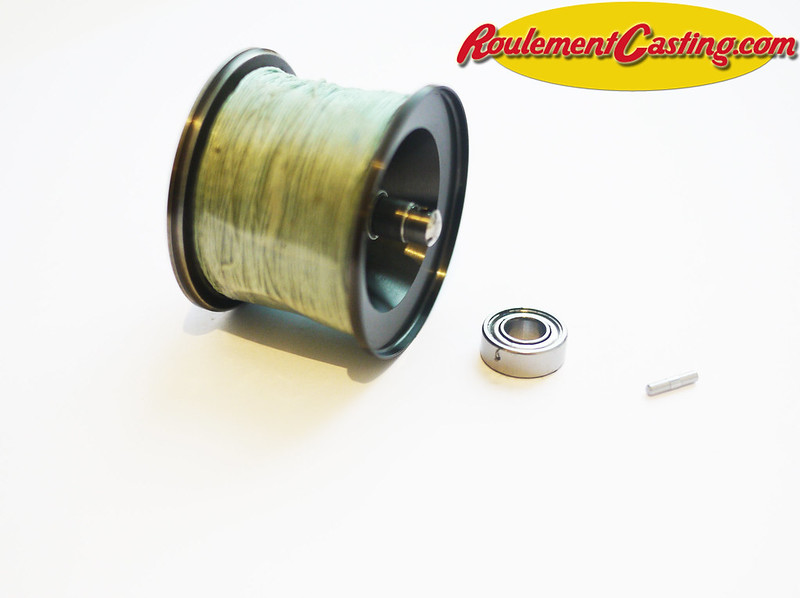
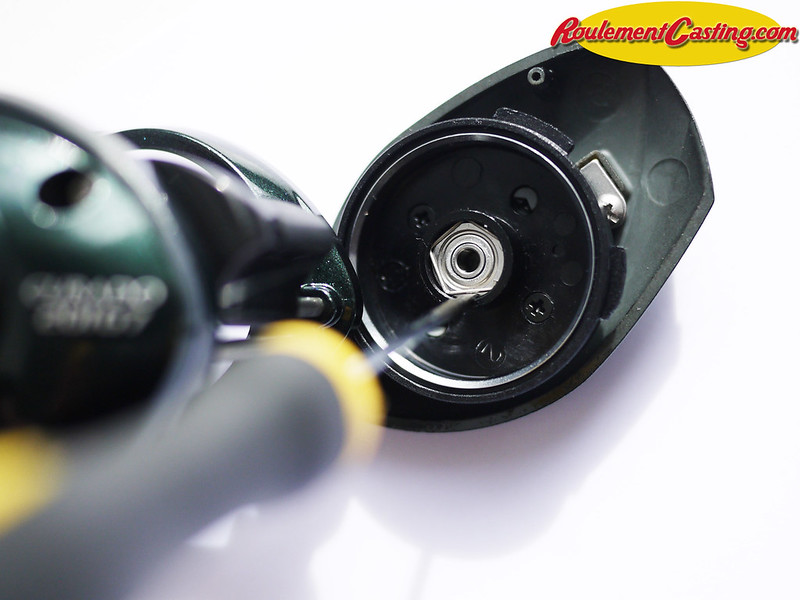
The pin on Abu Garcia and Lew’s reels has a specific direction; make sure you remove it in the correct direction (press the narrower end to remove it and the wider end to push it back in)
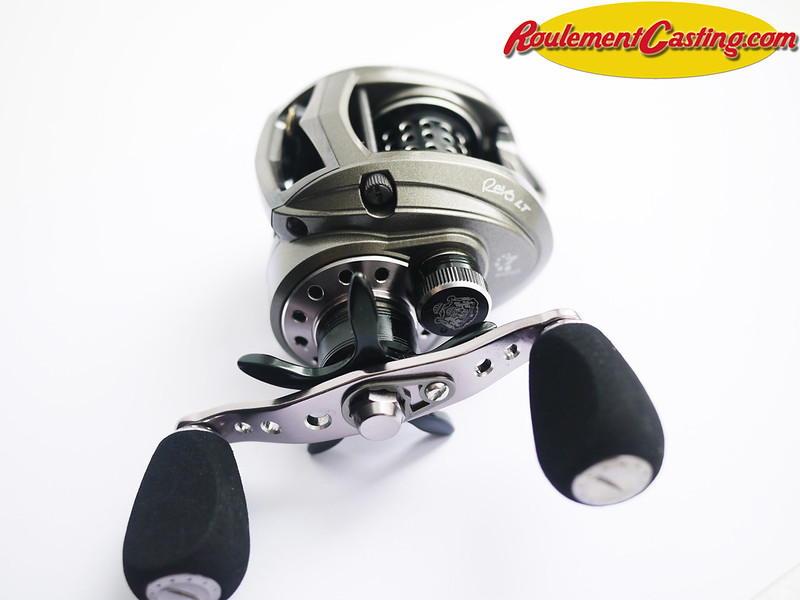
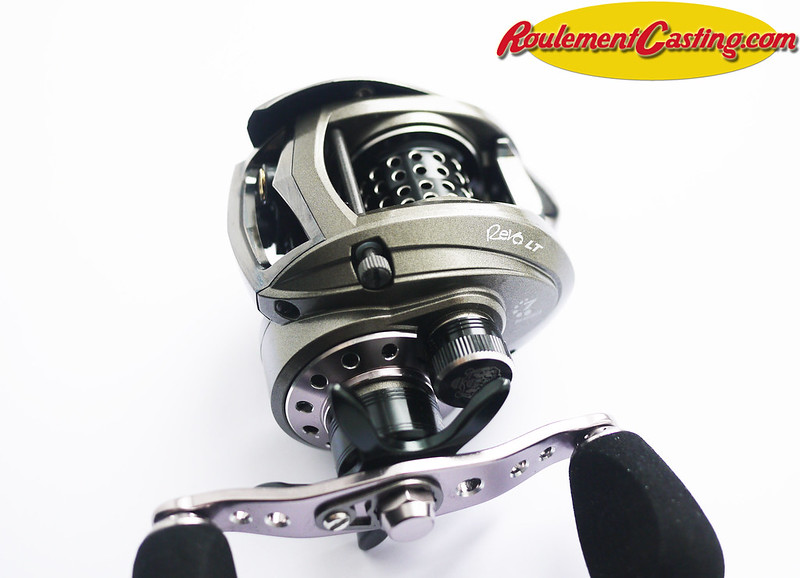
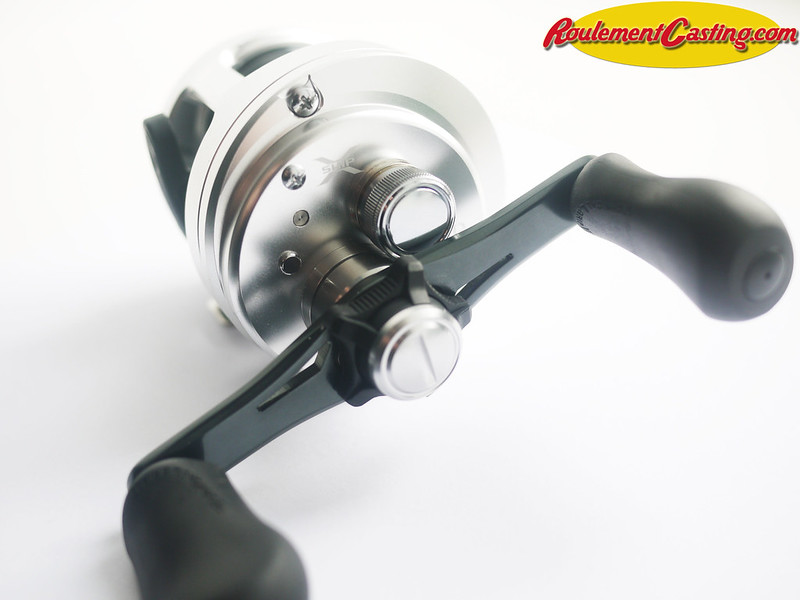
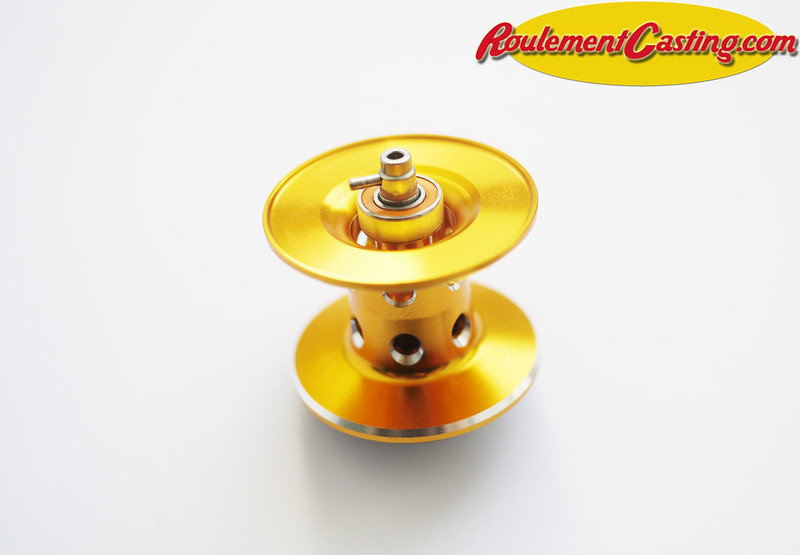
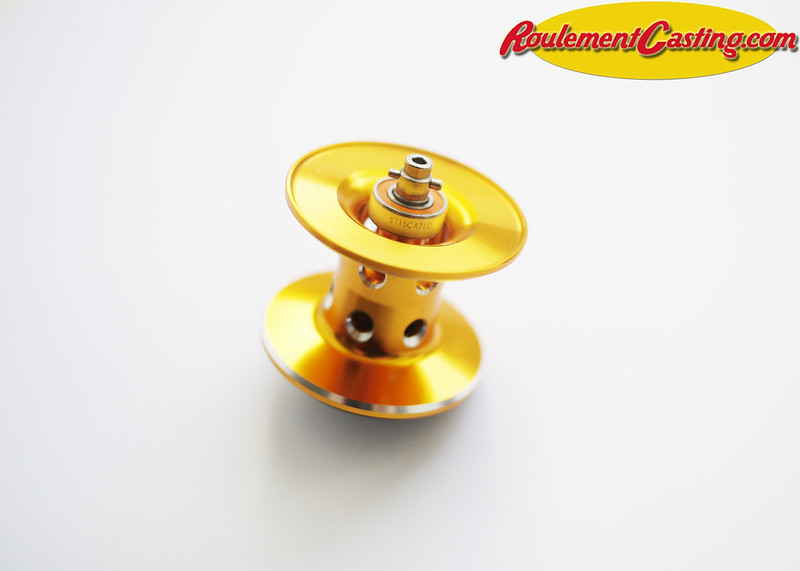
We’re going to look at how to quickly and easily replace the original ball bearings on an Abu Garcia LT with hybrid ceramic bearings to significantly improve its performance.
You can find our selection of parts for your Abu Garcia Revo LT on the following page: Abu Garcia Revo LT Upgrade
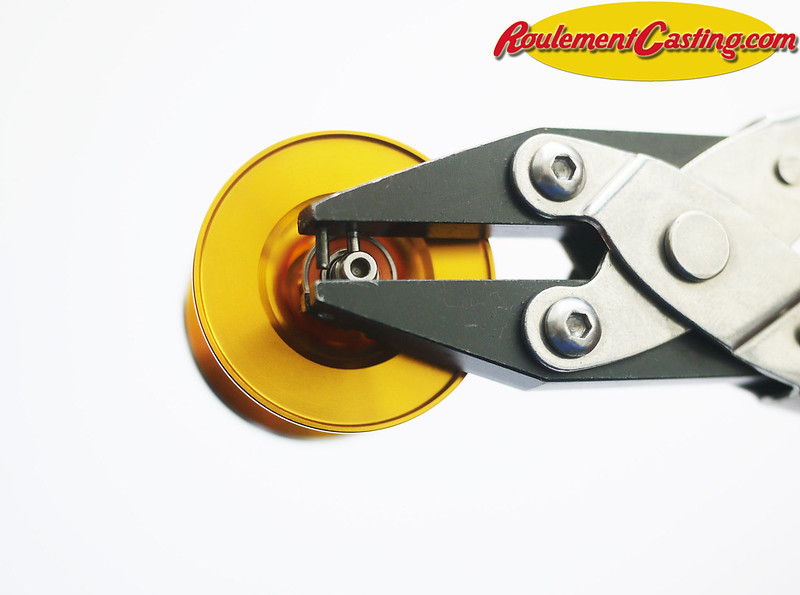
The pin on Abu Garcia and Lew’s reels has a specific direction; make sure you remove it in the correct direction (press the narrower end to remove it and the wider end to push it back in)
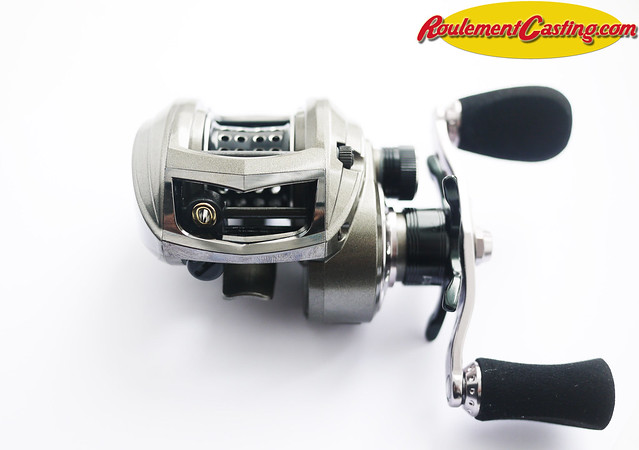
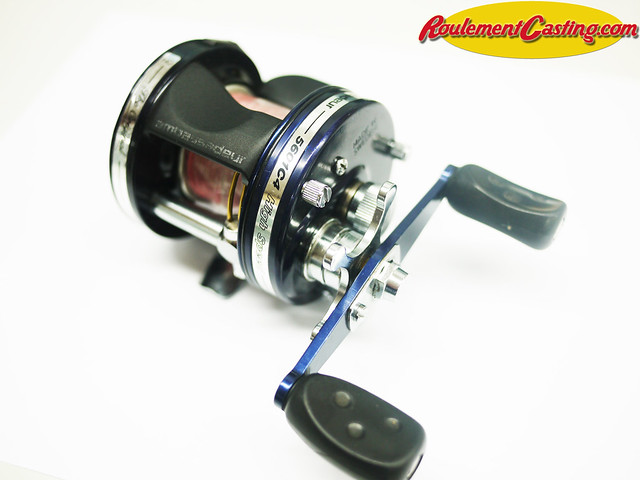
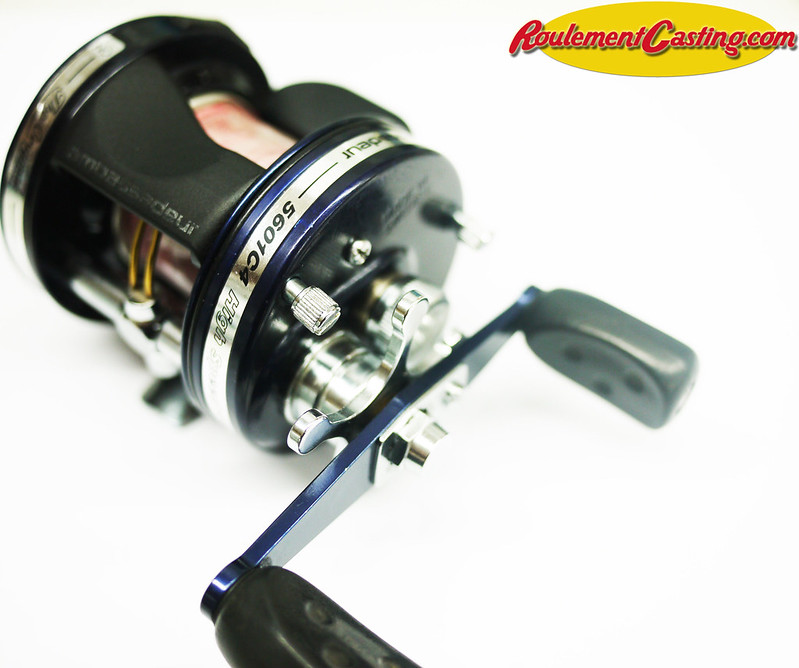
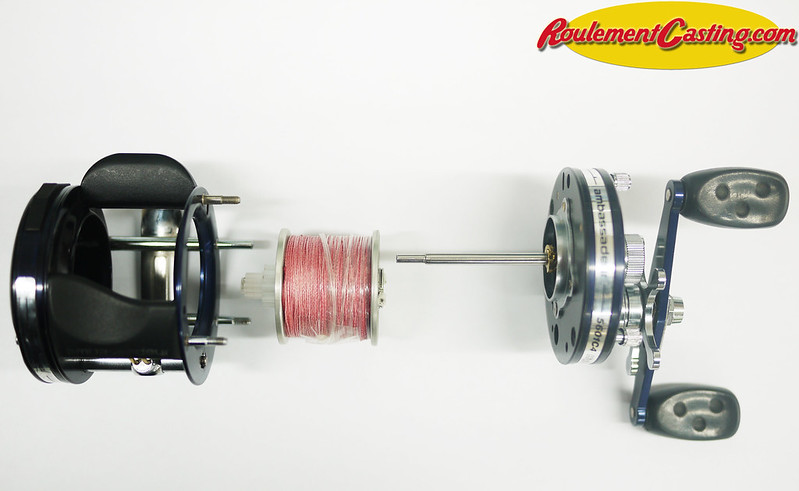
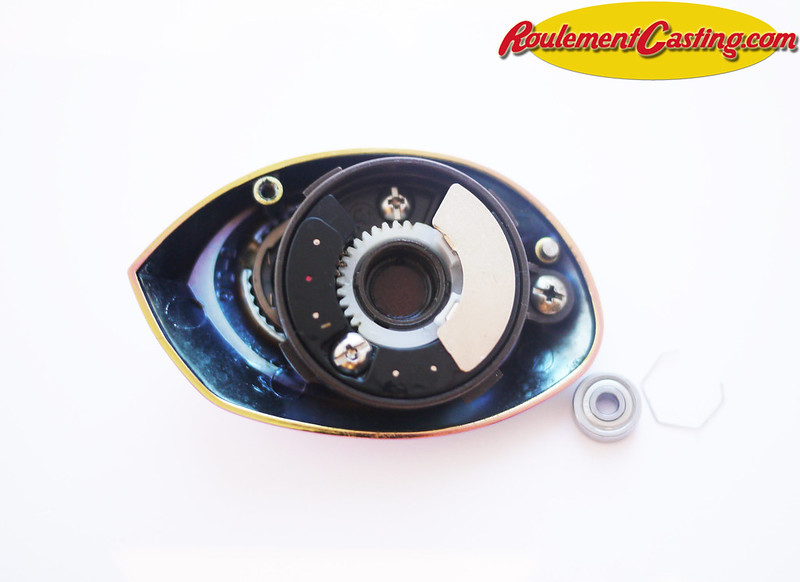
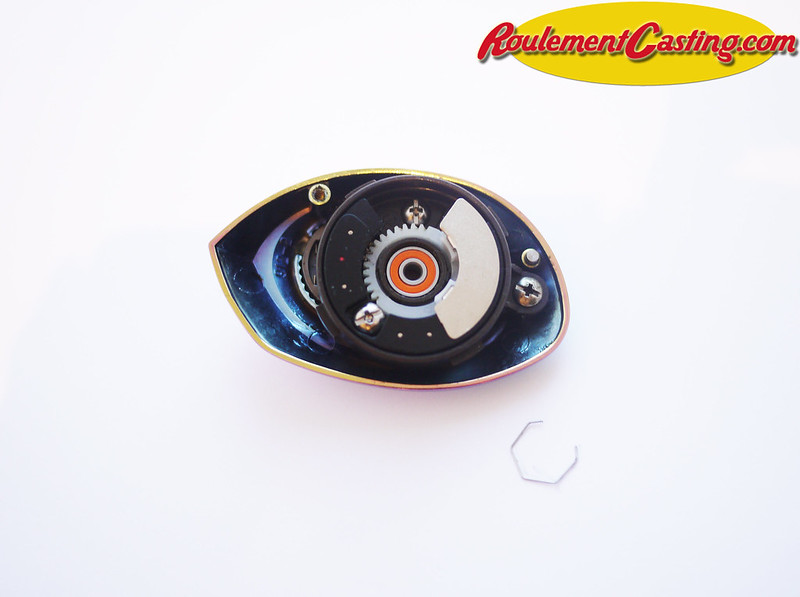
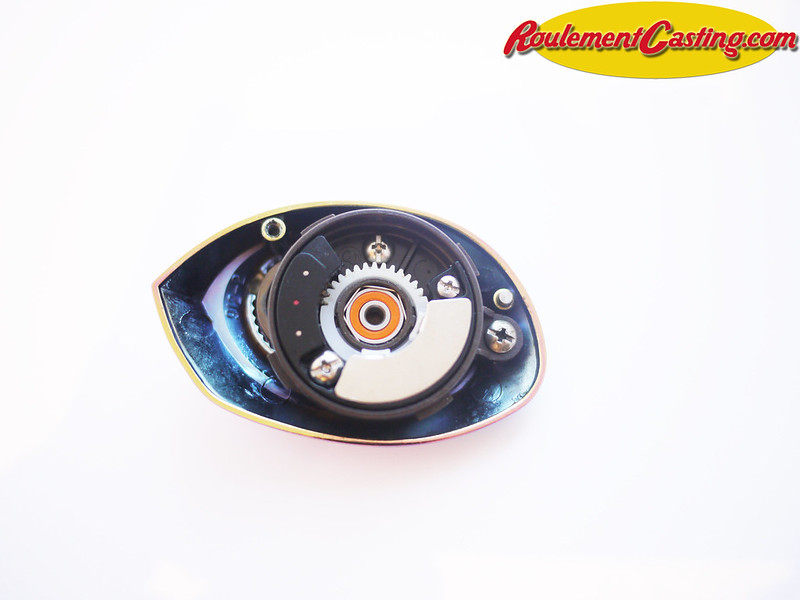
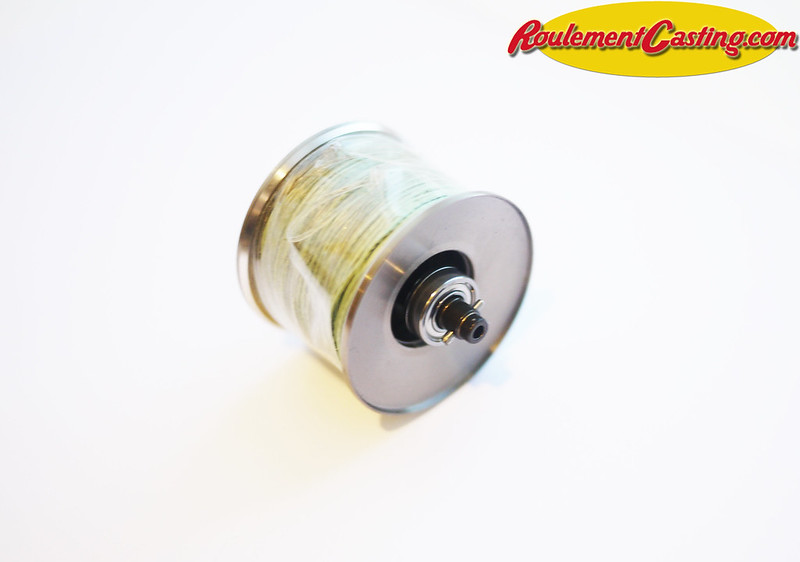
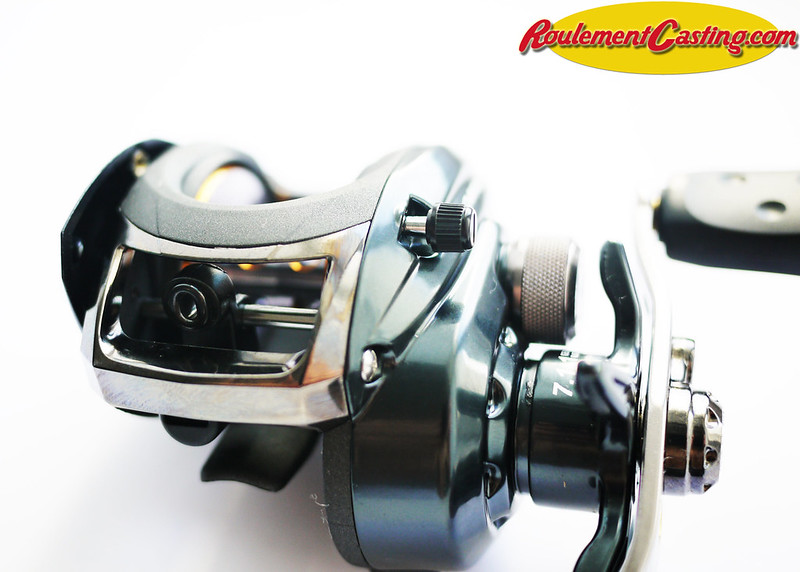
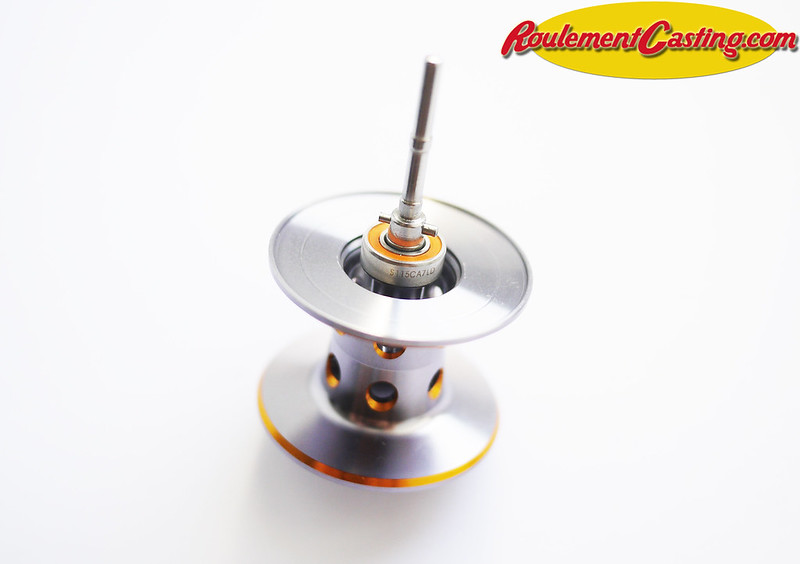
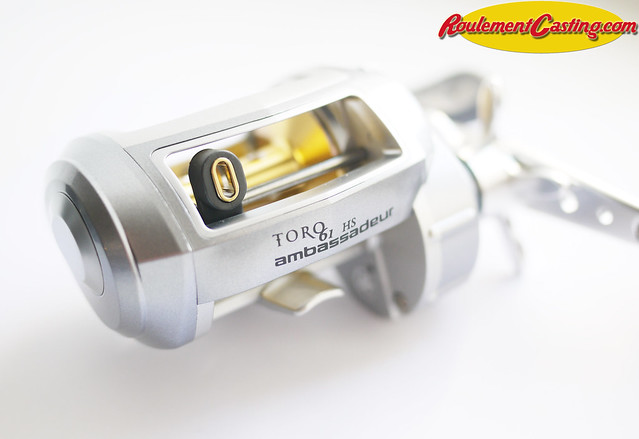
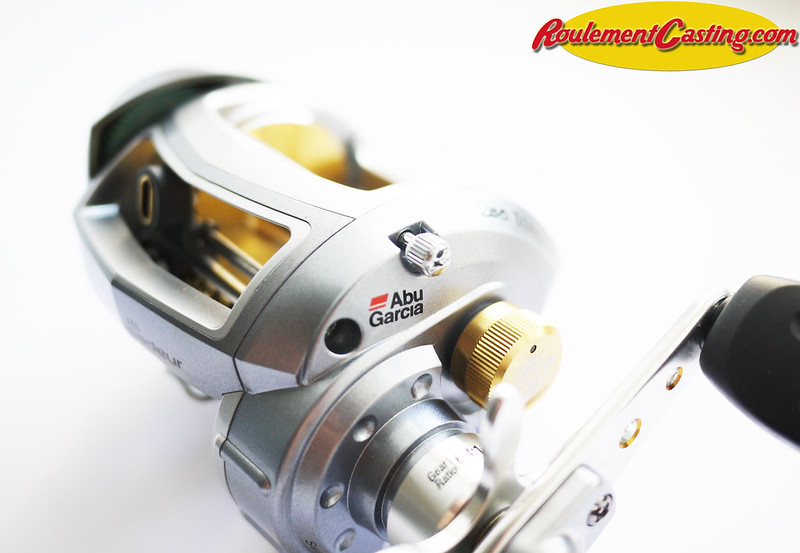
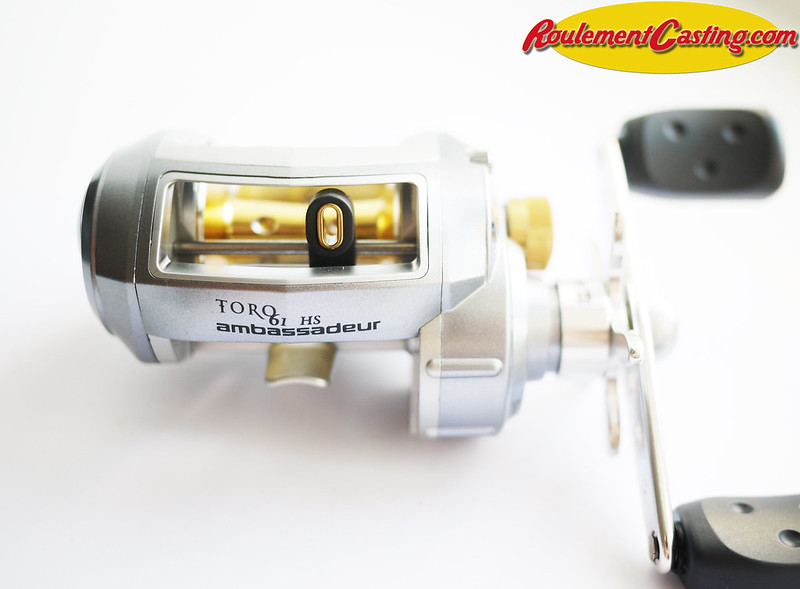
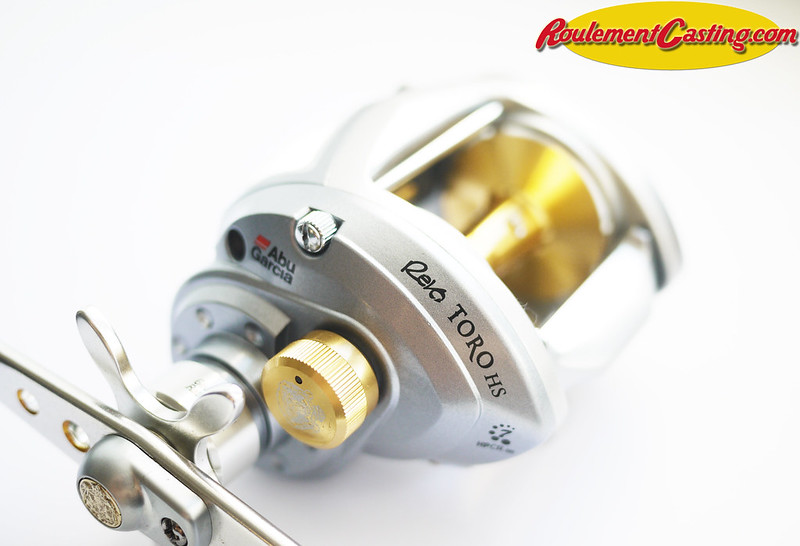
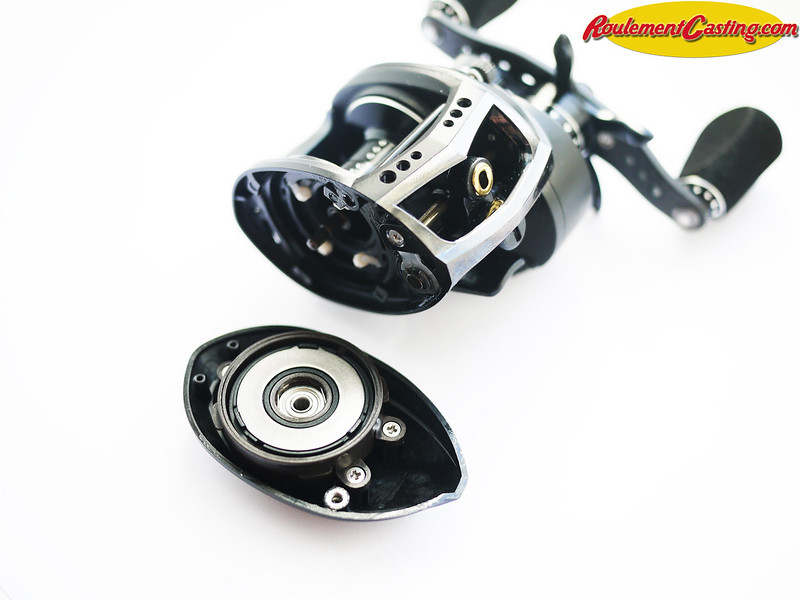
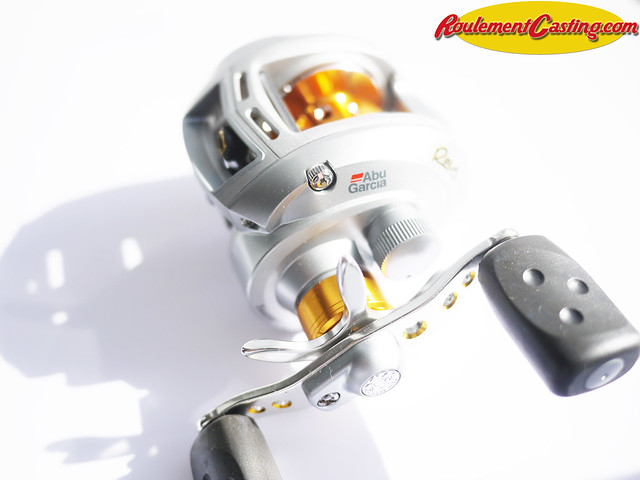
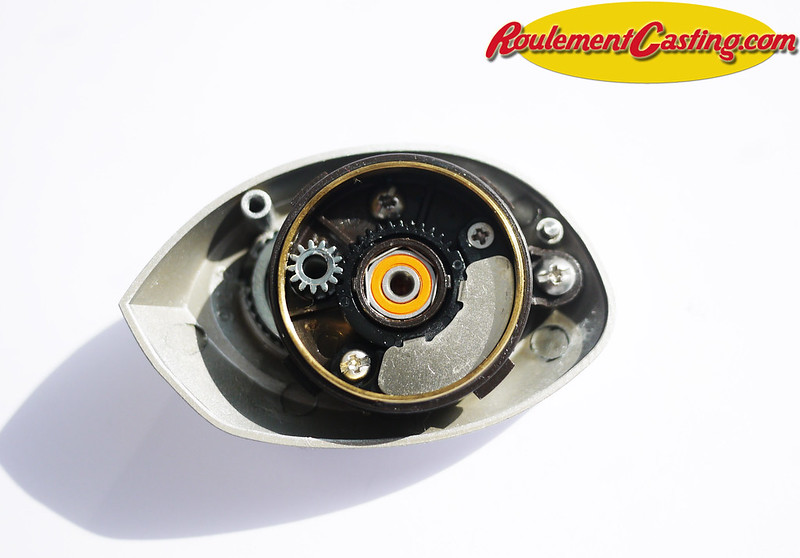
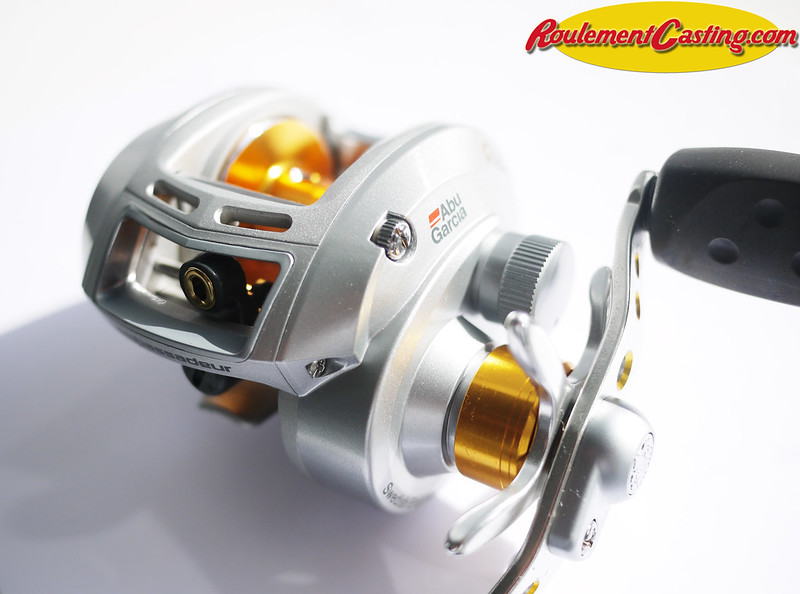
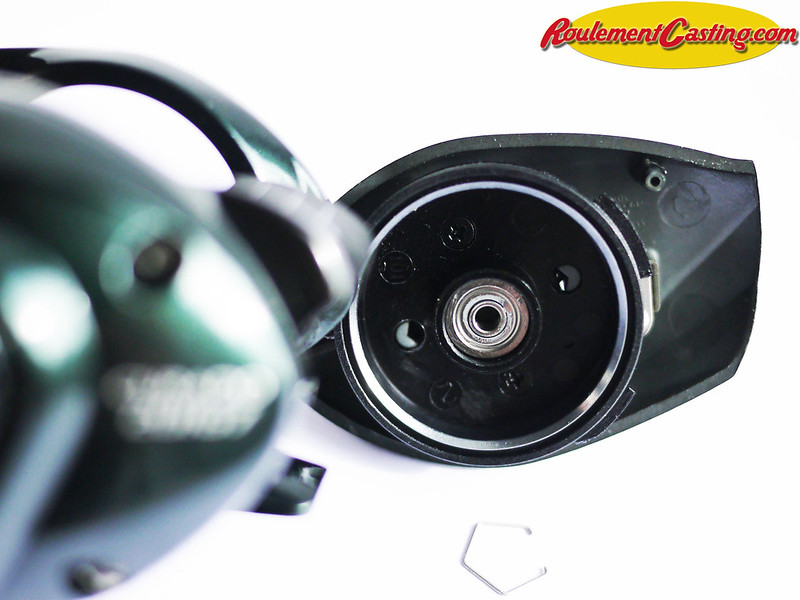
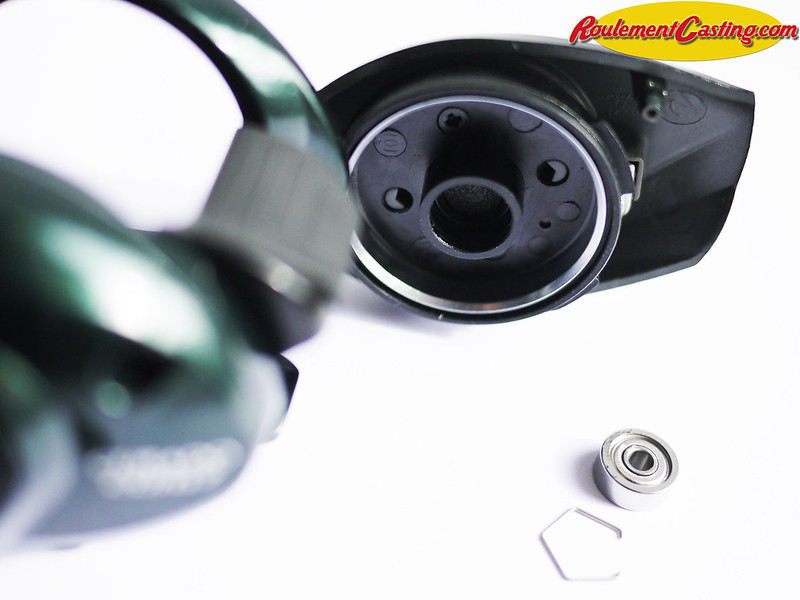
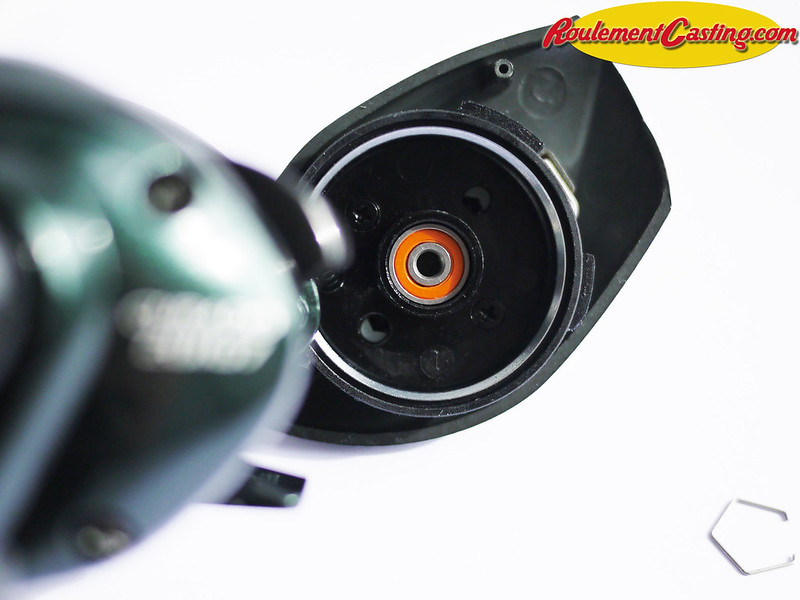
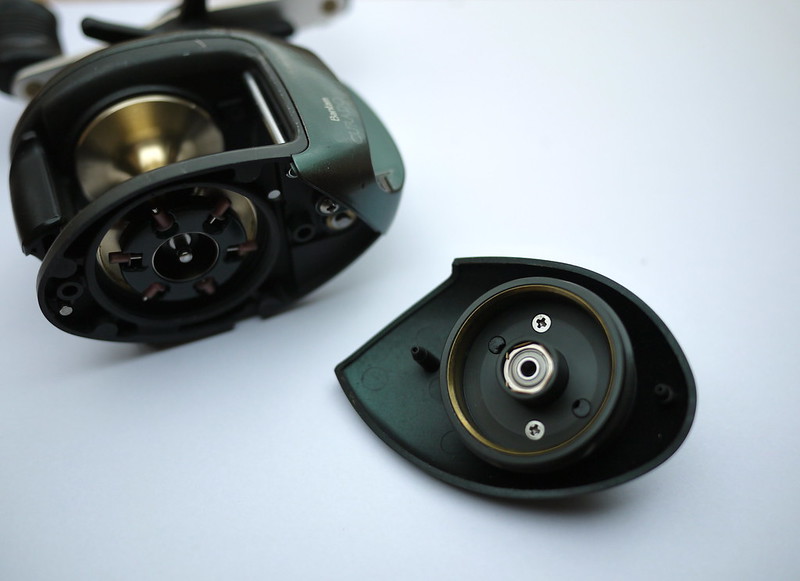
We’re going to look at how to quickly and easily replace the original ball bearings on an Abu Garcia C4 (and C3) with hybrid ceramic bearings to significantly improve its performance.
You can find our selection of parts for your C4/C3 Ambassador on the following pages: Improvement Abu Garcia Ambassador
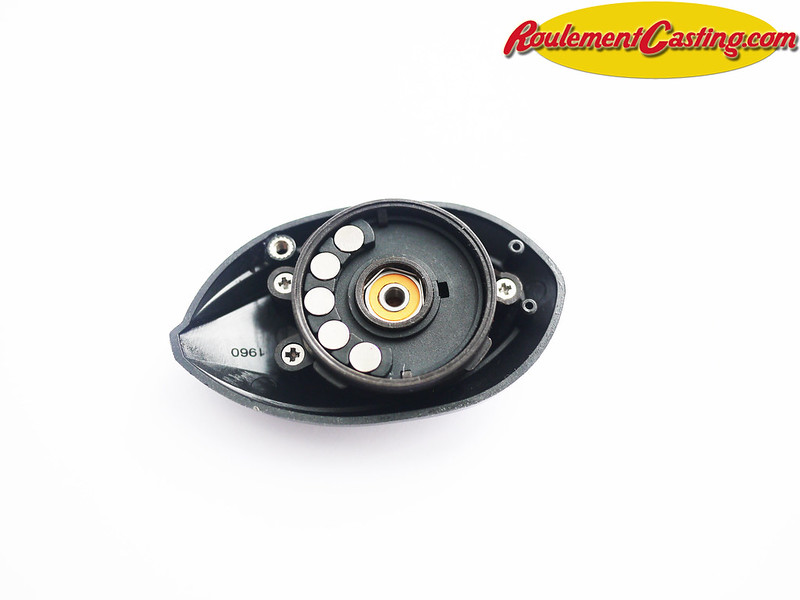
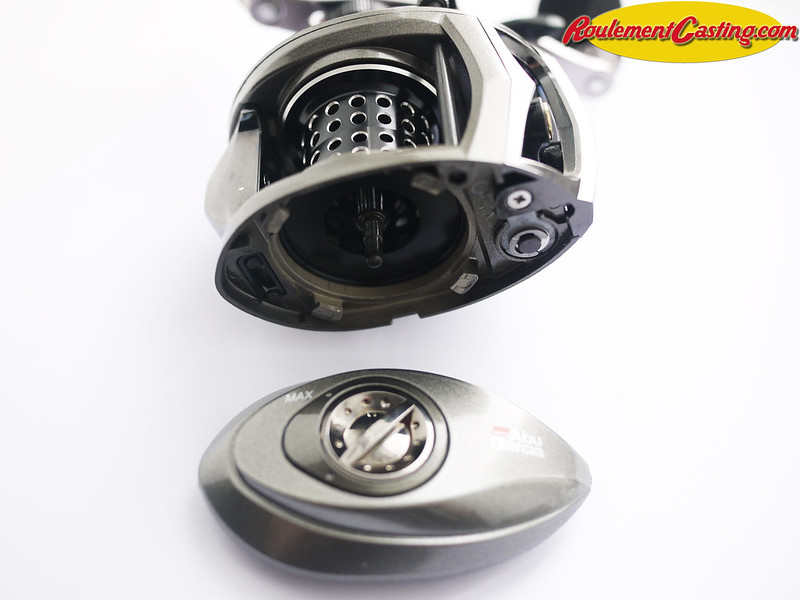
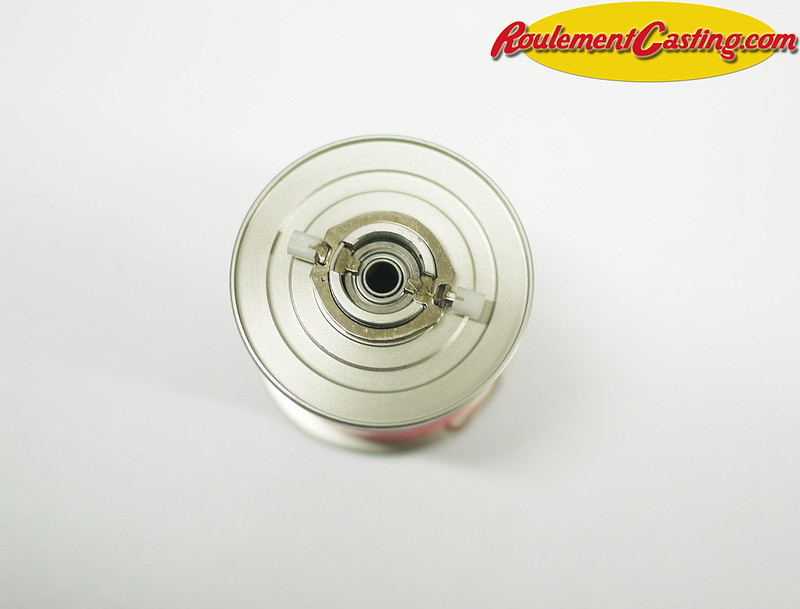
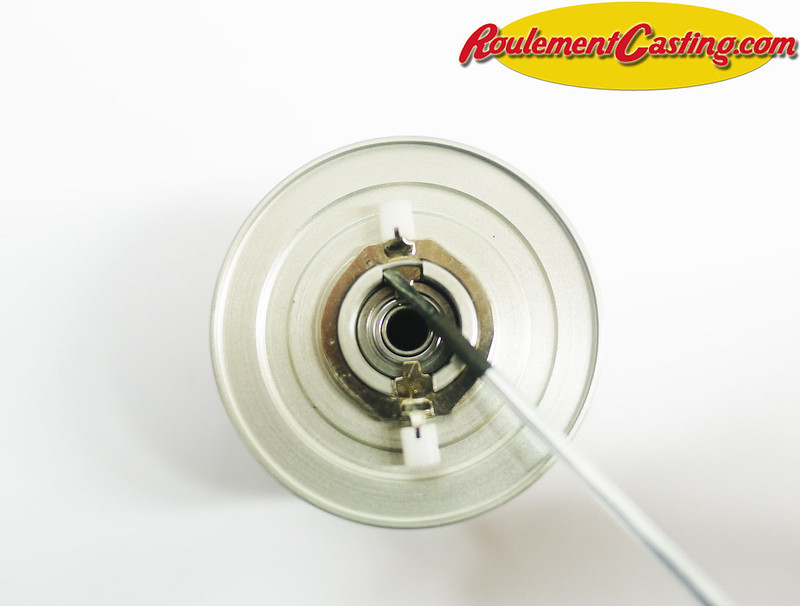
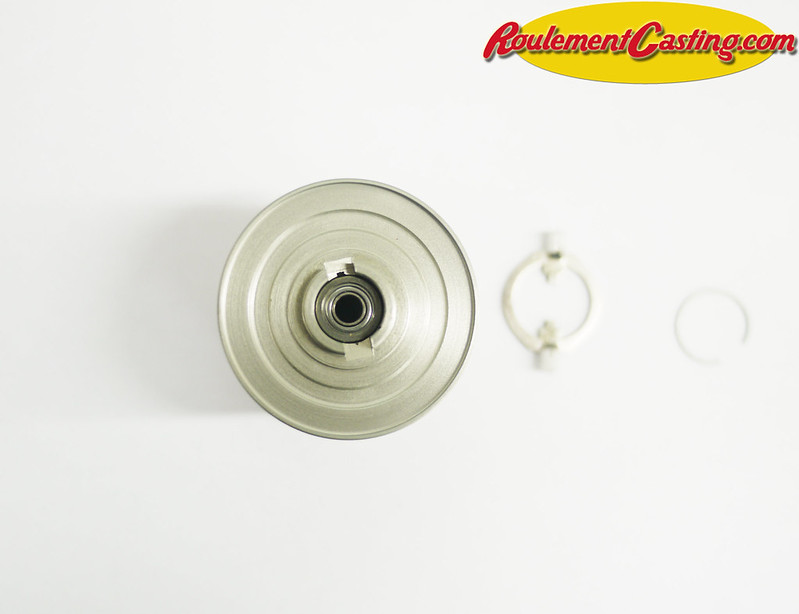
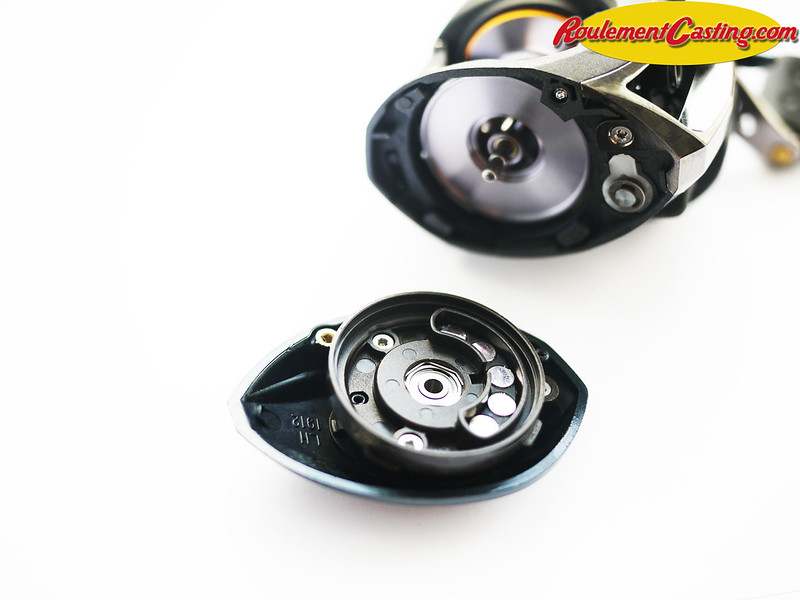
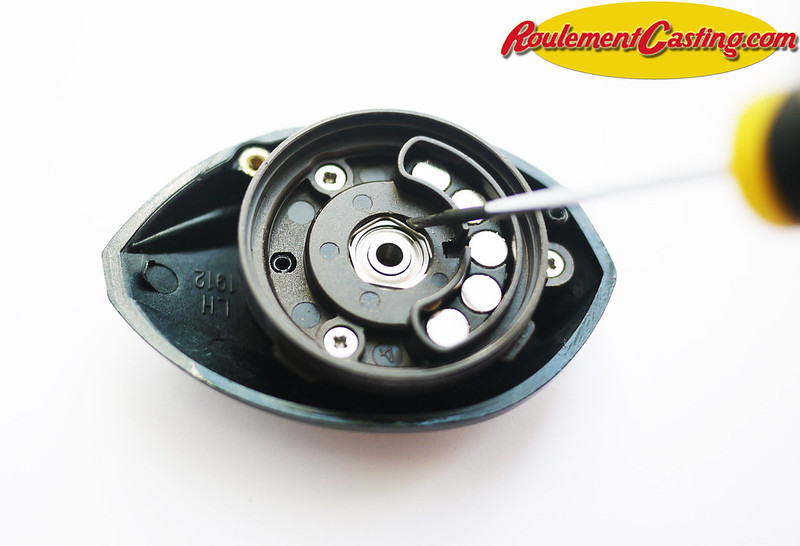
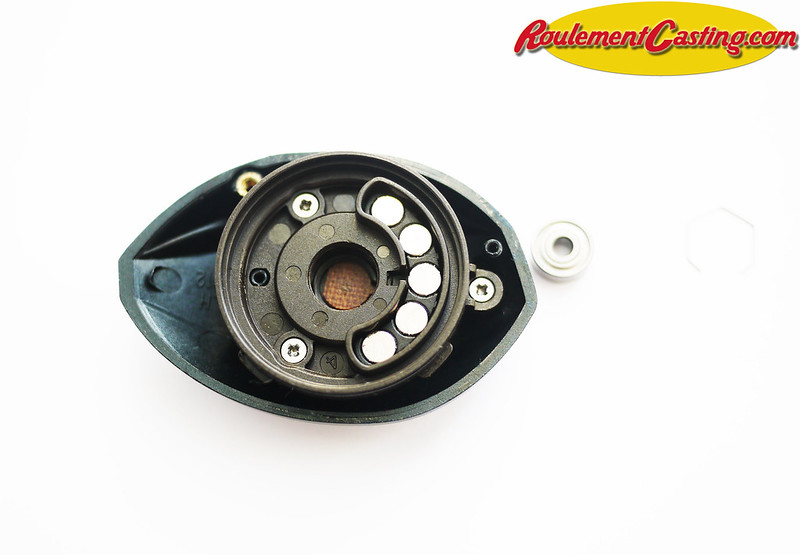
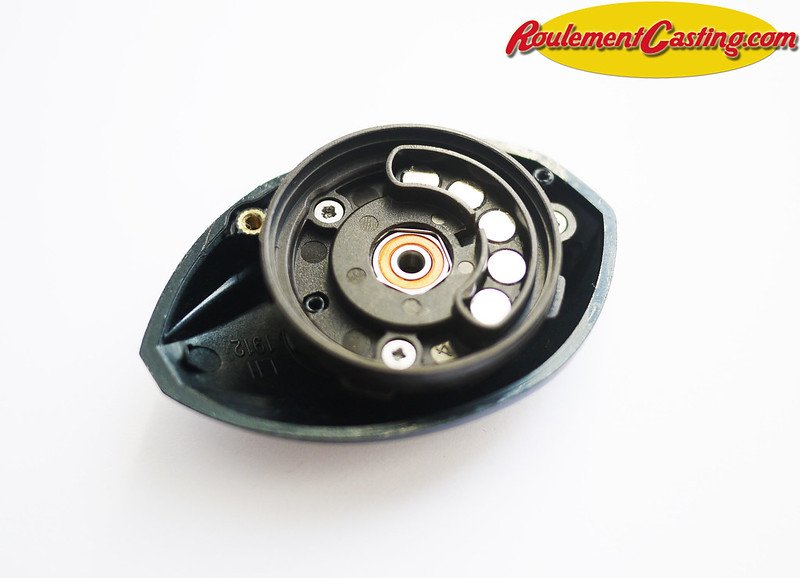
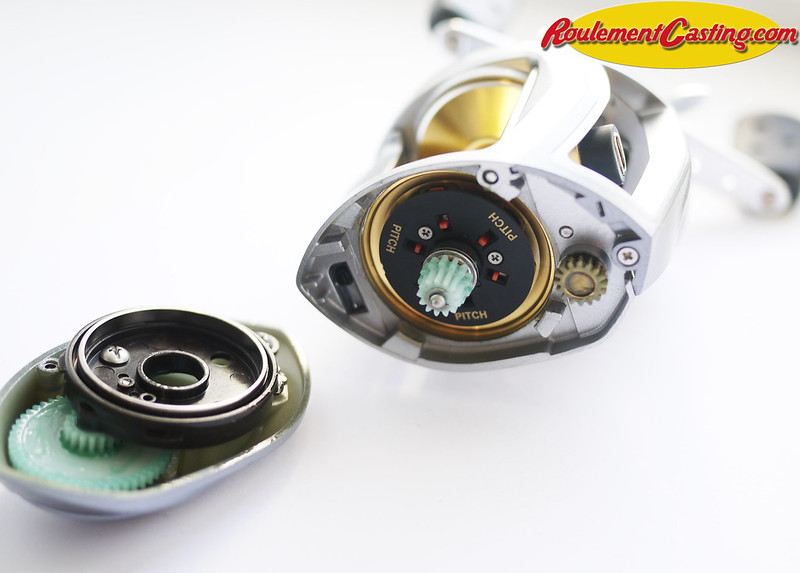
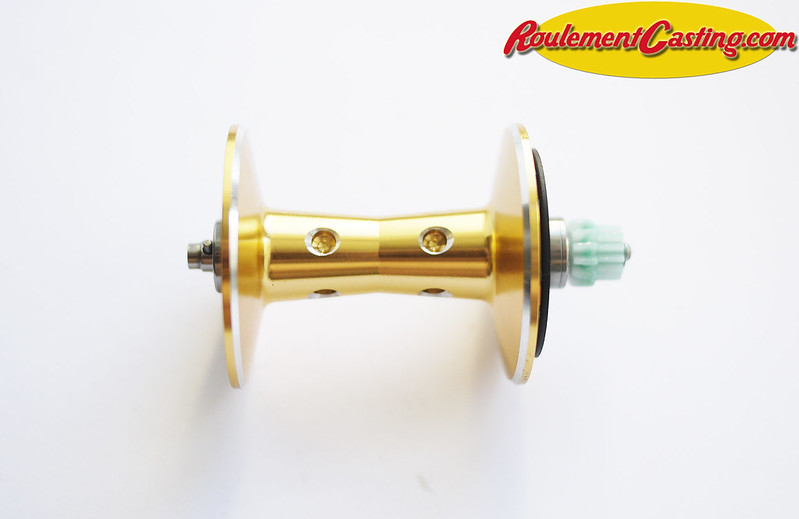
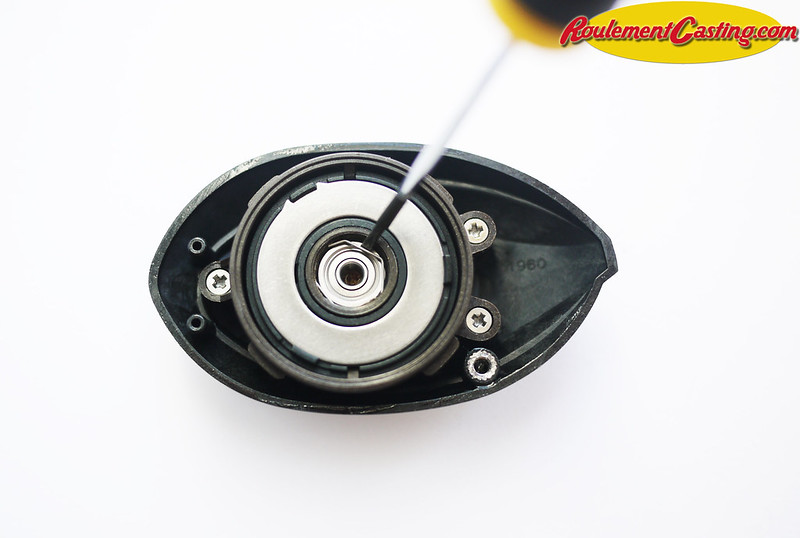
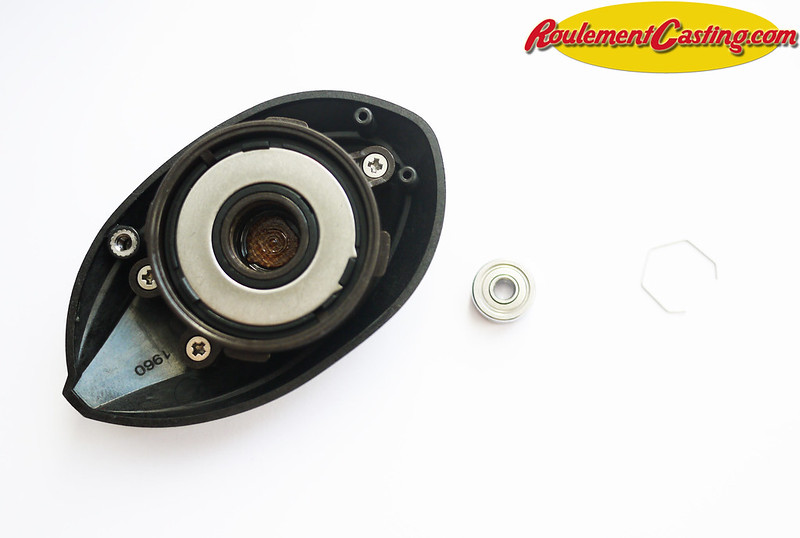
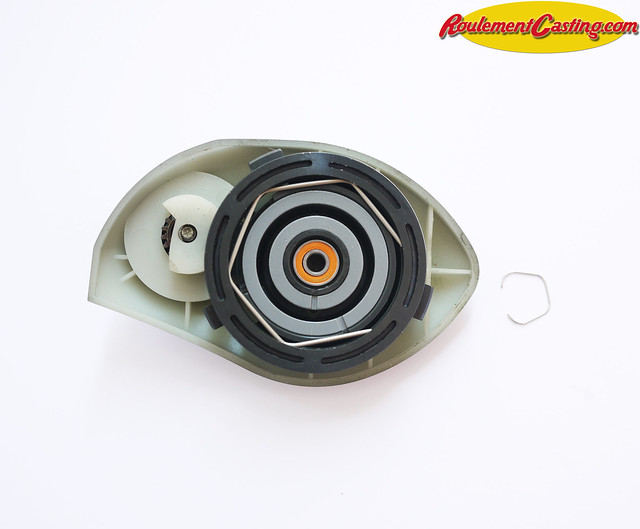
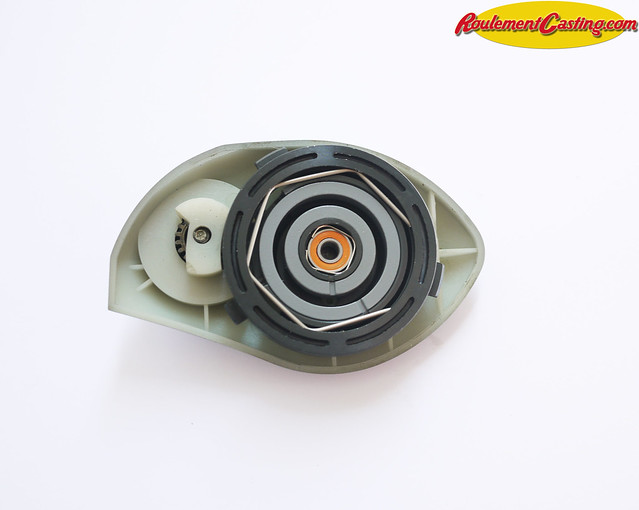
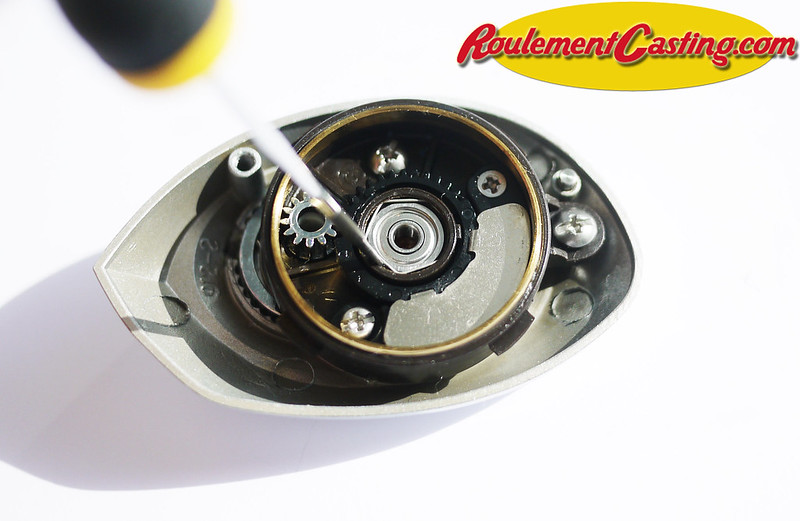
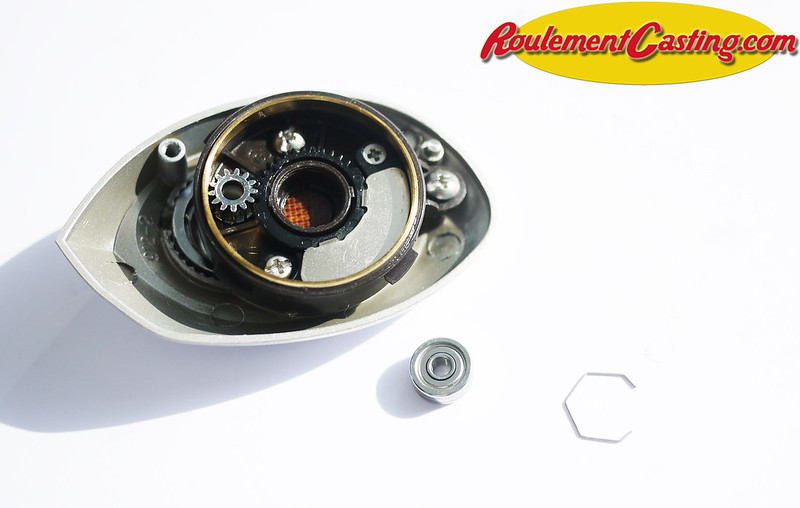
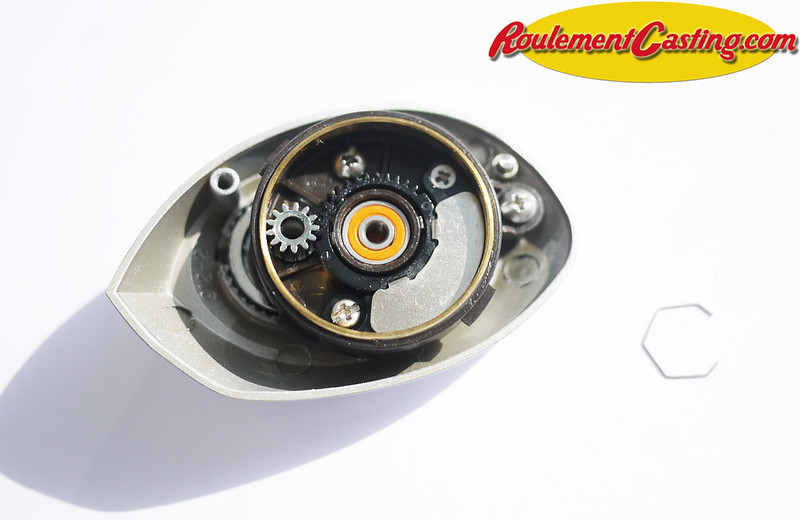
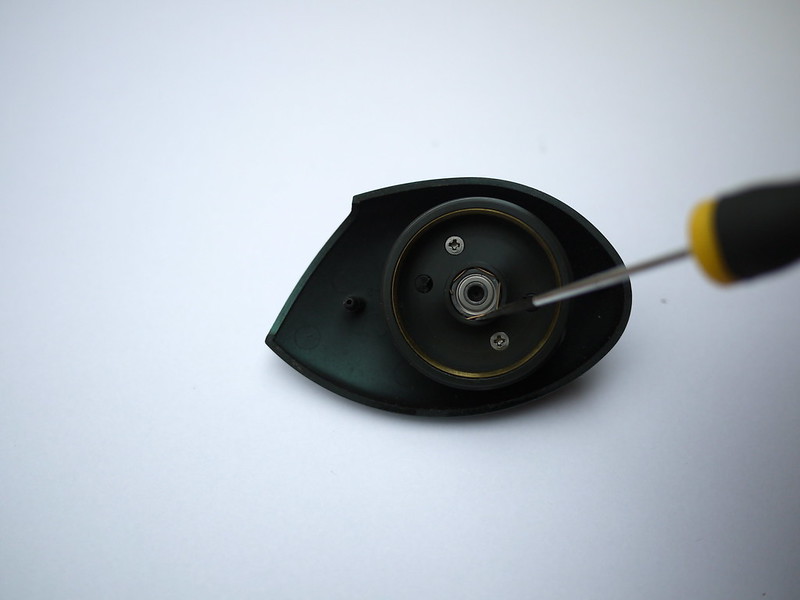
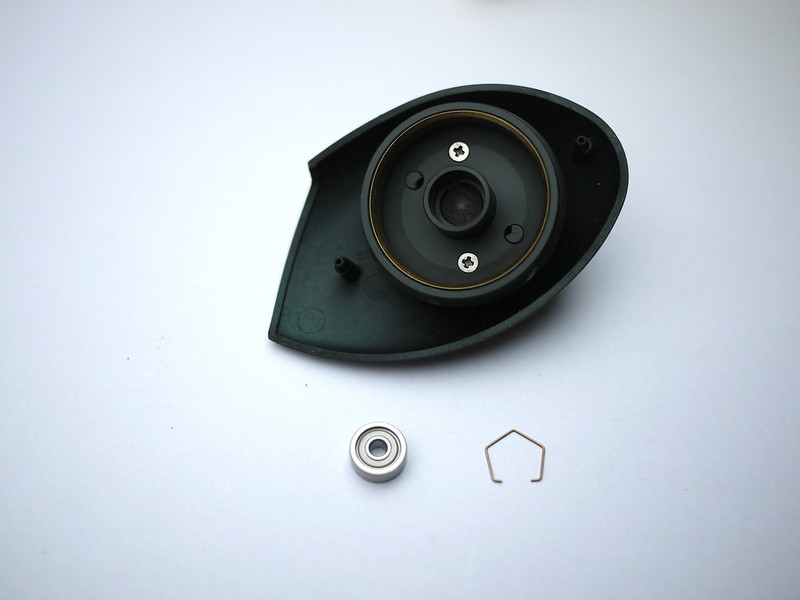
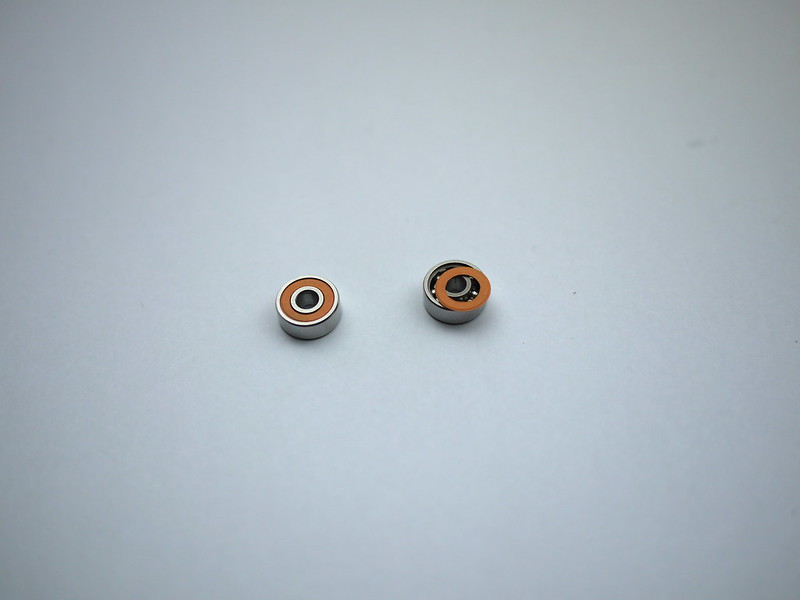
Unscrew the three large screws to access the coilFor the C4: Remove the metal clip that secures the centrifugal brake assembly For the C3: simply remove the centrifuge system (the black part) carefullyRemove the original bearingFit the Orange Seals bearingRefit the centrifugal system and the metal clipRemove the plastic partFit the Orange Seals bearingPut the spool back in place
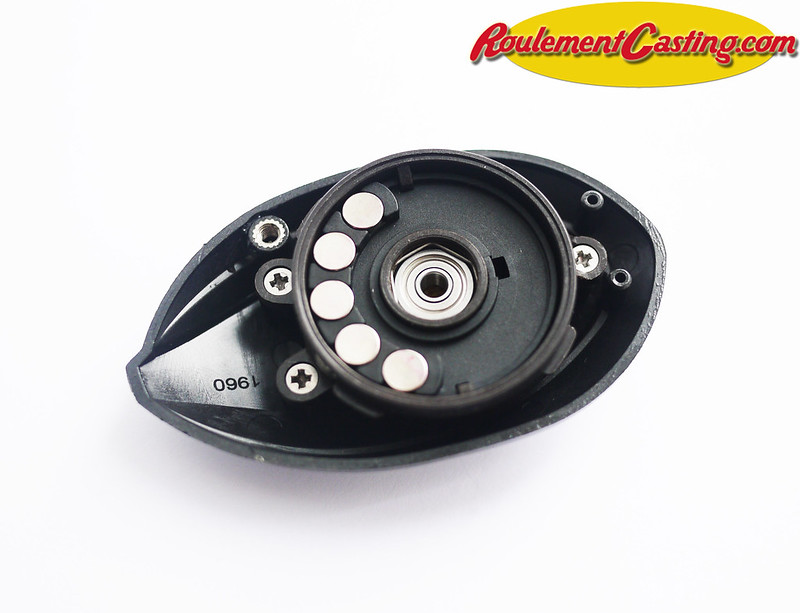
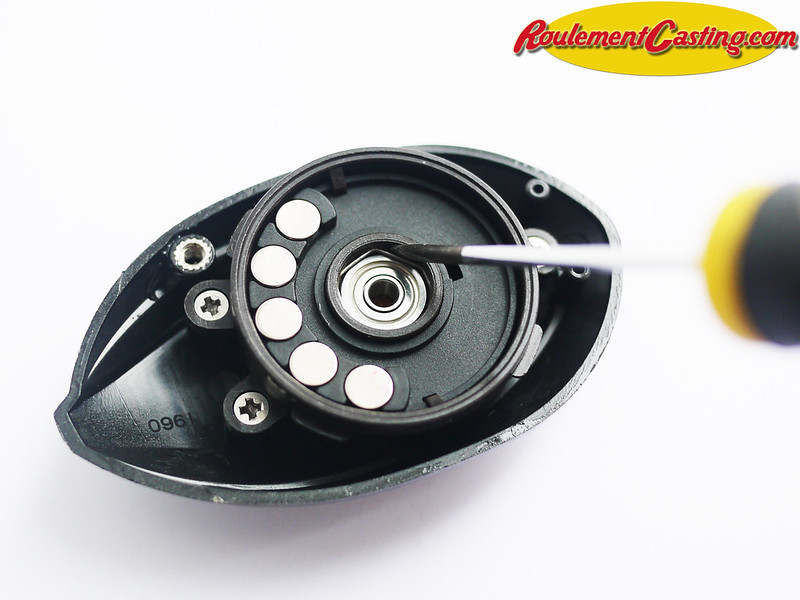
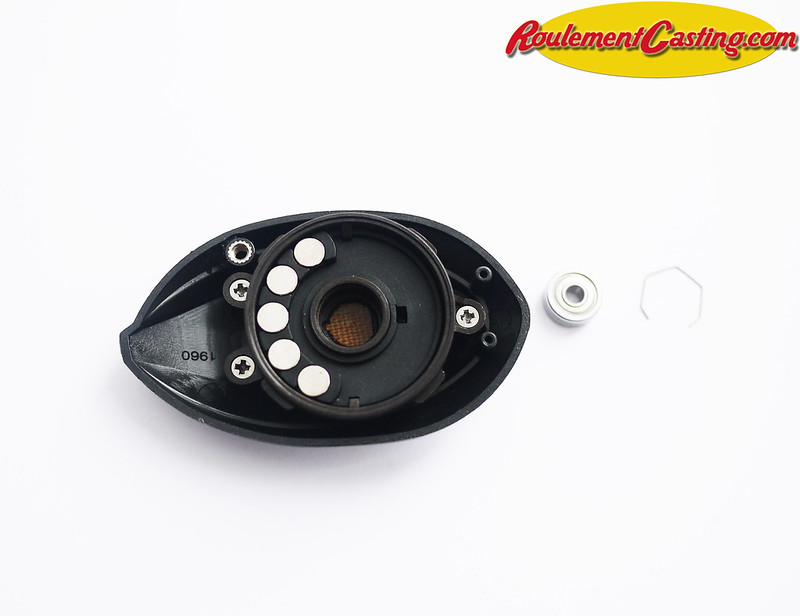
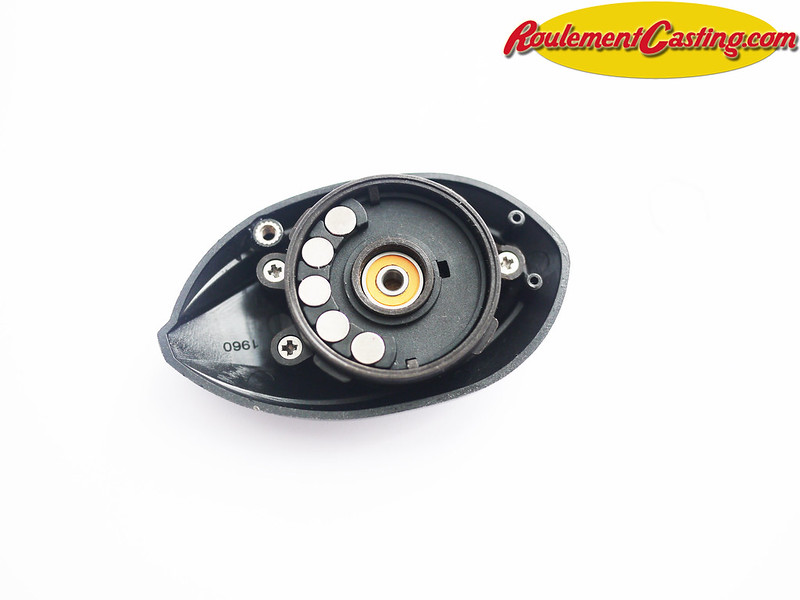
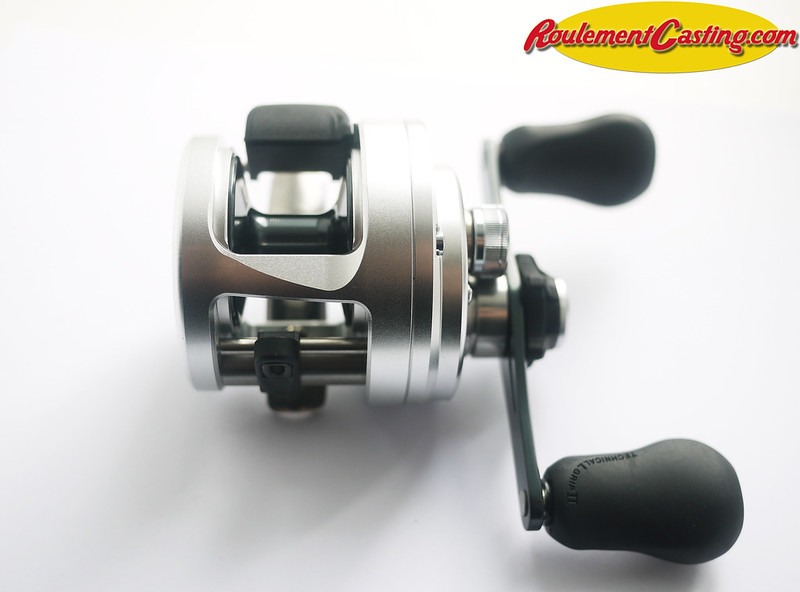
We’re going to look at how to quickly and easily replace the original ball bearings on an Abu Garcia Aurora Elite with hybrid ceramic bearings to significantly improve its performance.
The pin on Abu Garcia and Lew’s reels has a specific direction; make sure you remove it in the correct direction (press the narrower end to remove it and the wider end to push it back in)
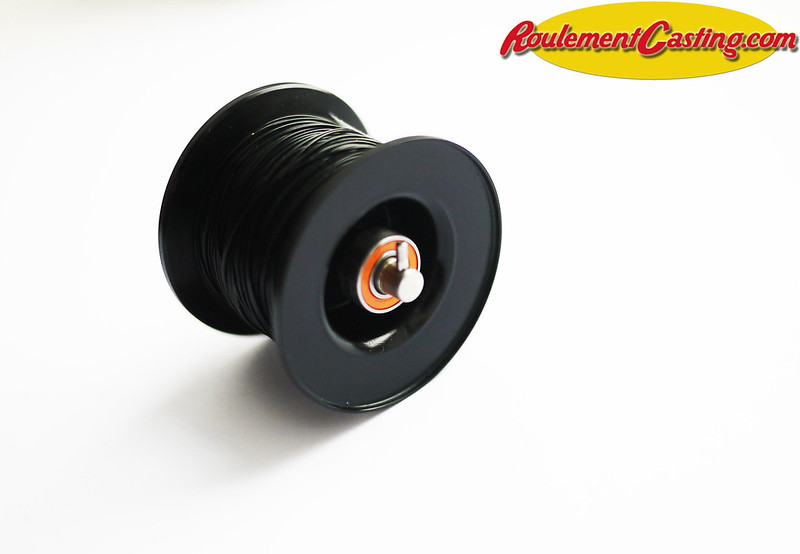
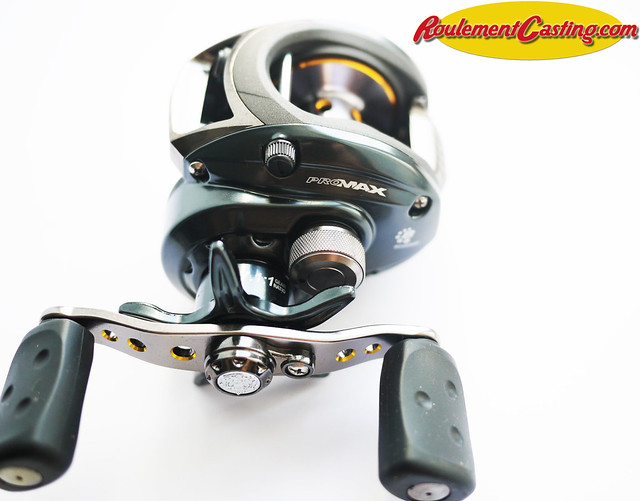
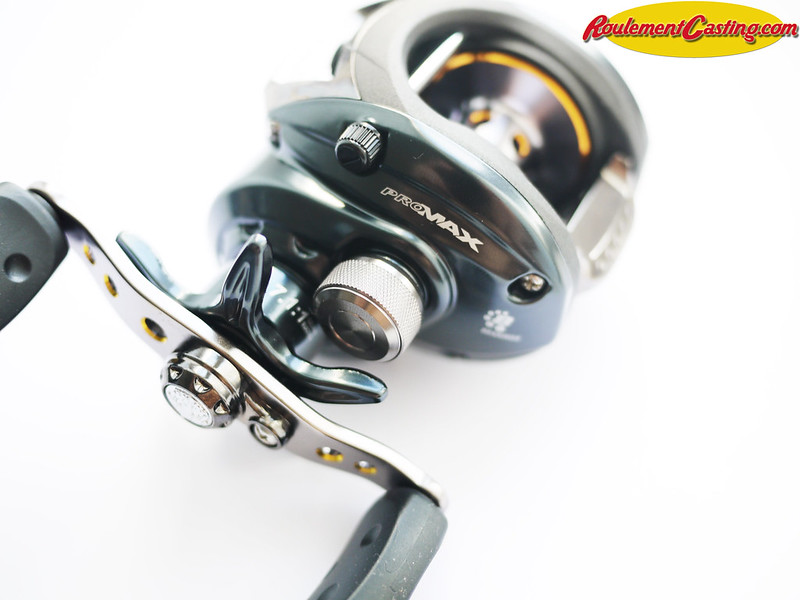
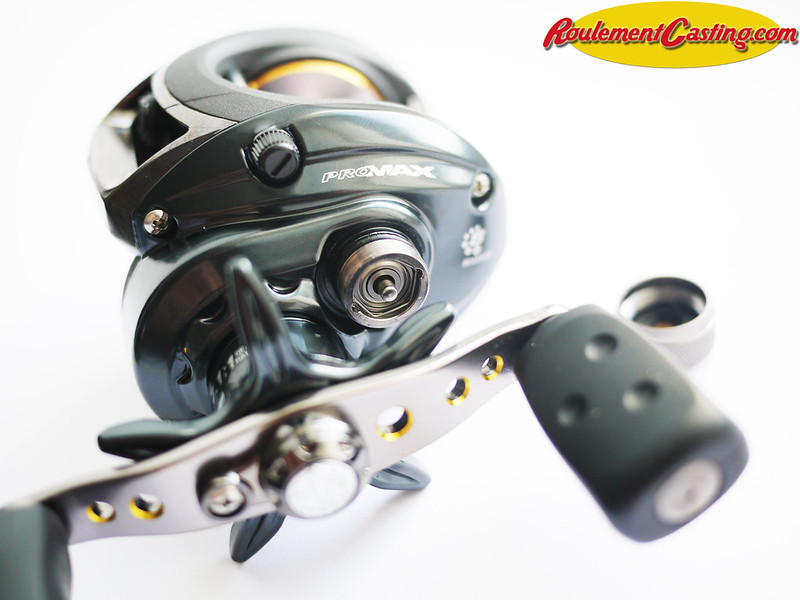
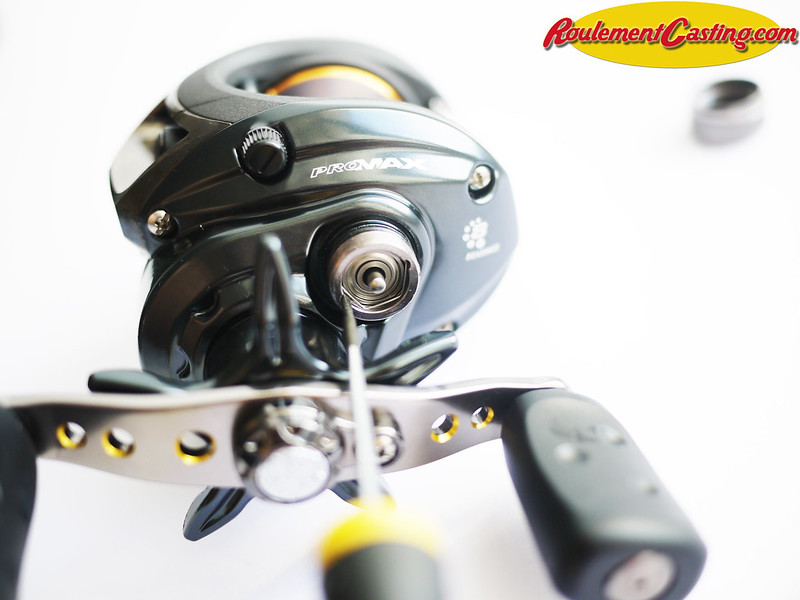
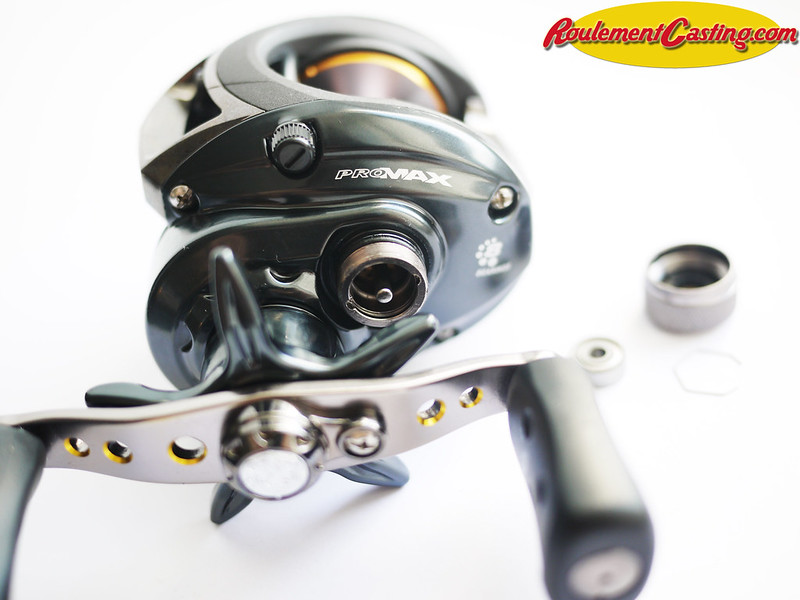
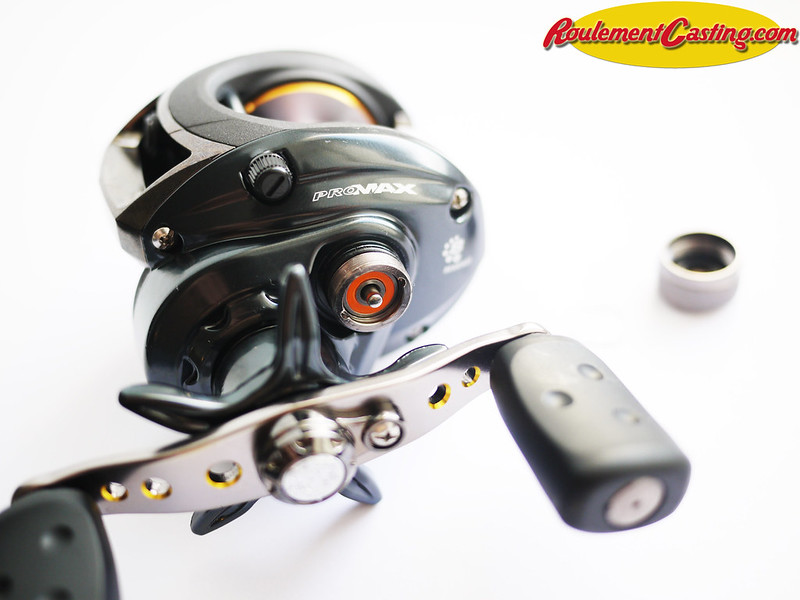
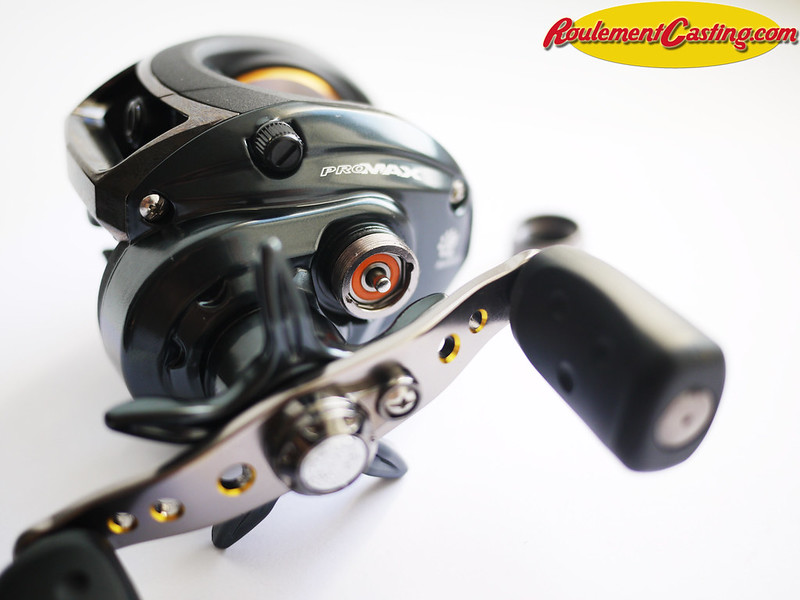
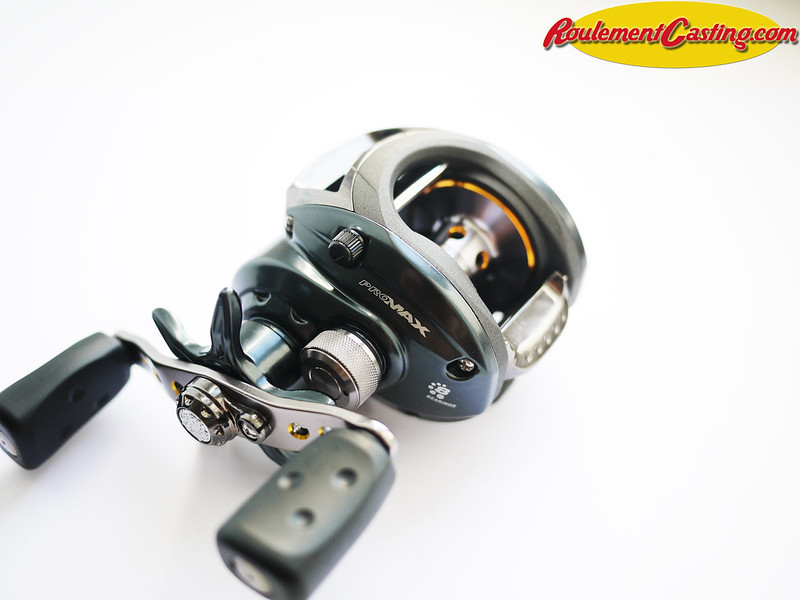
We’re going to look at how to quickly and easily replace the original ball bearings on an Abu Garcia Promax with Boca Bearings Orange Seals to significantly improve its performance.
You can find our selection of parts for your Abu Garcia Pro Max on the following page: Abu Garcia Pro Max Upgrade
The pin on Abu Garcia and Lew’s reels has a specific direction; make sure you remove it in the correct direction (press the narrower end to remove it and the wider end to push it back in)
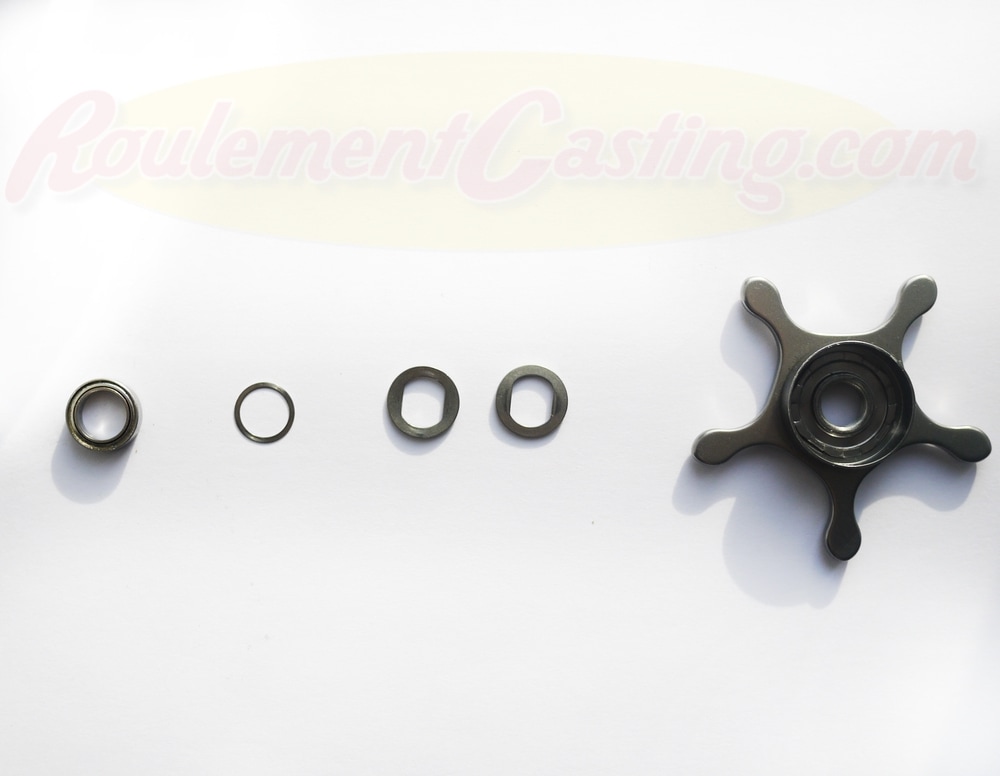
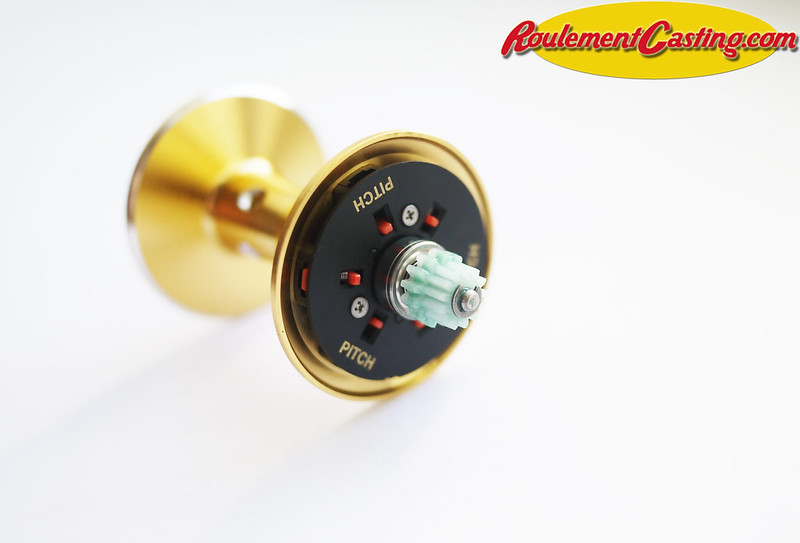
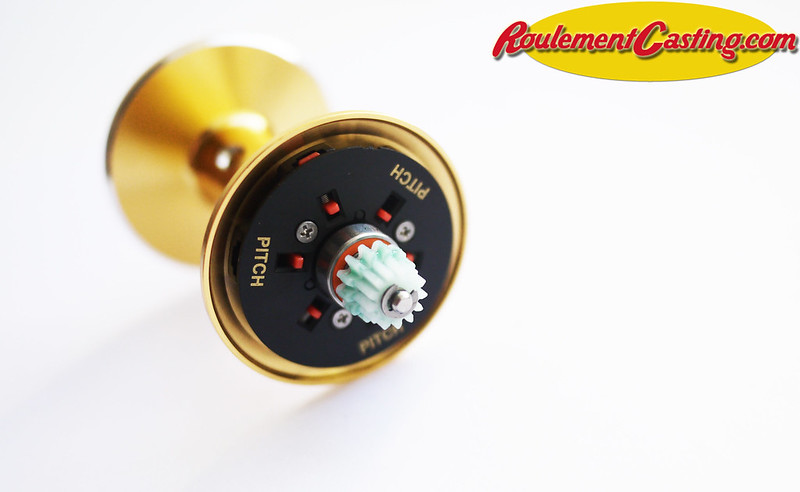
The following procedure applies only if you are using a set of three bearings
The pin on Abu Garcia and Lew’s reels has a specific direction; make sure you remove it in the correct direction (press the narrower end to remove it and the wider end to push it back in)
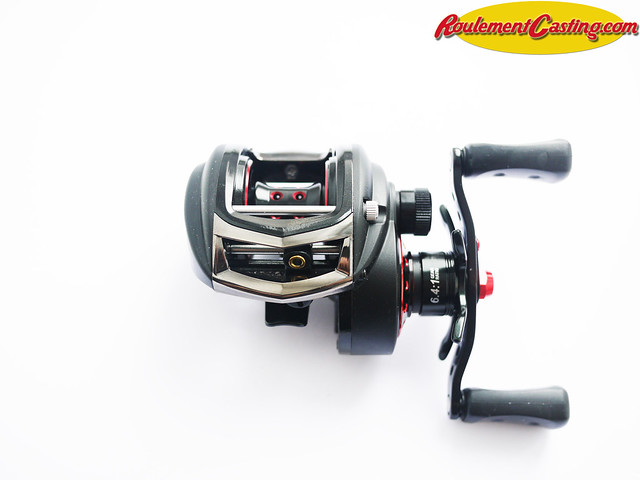
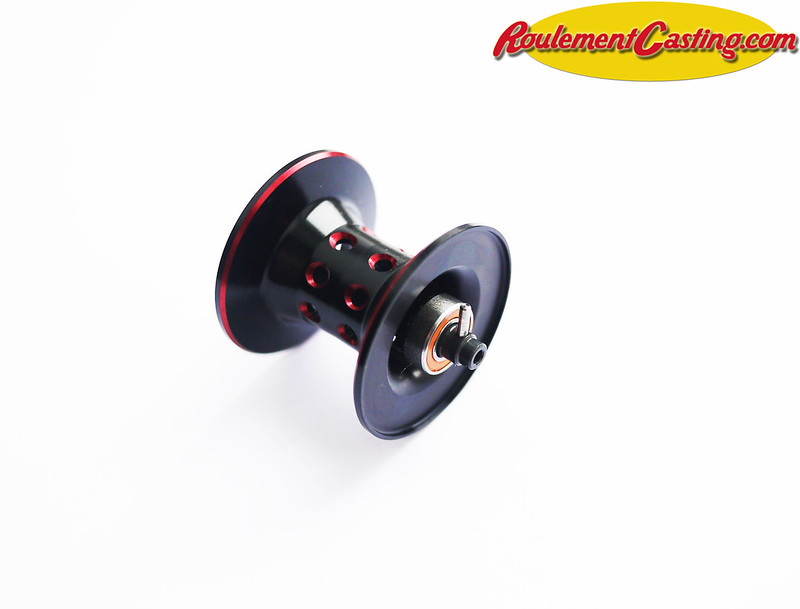
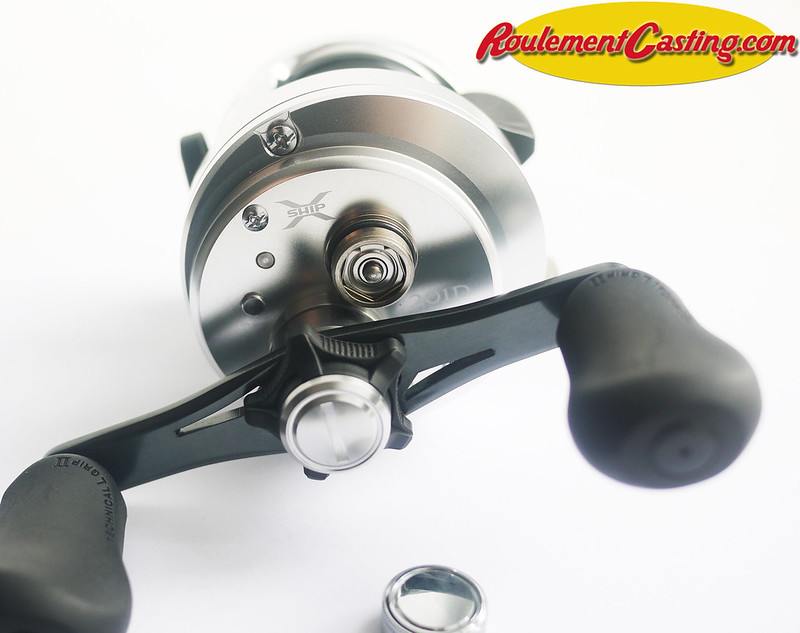
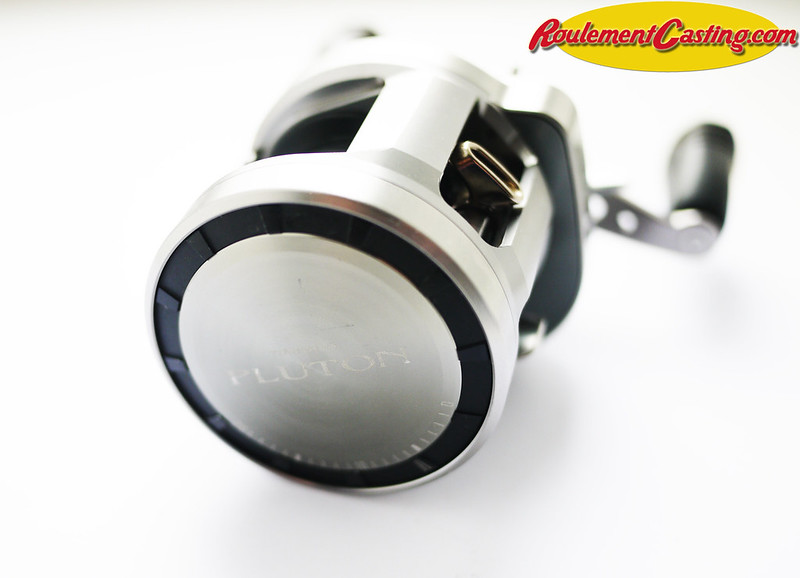
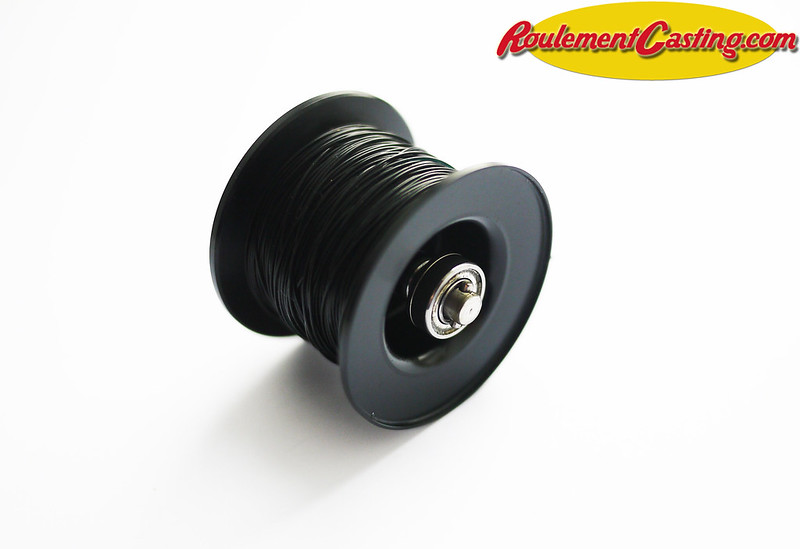
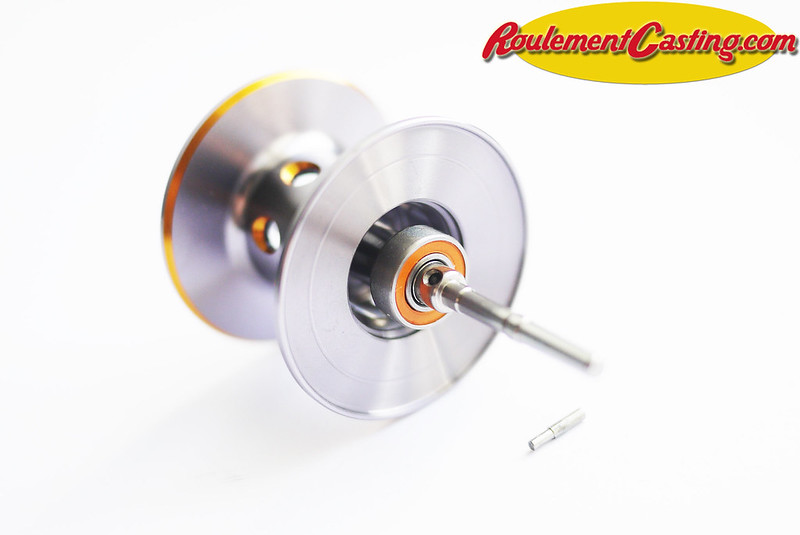
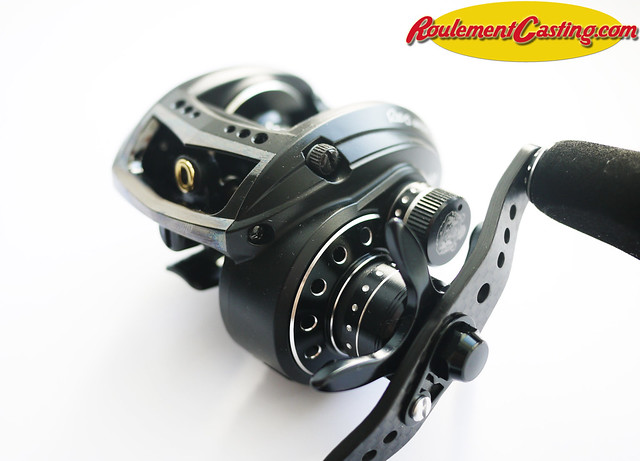
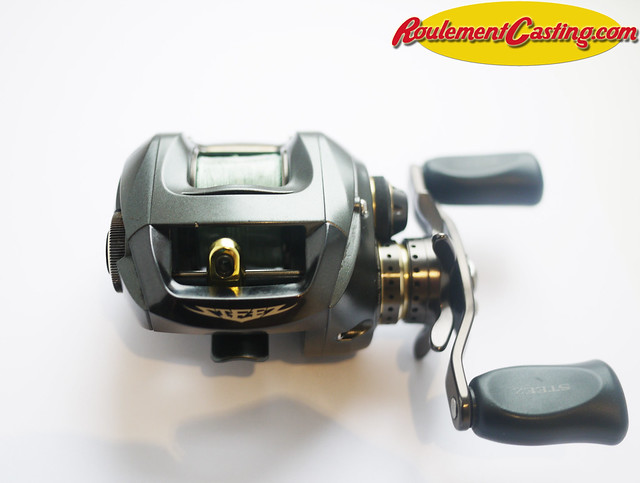
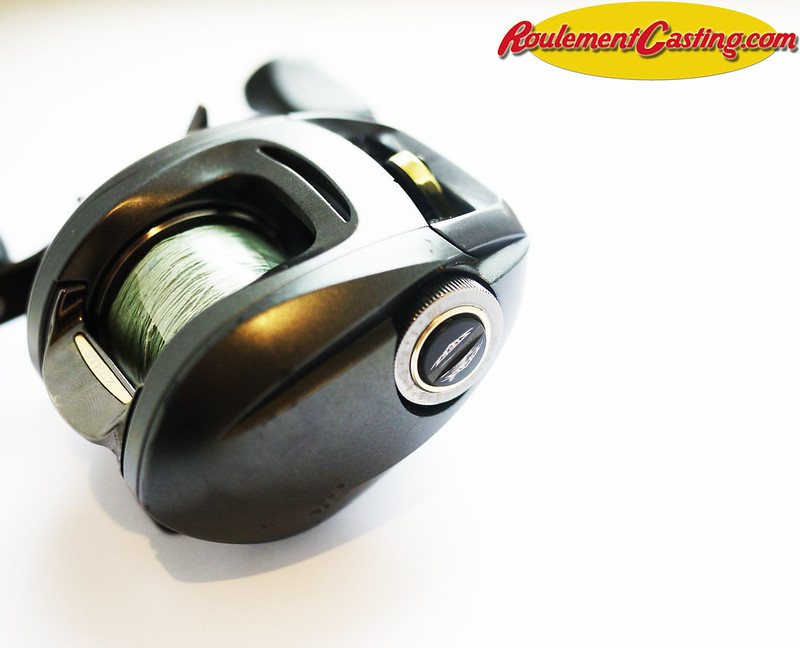
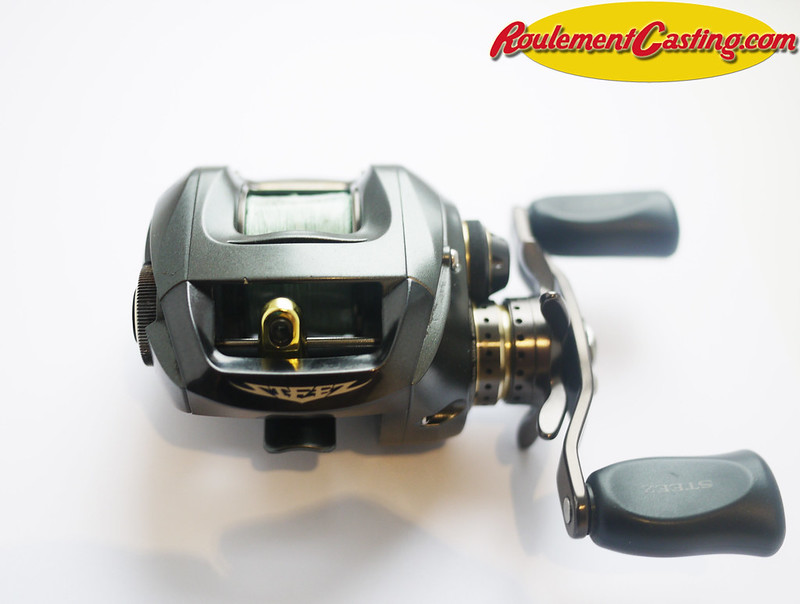
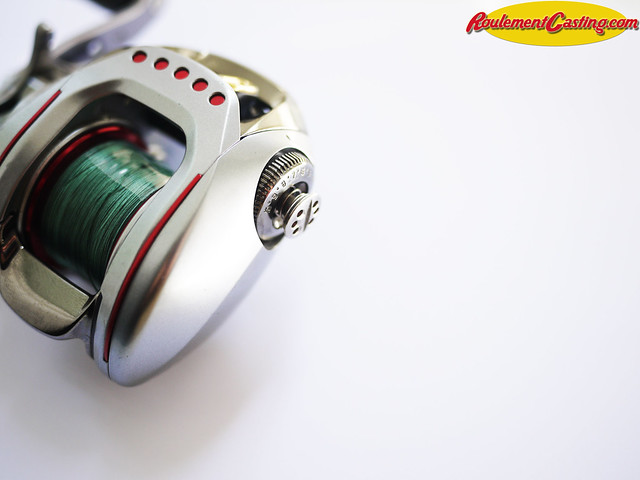
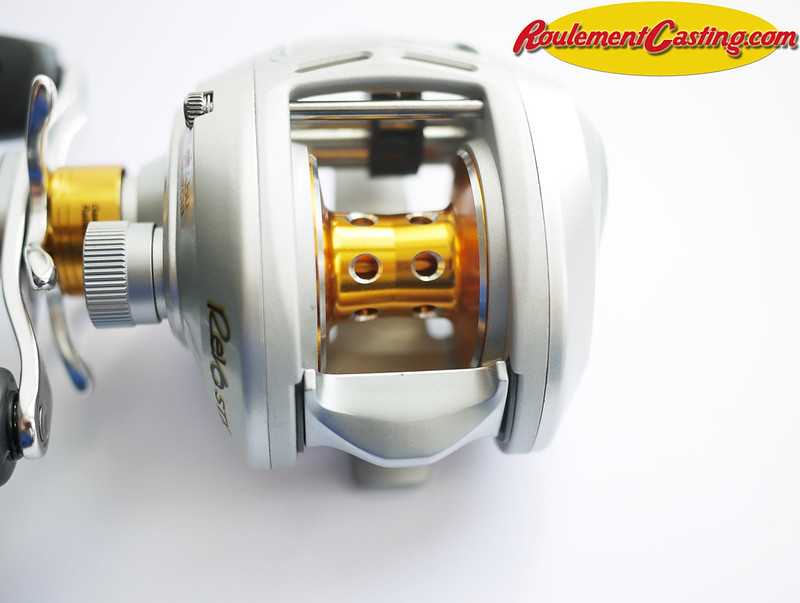
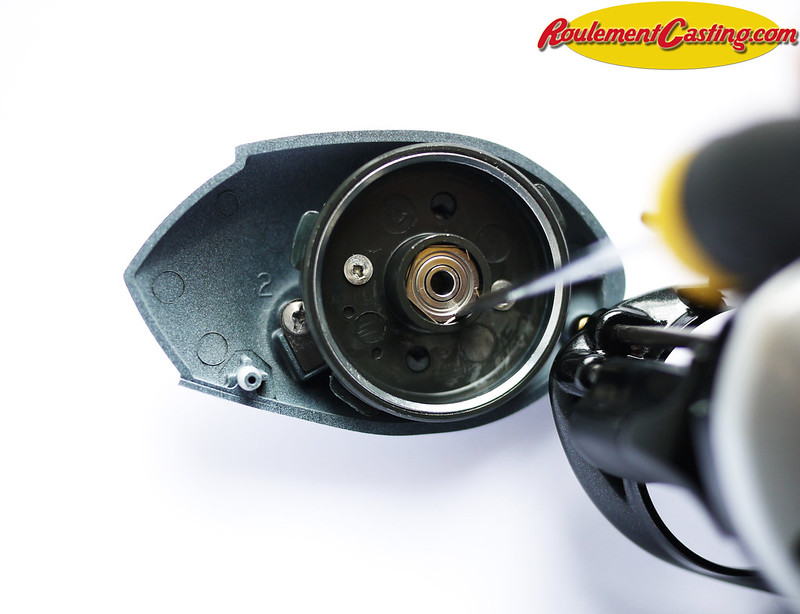
We’re going to look at how to quickly and easily replace the original ball bearings on an Abu Garcia Magnesium MGX with Boca Bearings Orange Seals to significantly improve its performance. The procedure is exactly the same for Revo S, SX, STX, Premier, Inshore and Skeet Reese reels…
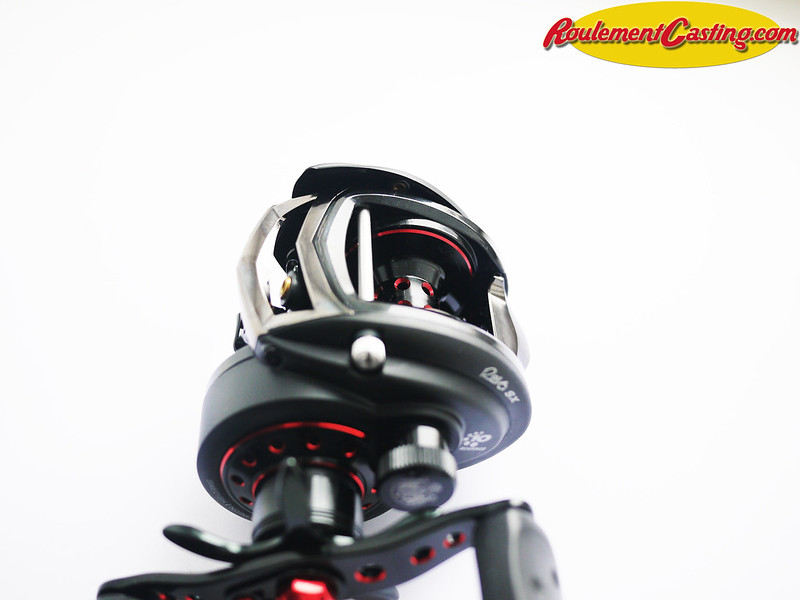
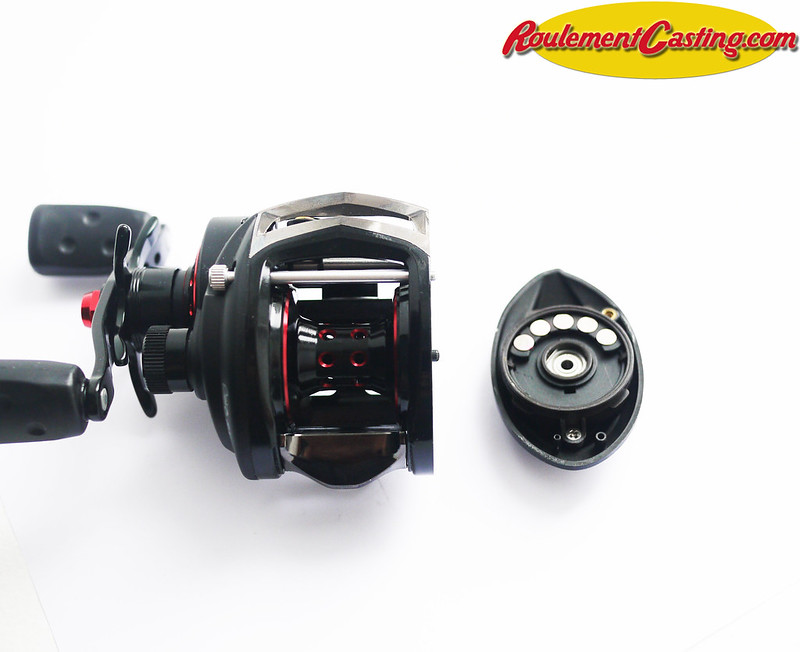
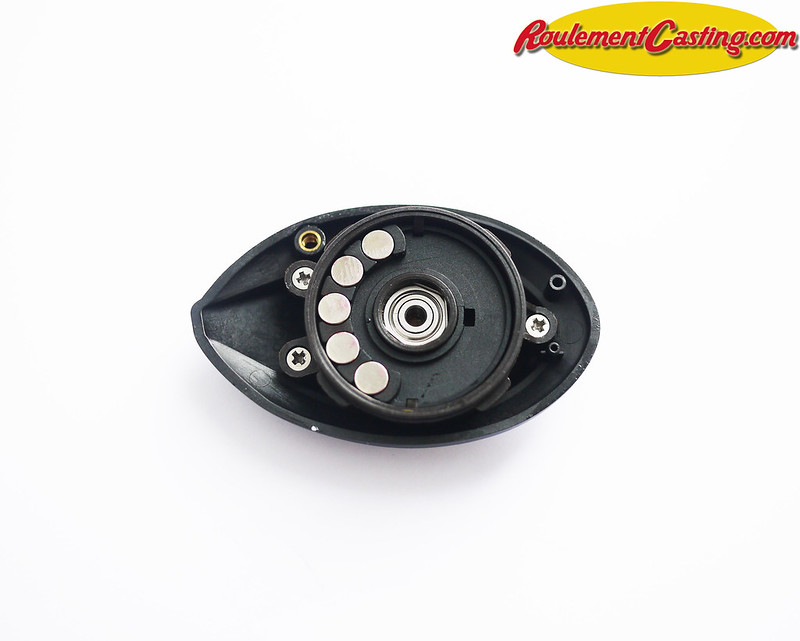
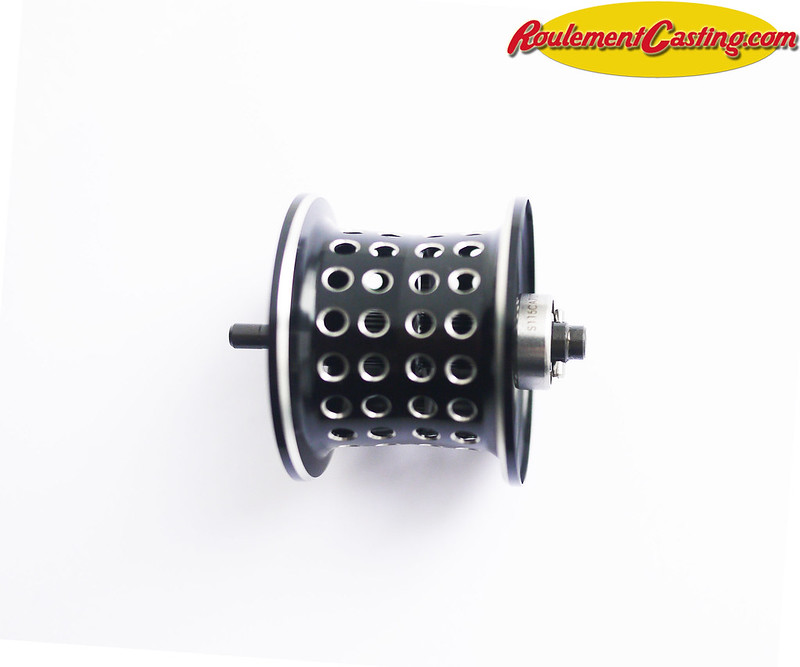
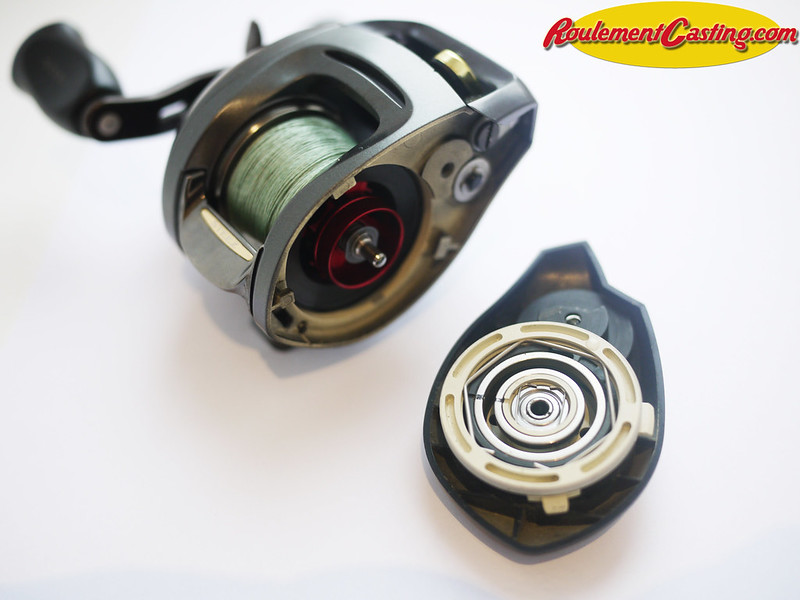
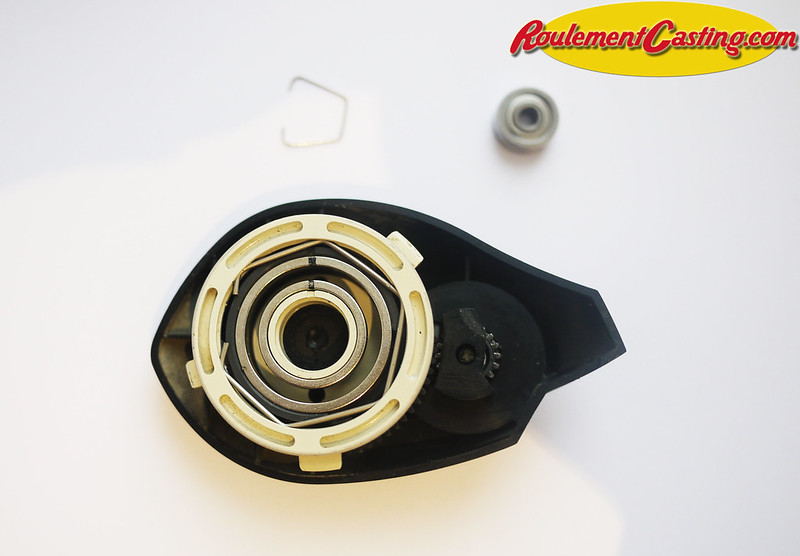
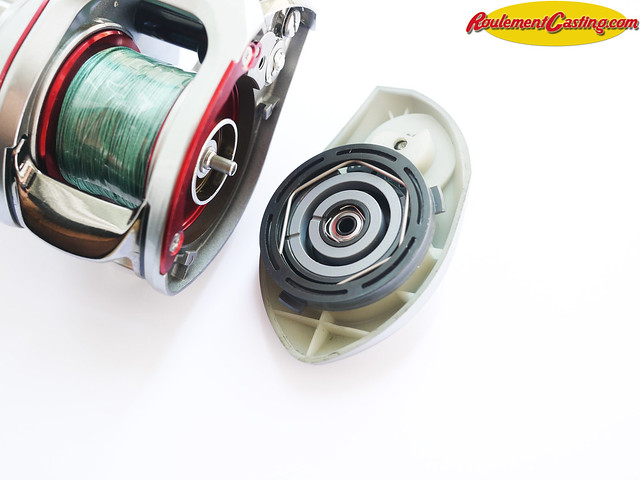
Remove the side plate by unscrewing the screw at the topRemove the clip holding the ball bearing in place using a flat-head screwdriver. It is advisable to hold it with your finger to prevent it from falling out.
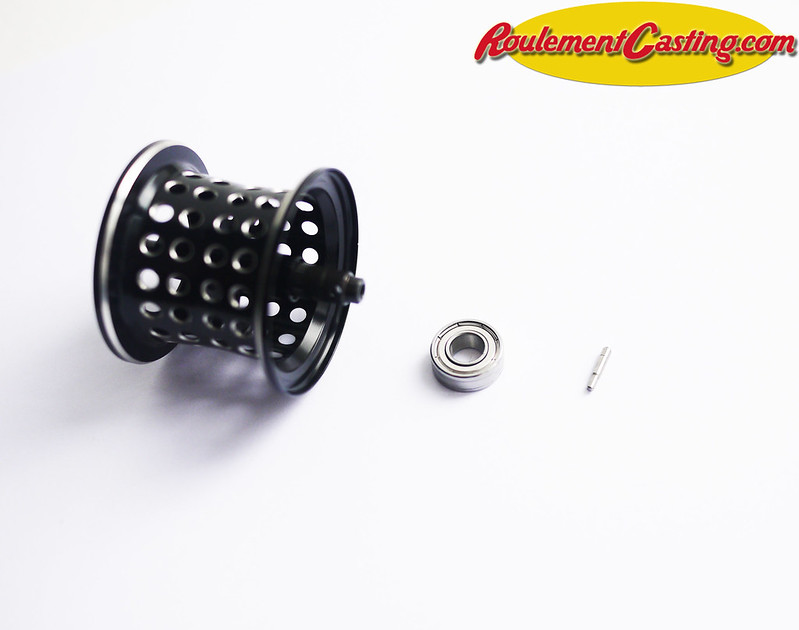
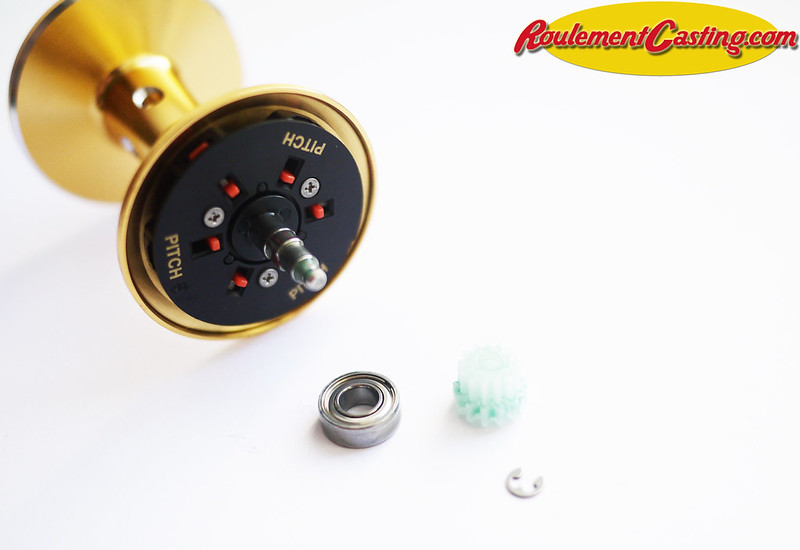
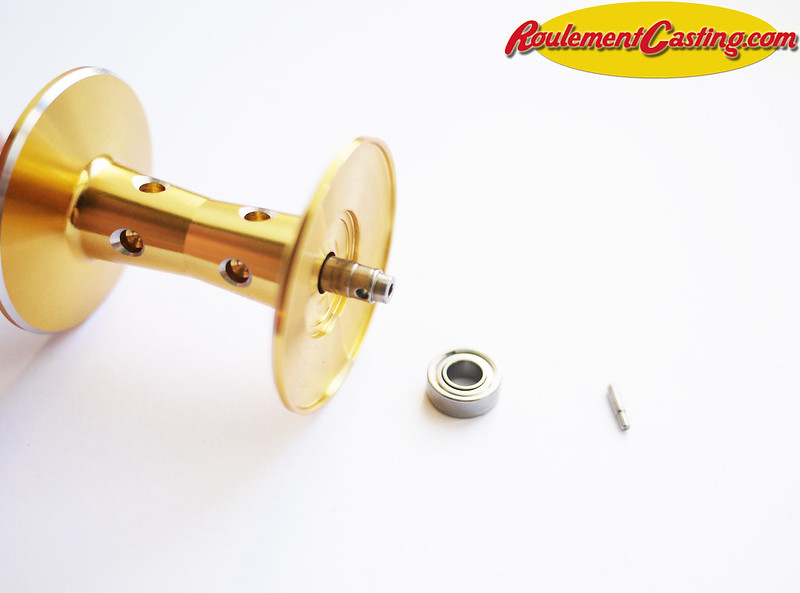
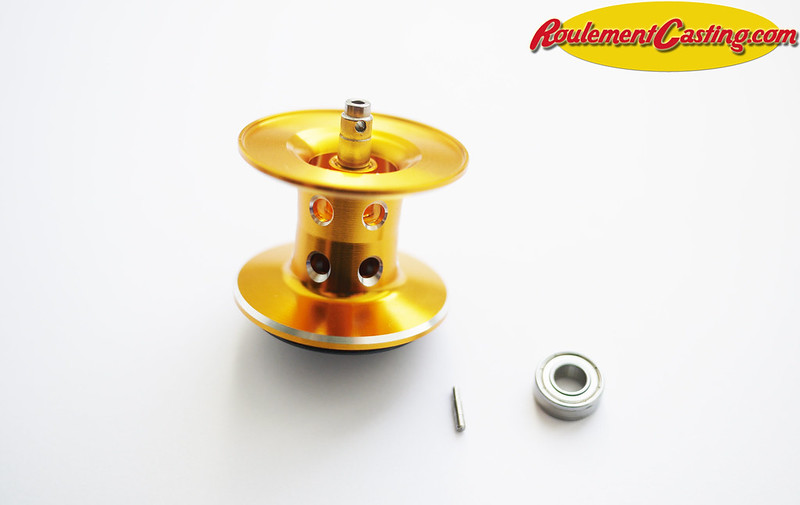
Remove the original ball bearing
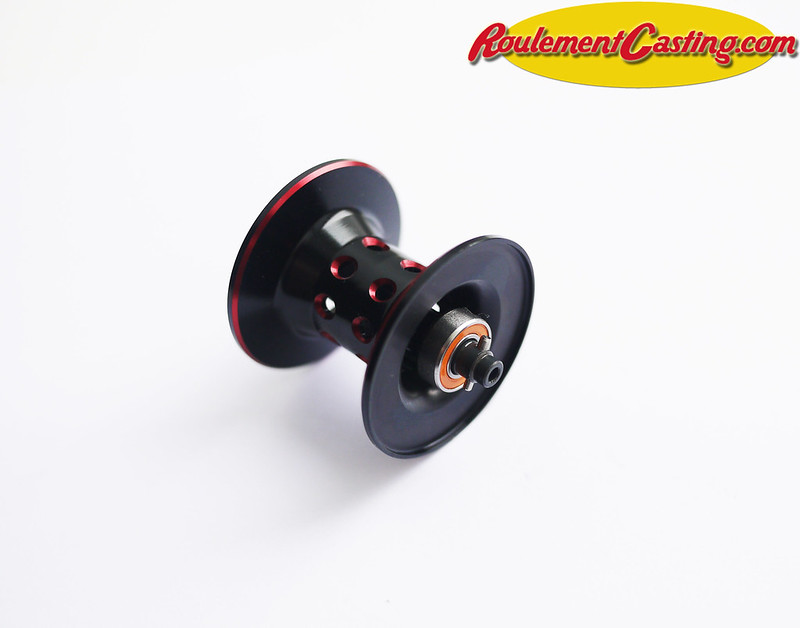
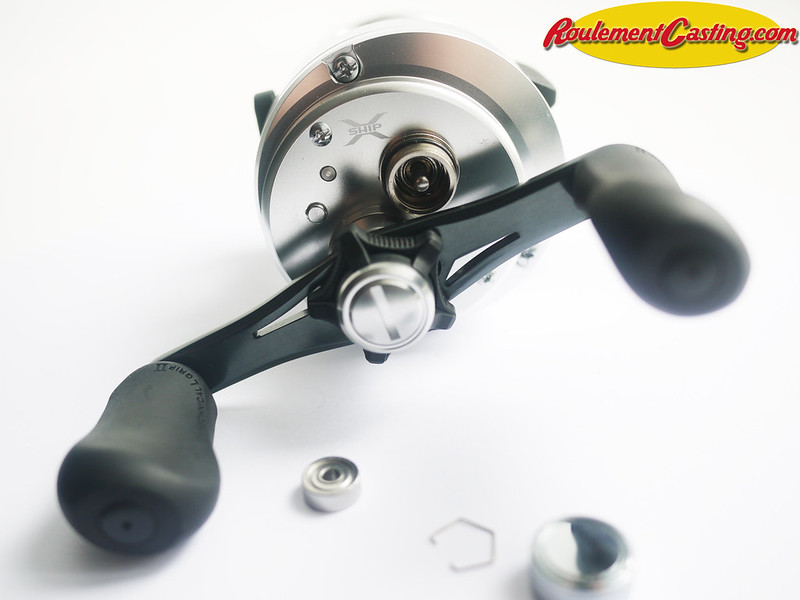
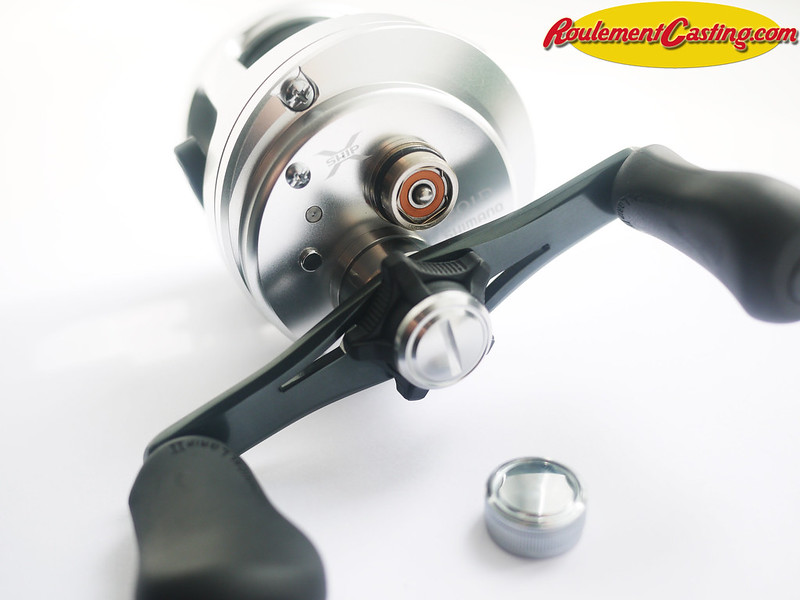
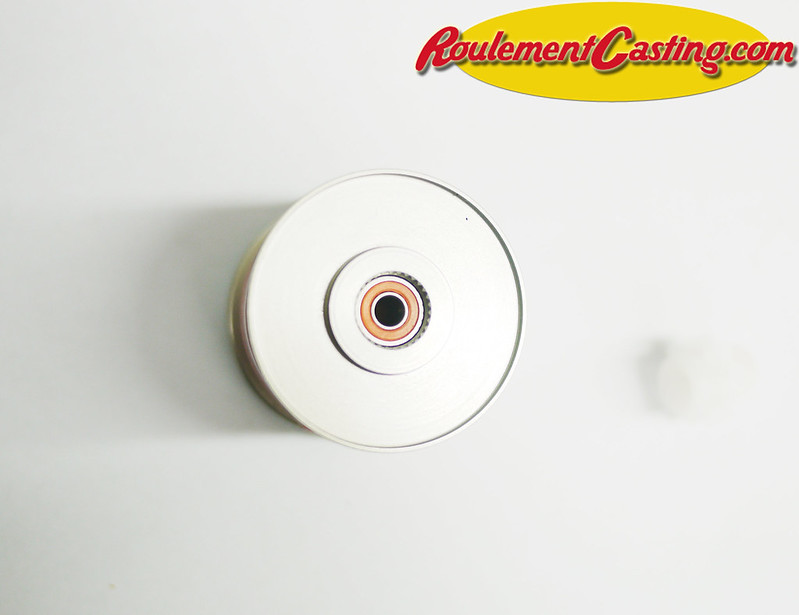
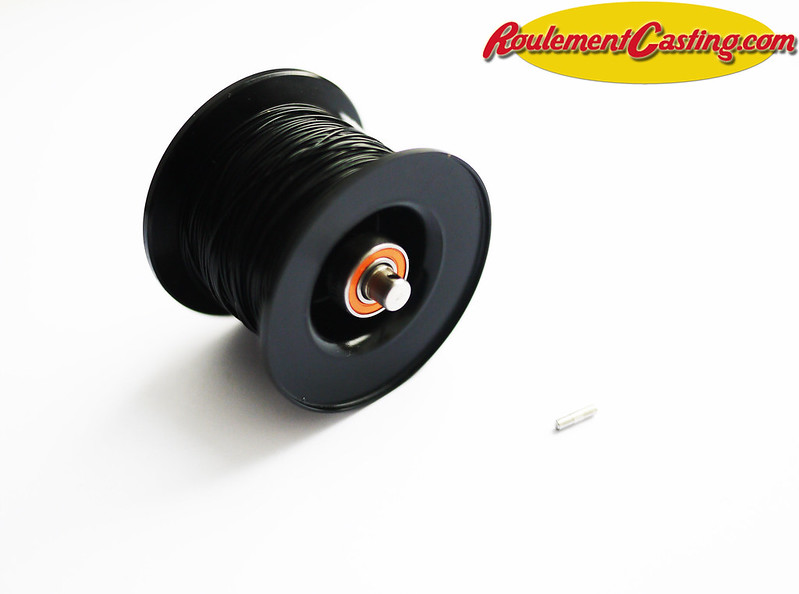
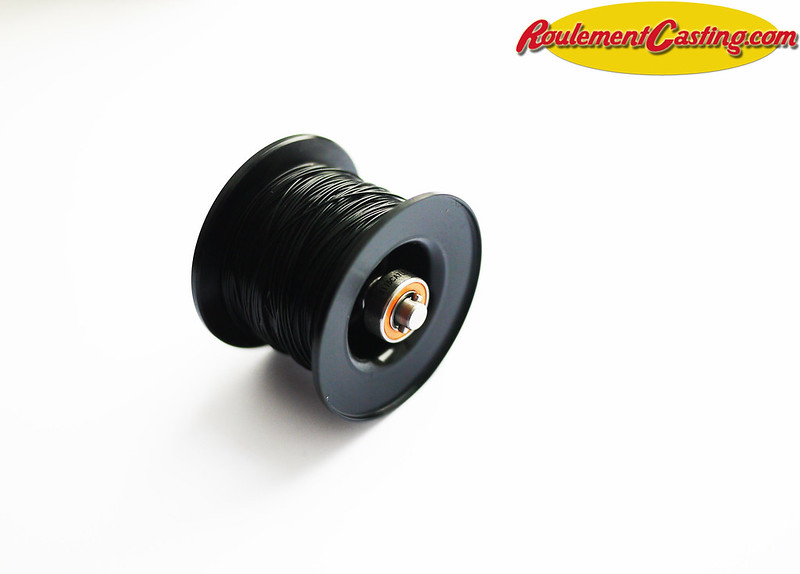
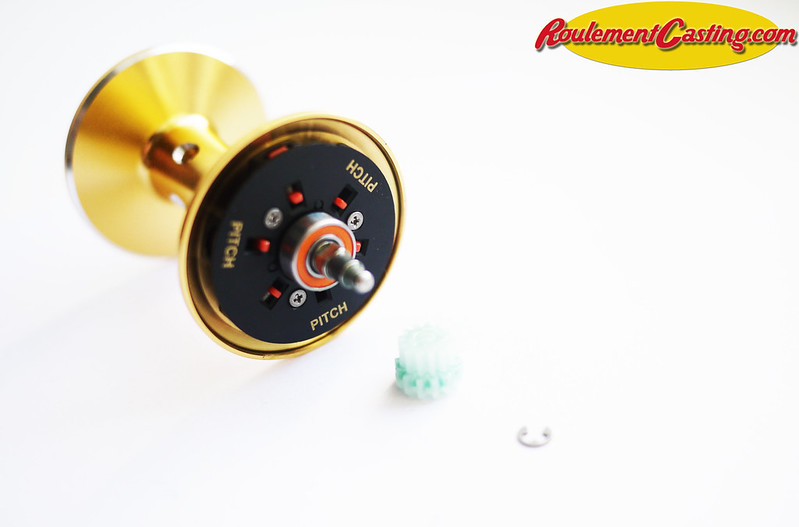
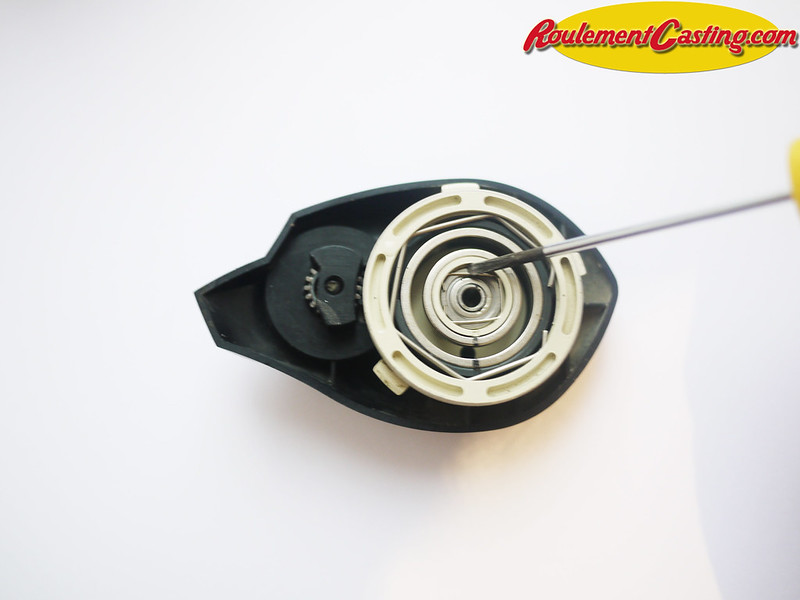
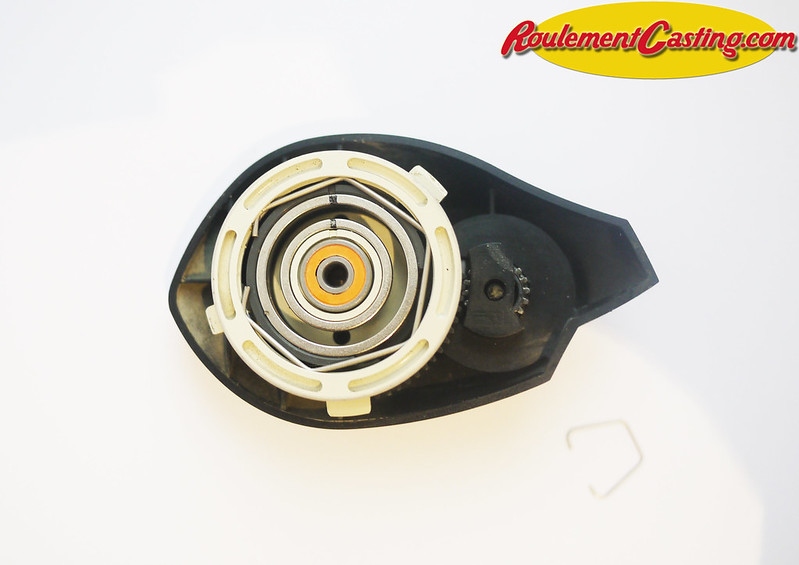
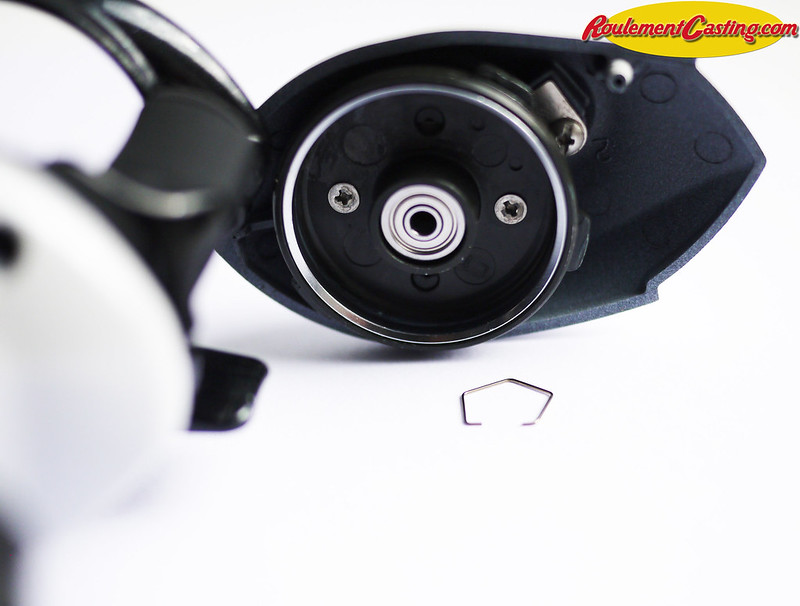
Fit the Boca Bearings Orange Seals ABEC #7 bearing into the sideplate
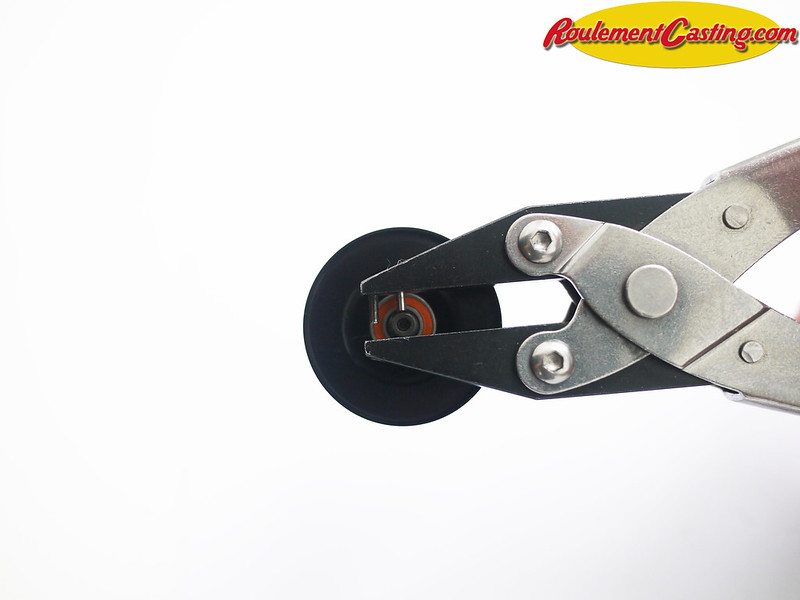
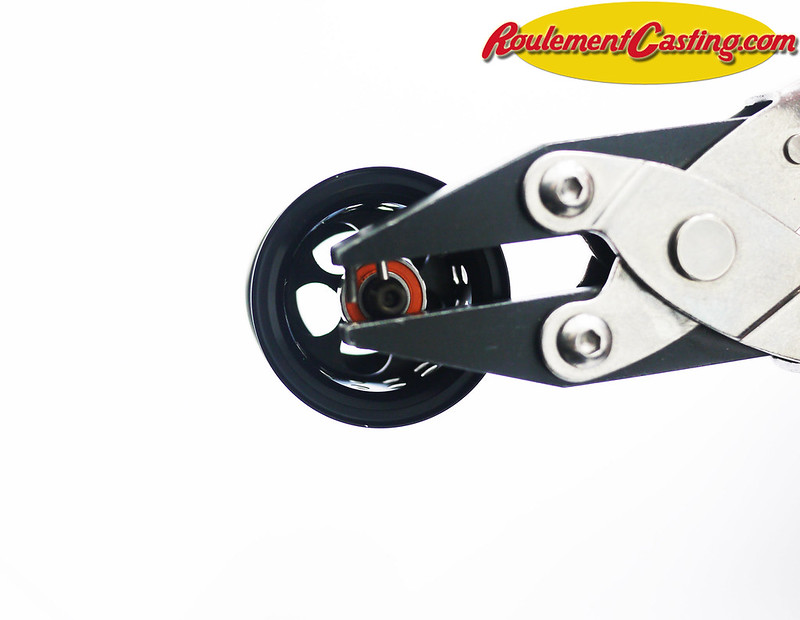
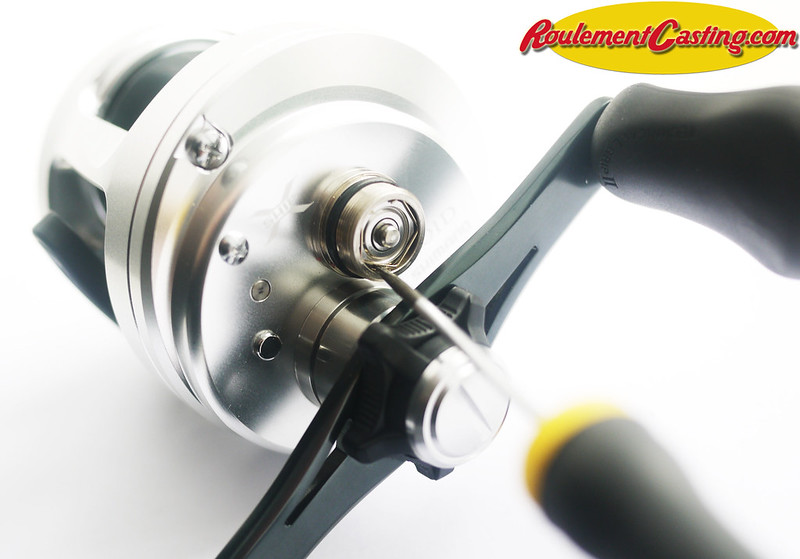
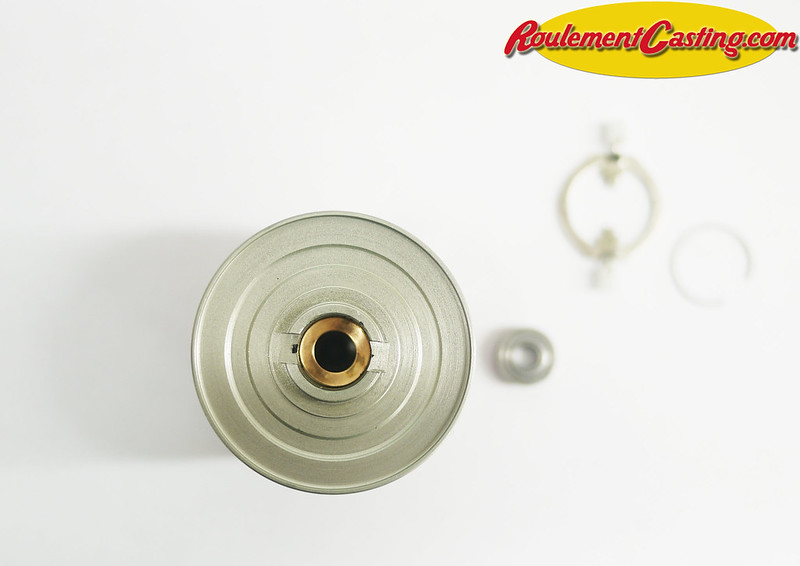
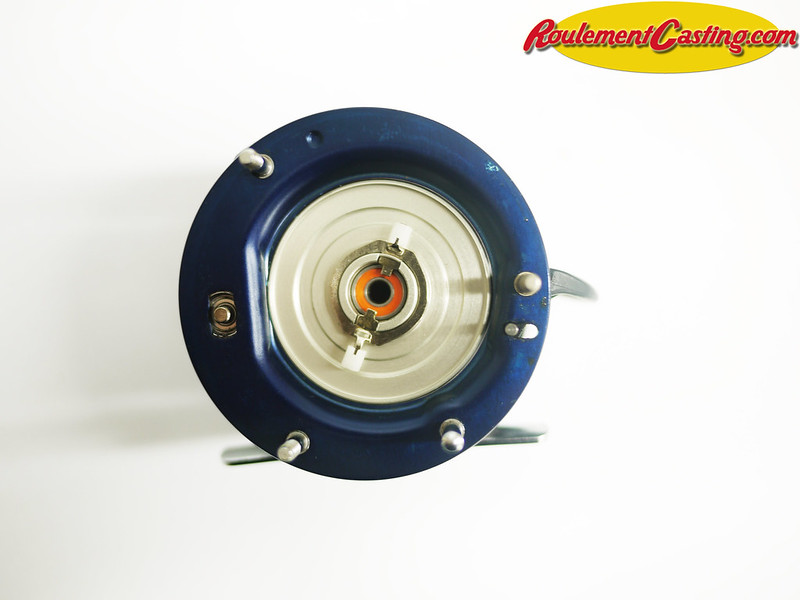
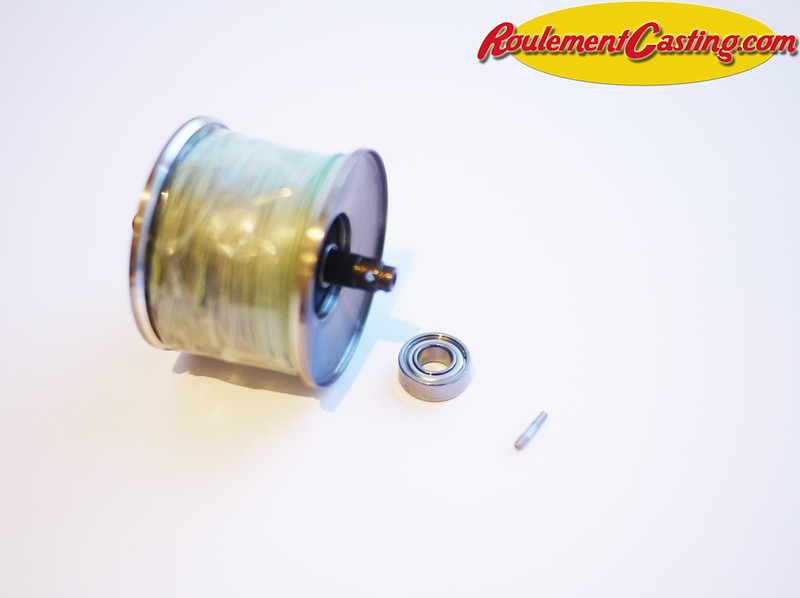
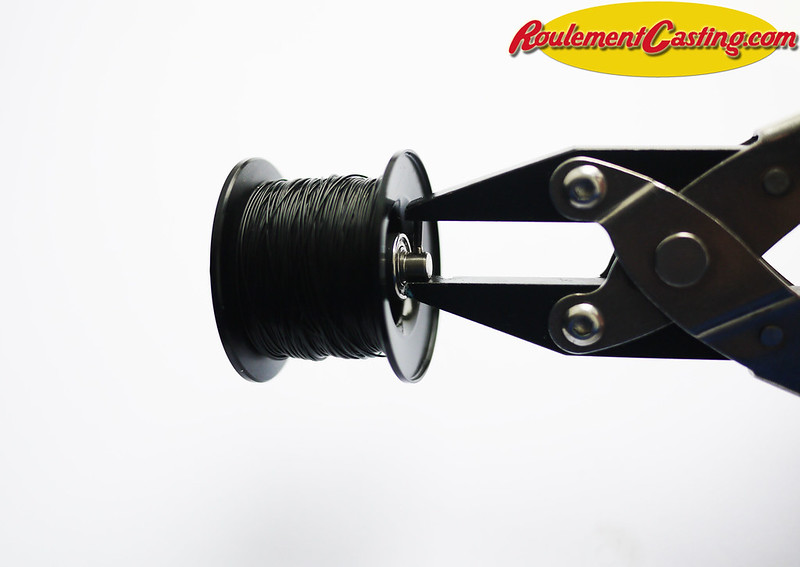
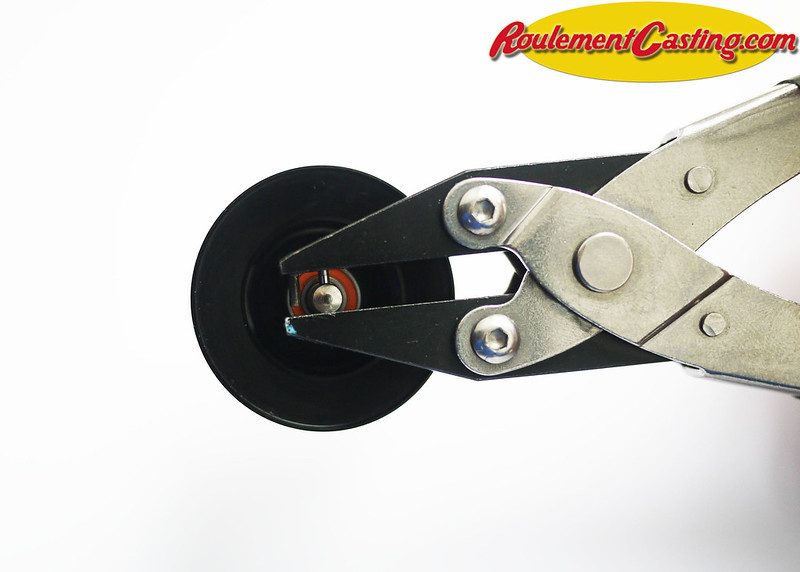
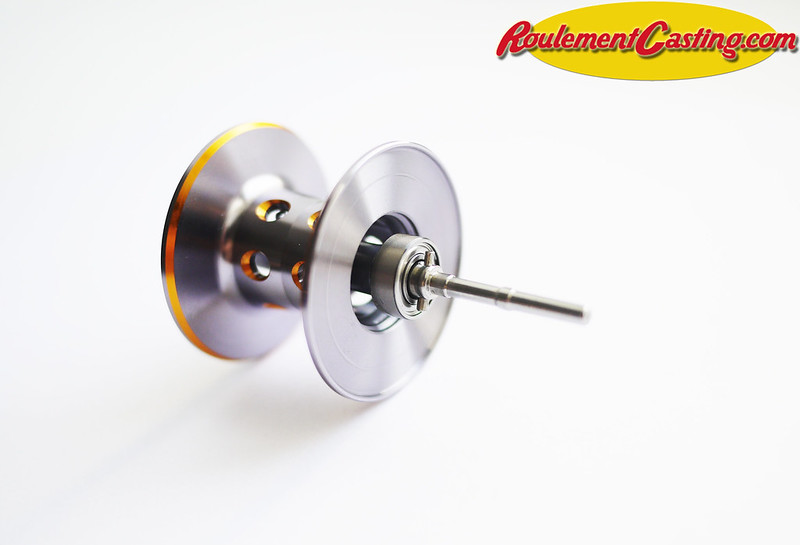
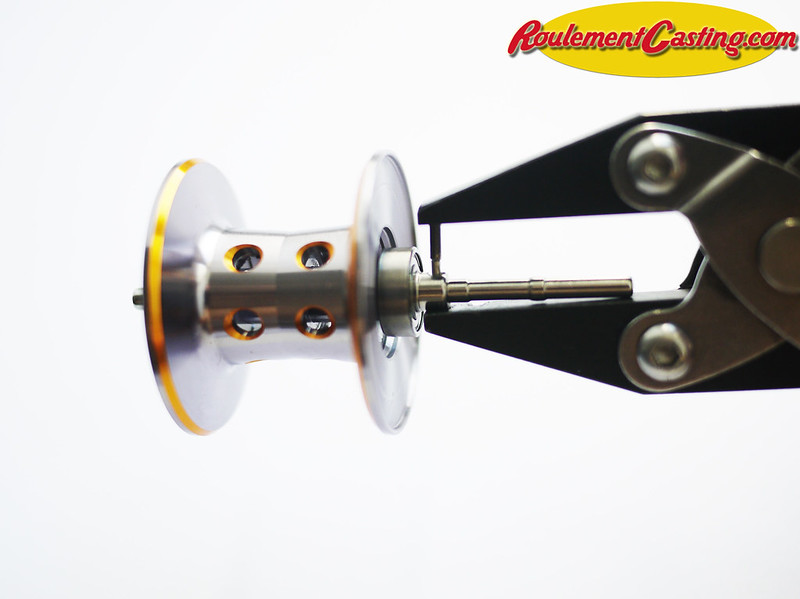
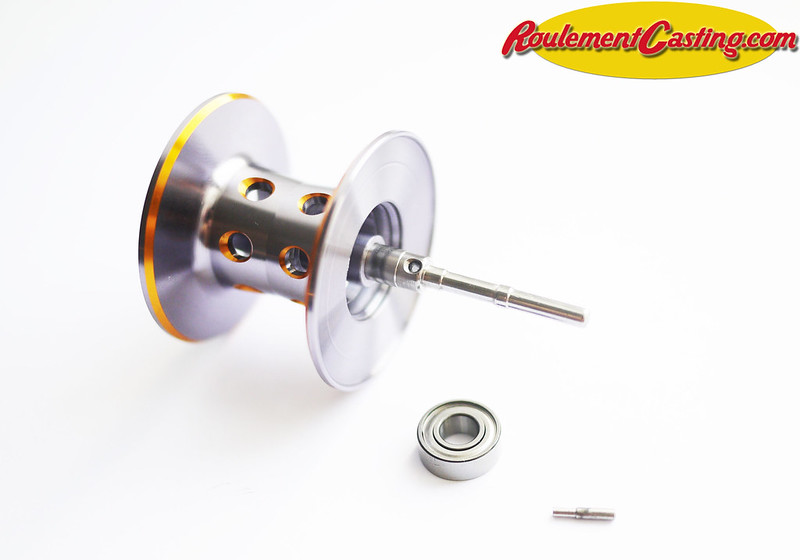
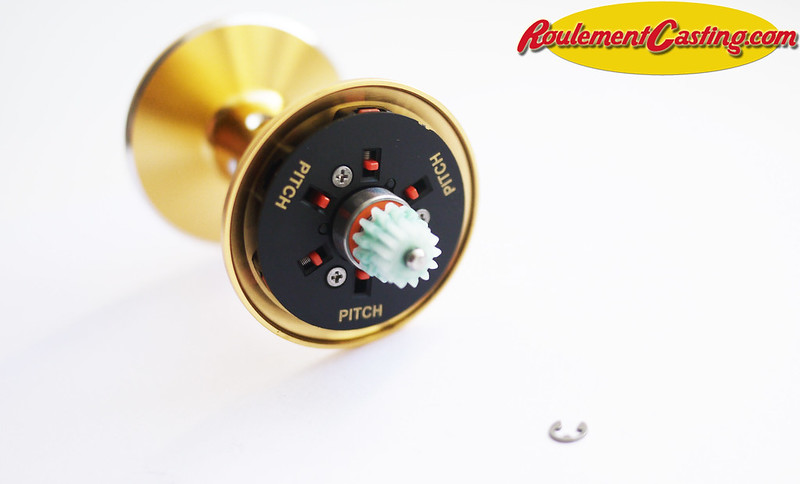
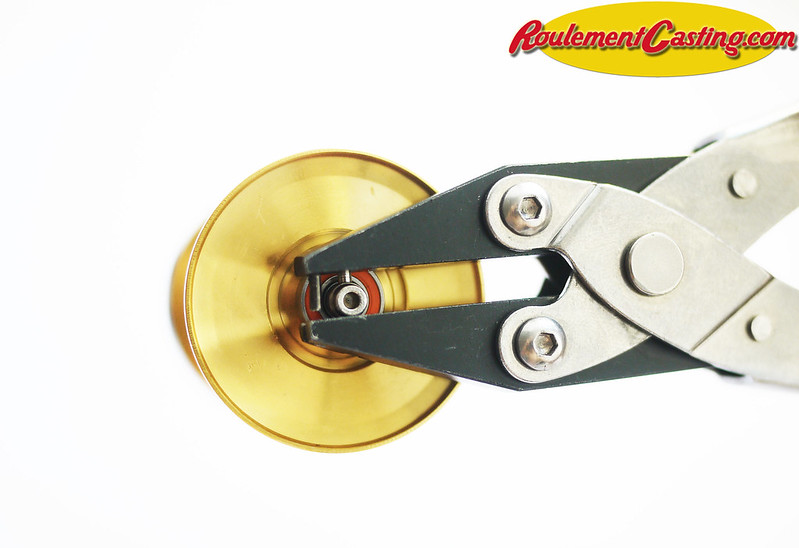
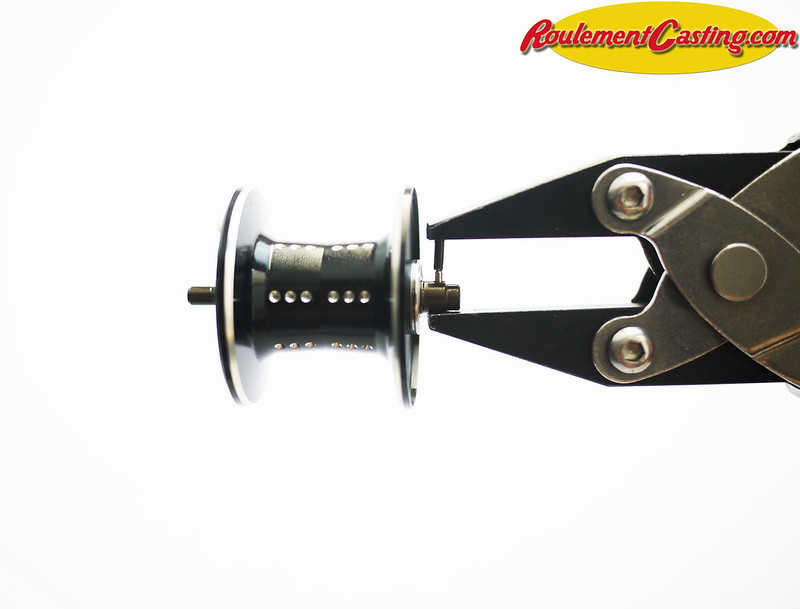
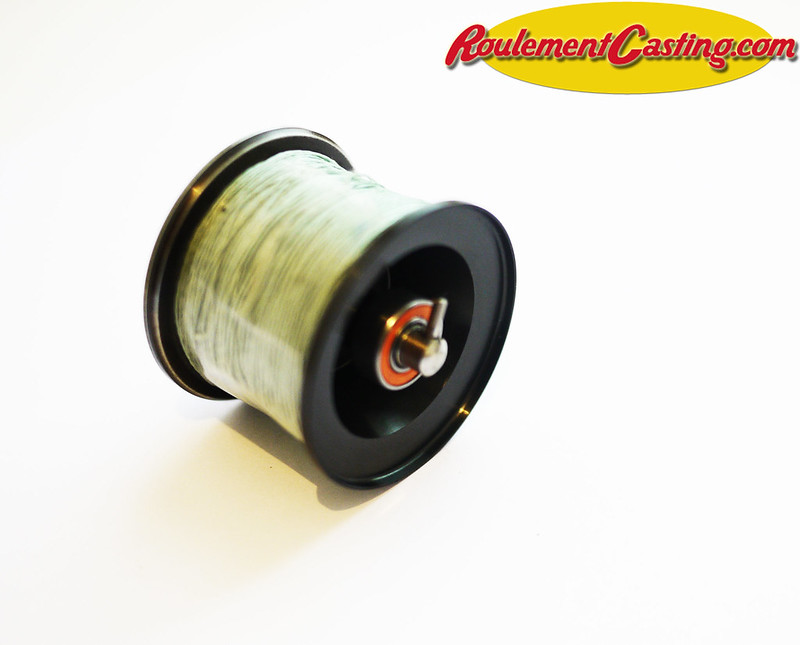
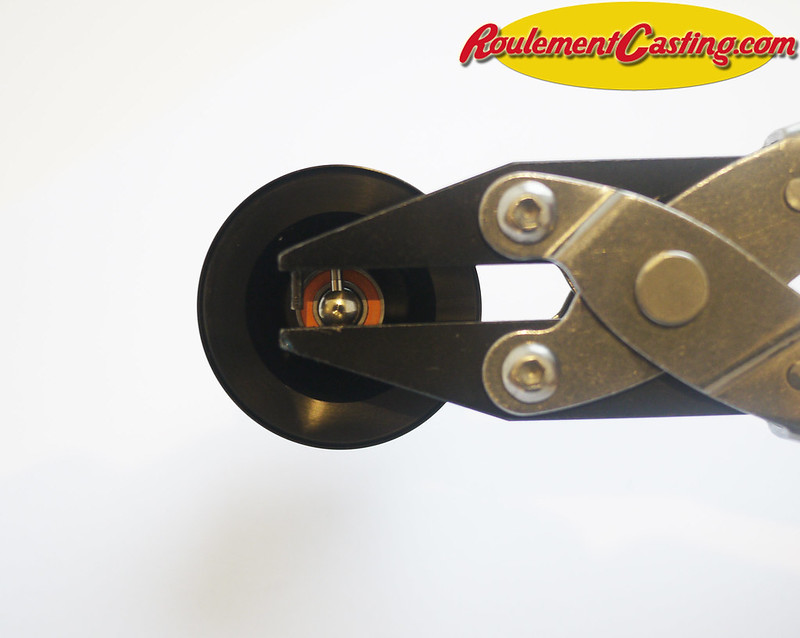
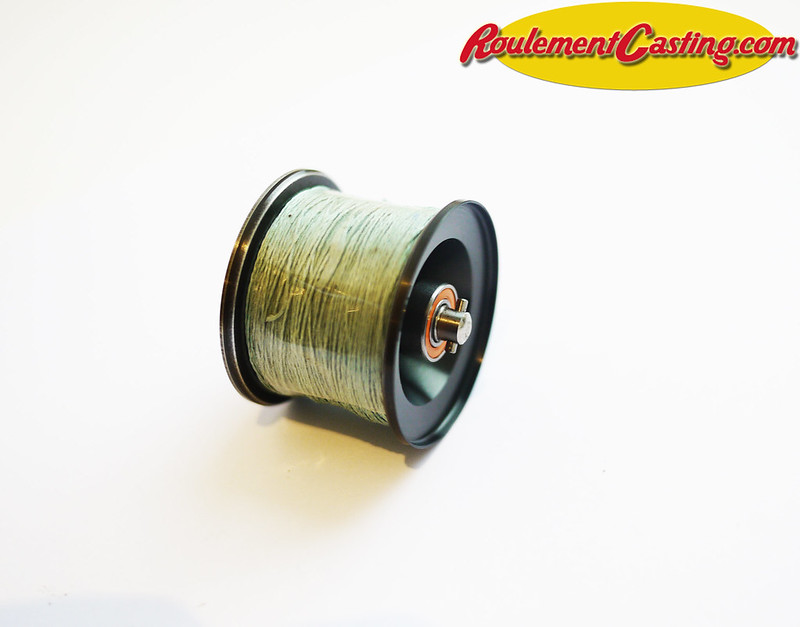
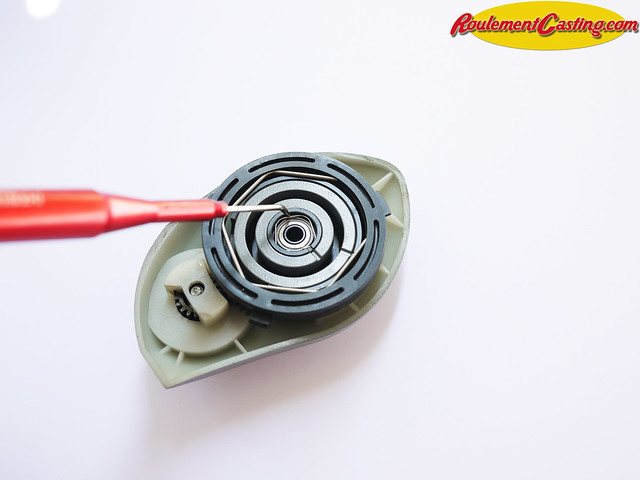
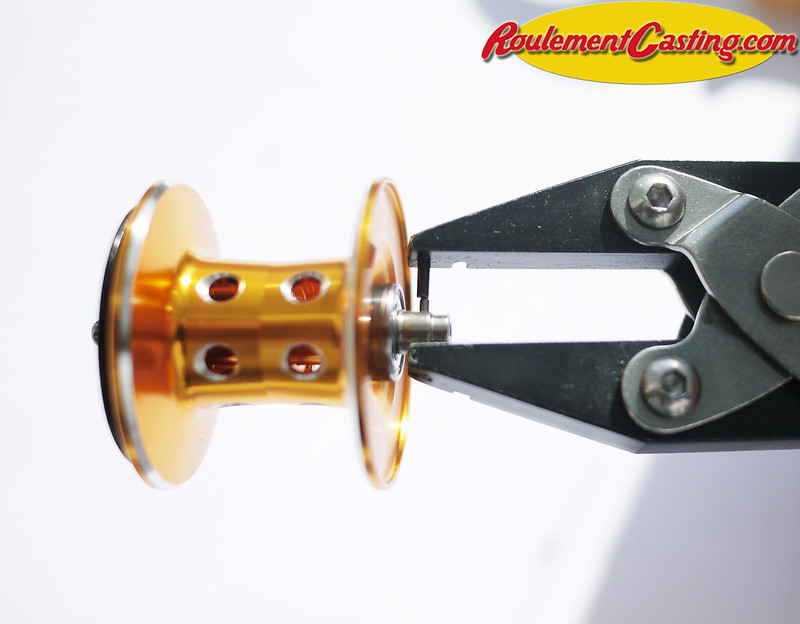
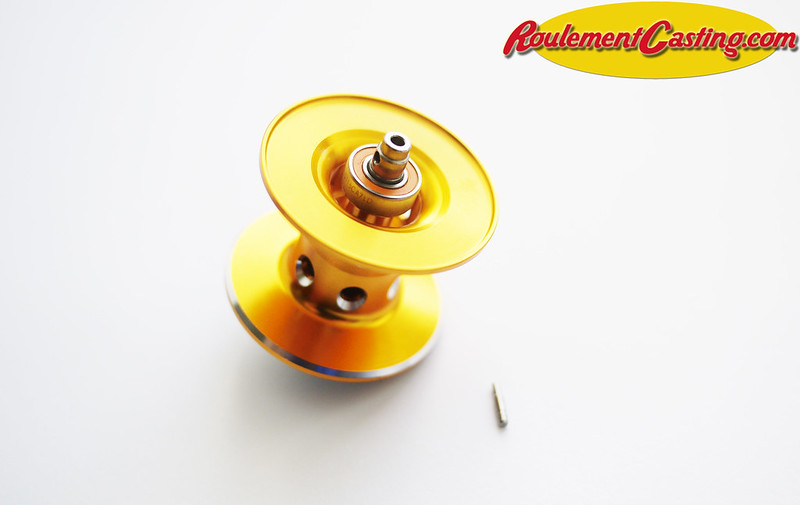
Refit the metal clipUsing the special Boca Bearings spool pliers, remove the pin that secures the bearing to the spool shaft. Note: The pin on Abu Garcia reels is tapered; please bear this in mind when handling them
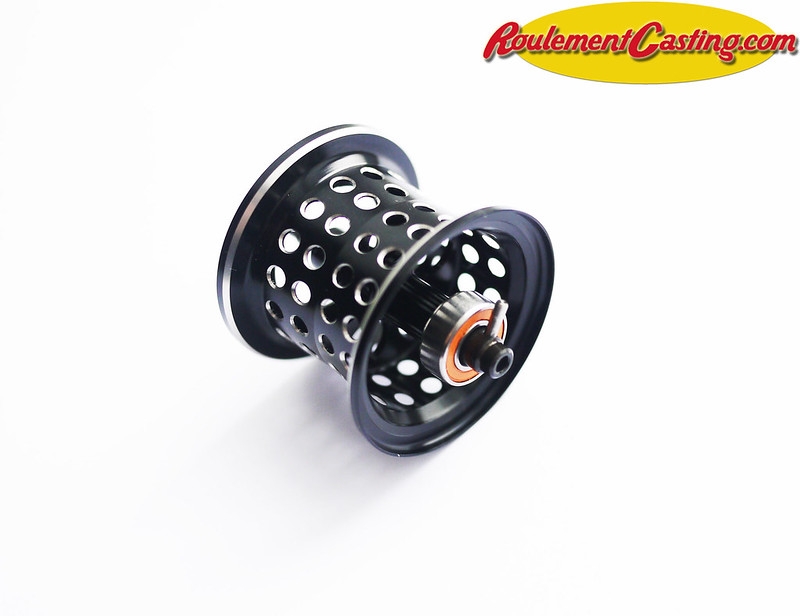
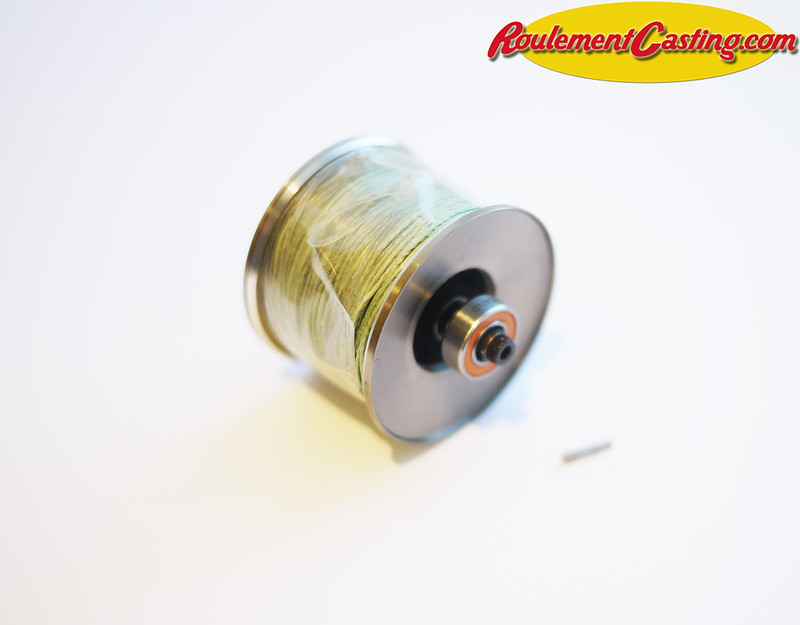
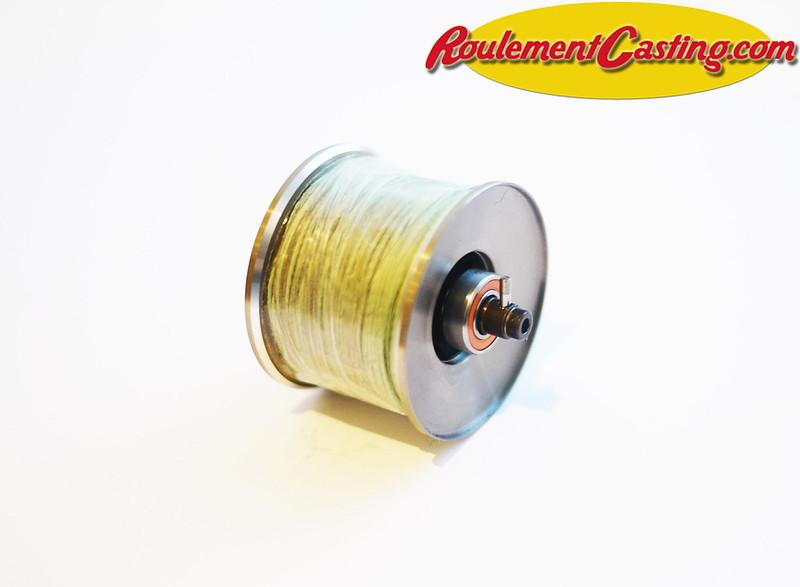
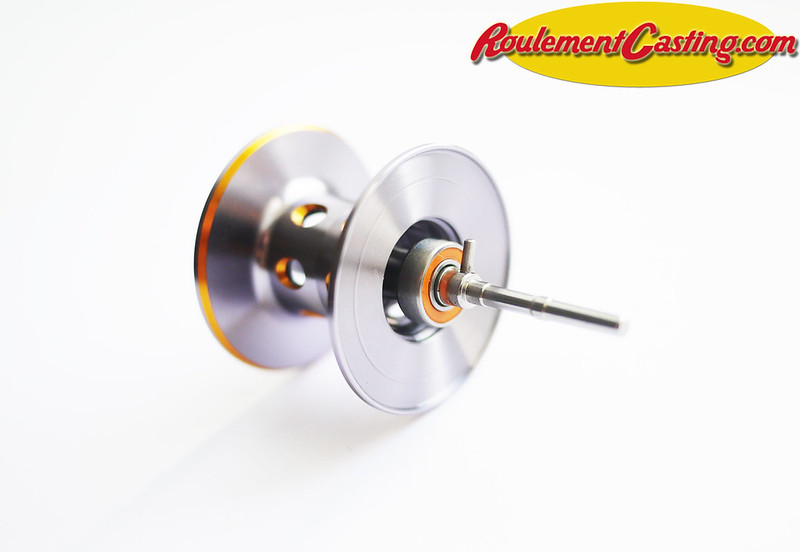
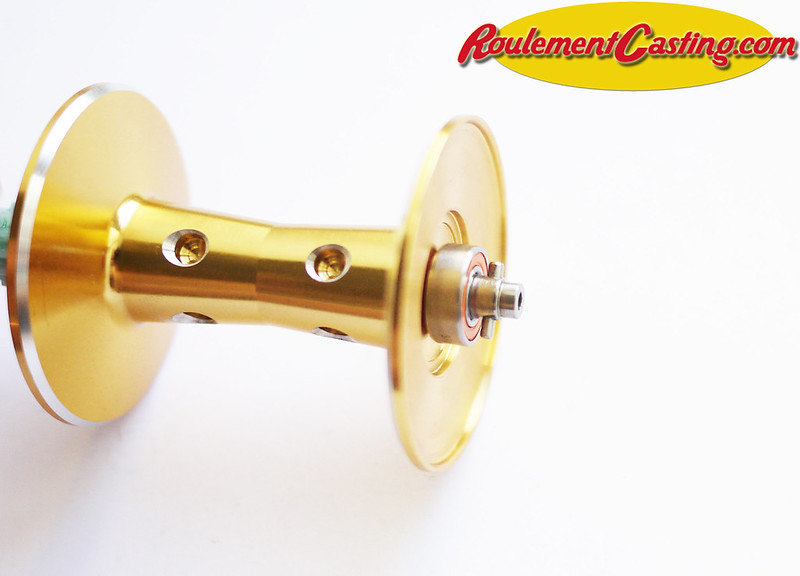
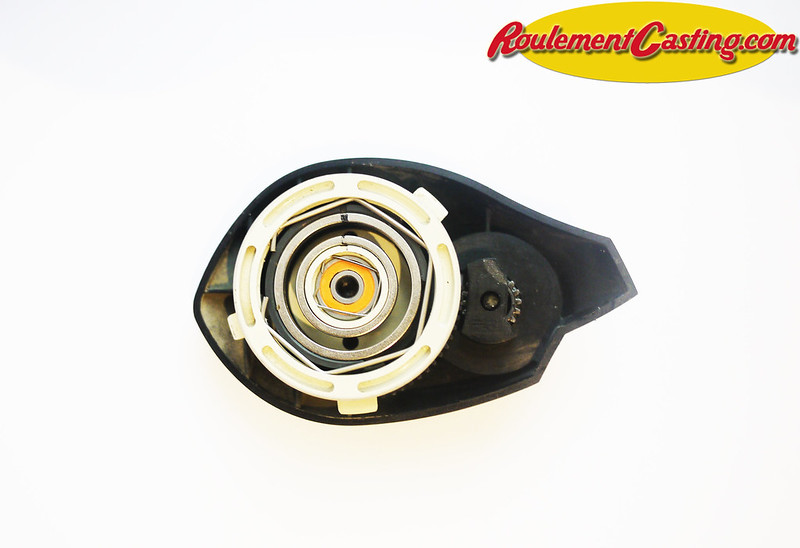
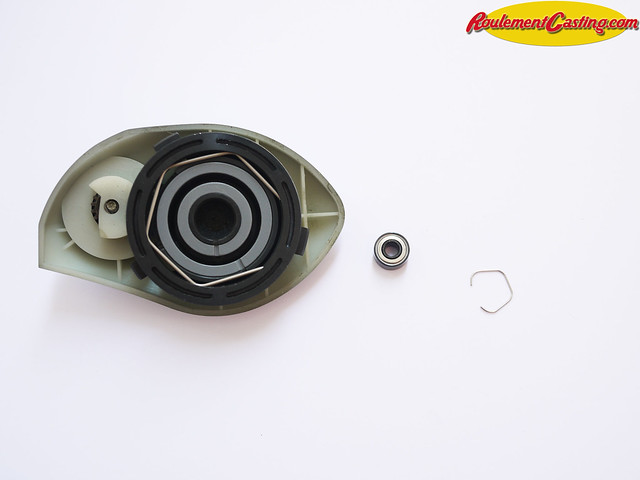
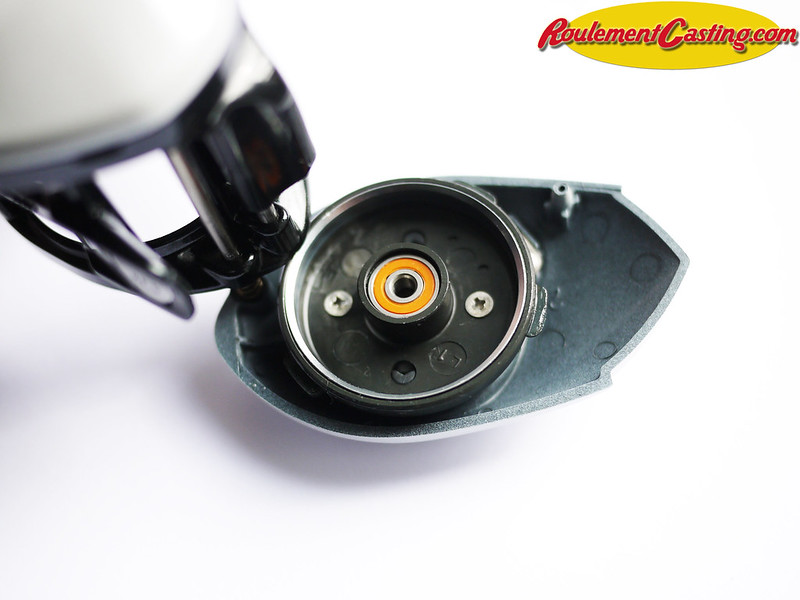
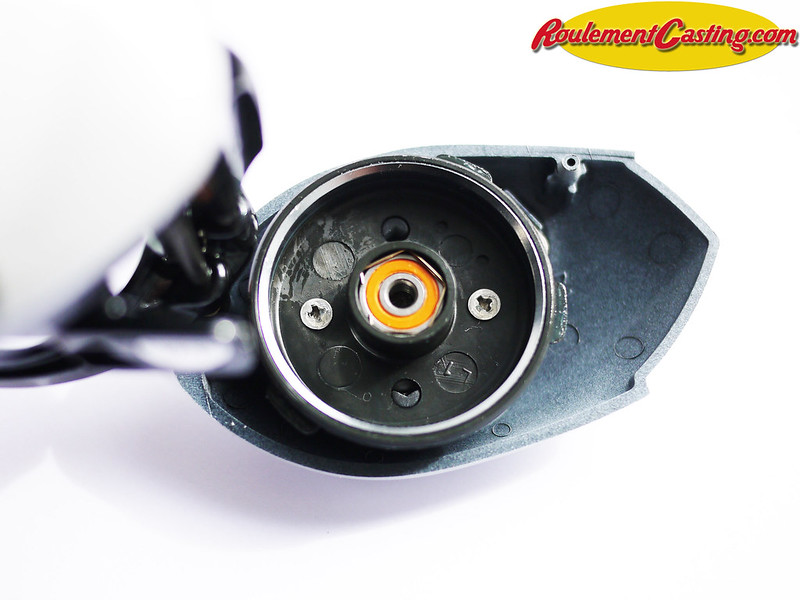
Push the pin in using the Boca Bearings Special Coil Pliers, ensuring that both sides are evenRefit the spool and sideplate
If you have any questions, please do not hesitate to contact us
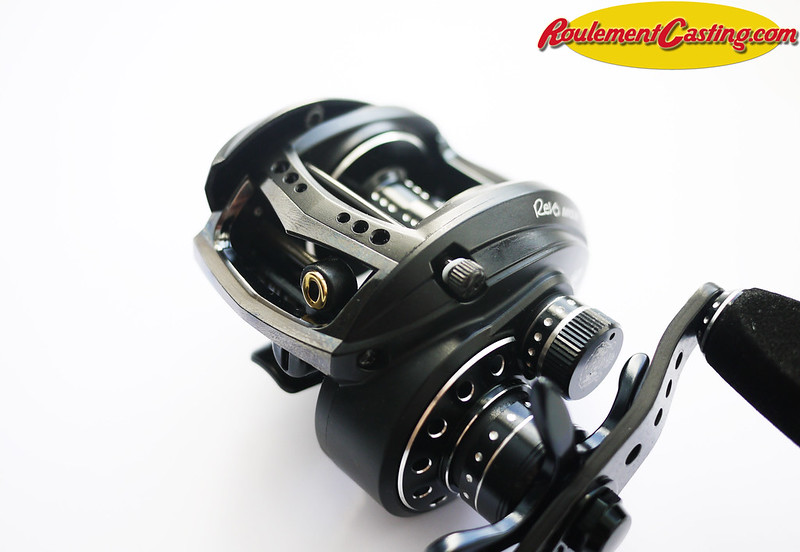
We’re going to look at how to quickly and easily replace the ball bearings on an Abu Garcia Revo STX to significantly improve its performance. The procedure is exactly the same for Revo S, SX, STX, Premier, Inshore and Skeet Reese reels…
Remove the side plate by unscrewing the screw at the topRemove the clip holding the ball bearing in place using a flat-head screwdriver. It is advisable to hold it with your finger to prevent it from falling out.Remove the original ball bearingFit the Boca Bearings Orange Seals ABEC #7 bearing into the sideplateRefit the metal clipUsing the special Boca Bearings spool pliers, remove the pin that secures the bearing to the spool shaft. Note: The pin on Abu Garcia reels is tapered; please bear this in mind when handling them
Push the pin in using the Boca Bearings Special Coil Pliers, ensuring that both sides are evenRefit the spool and sideplate
If you have any questions, please do not hesitate to contact us
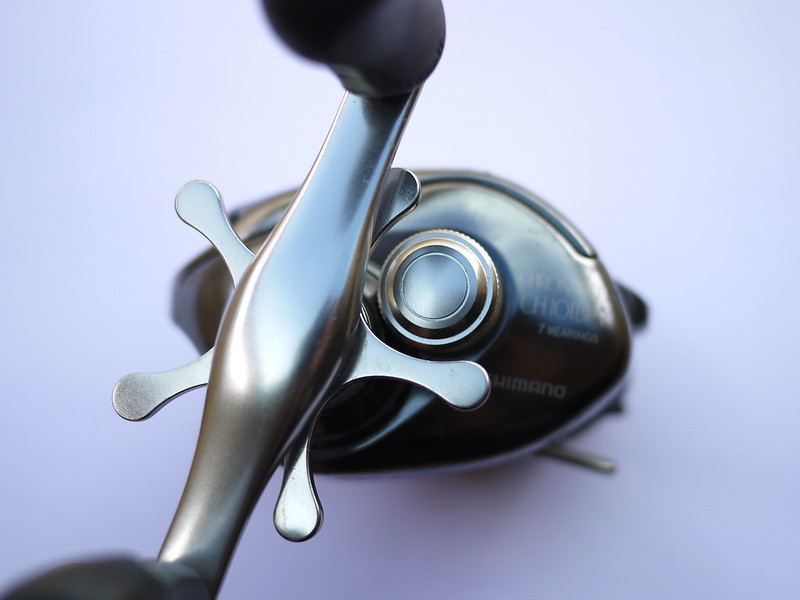
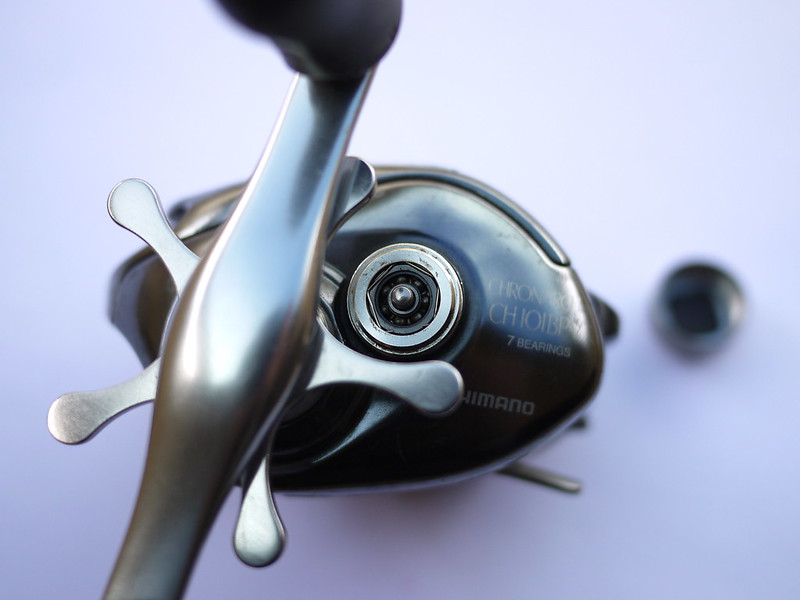
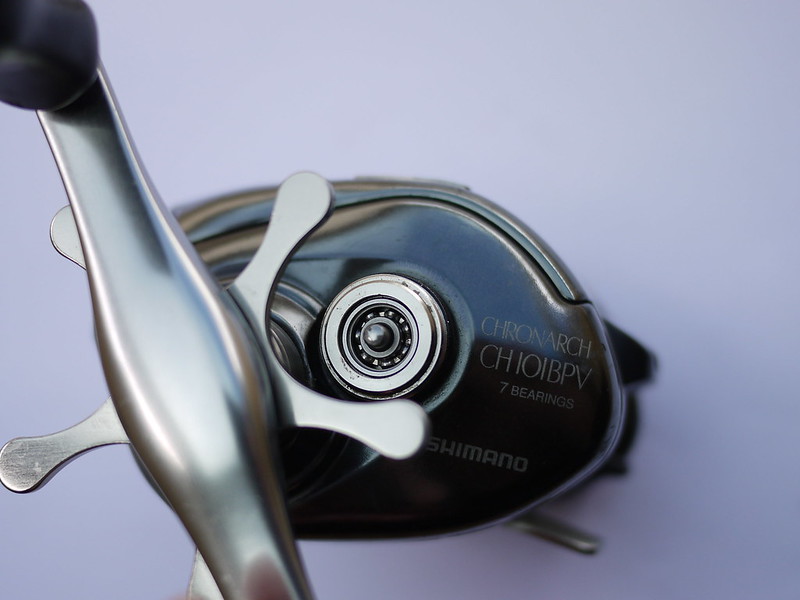
You can find our selection of parts for your Chronarch 101 BPV on the following page: Improvement Shimano Chronarch 101 BPV
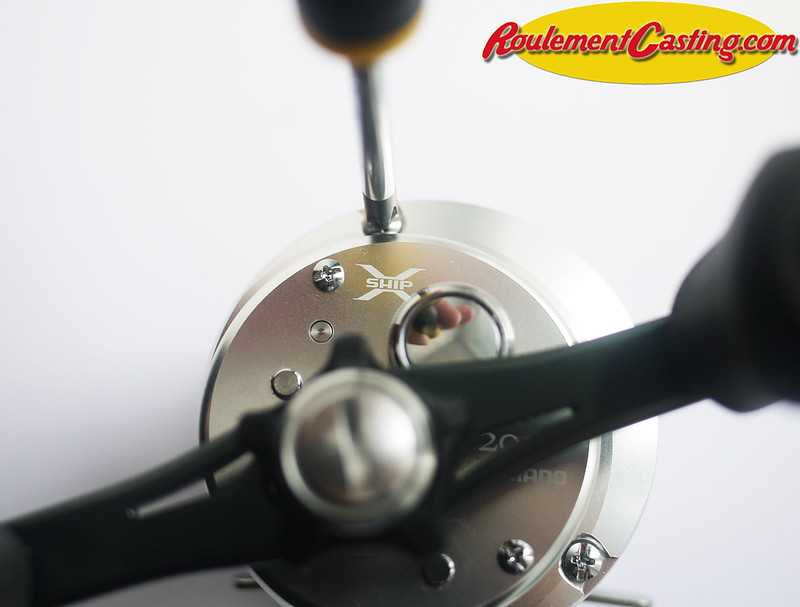
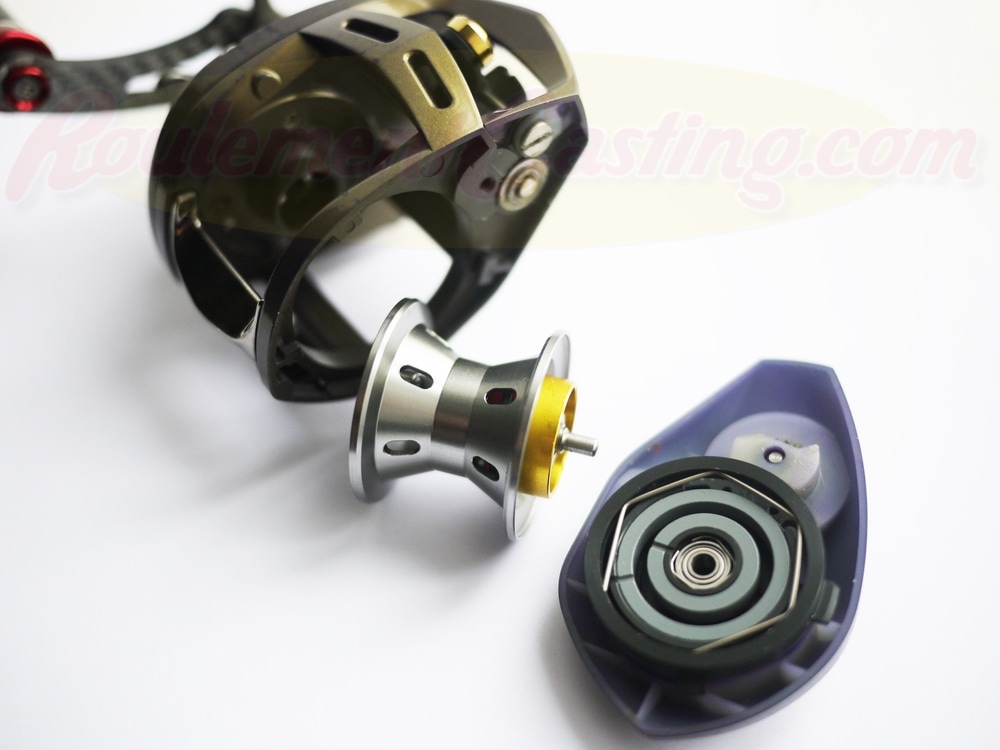
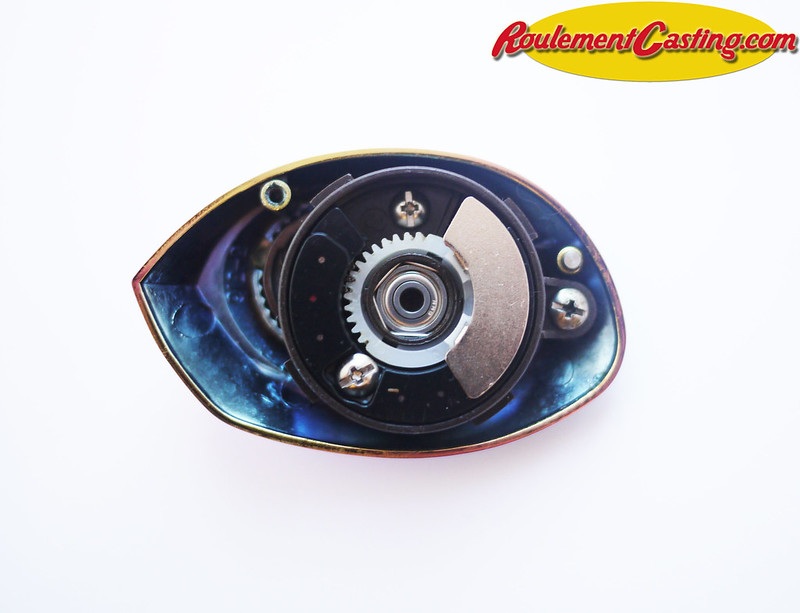
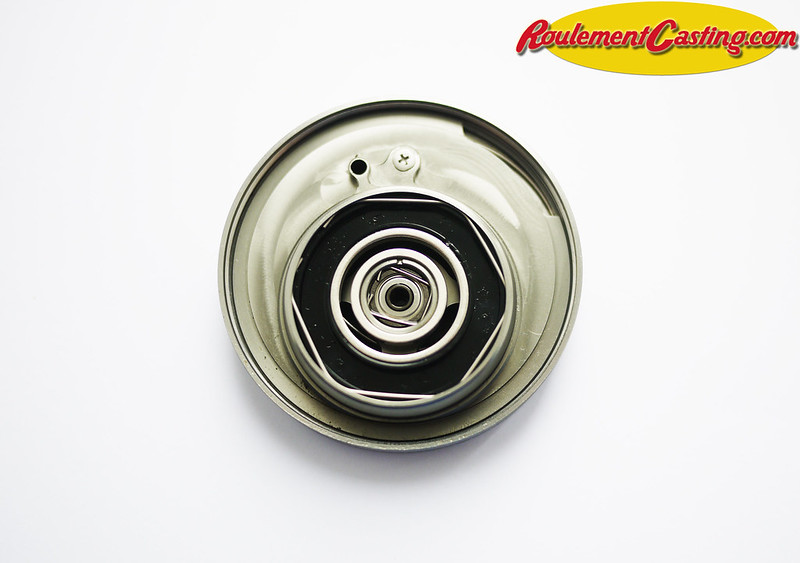
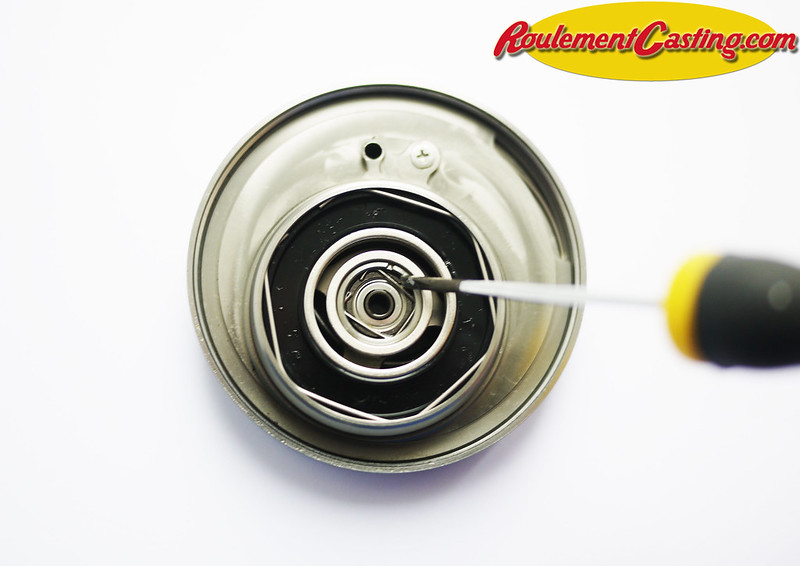
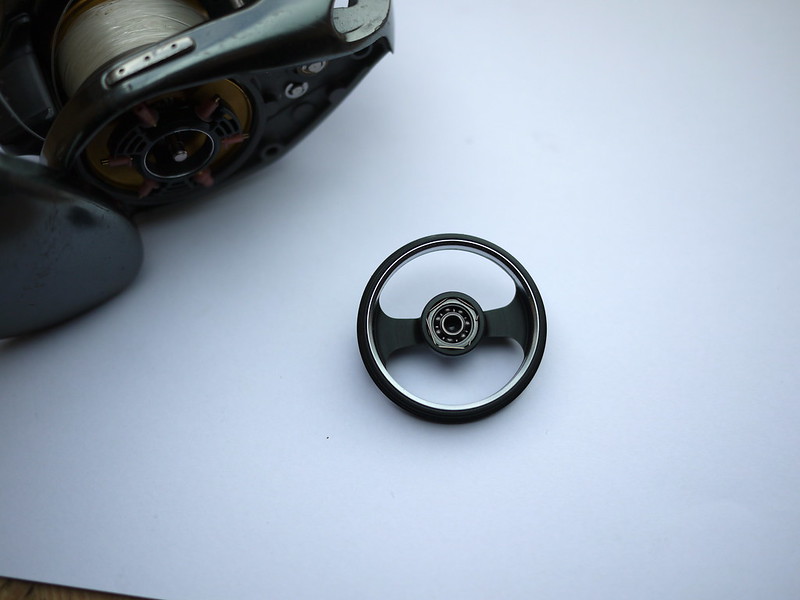
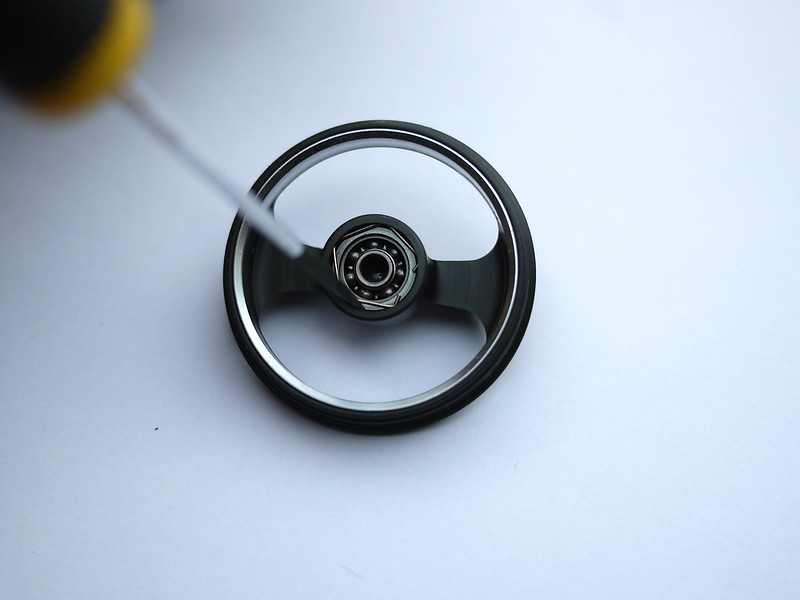
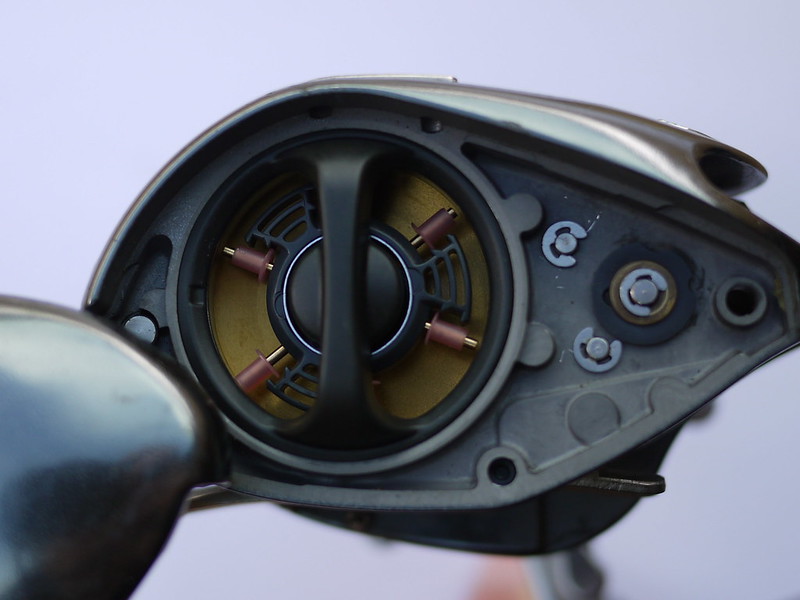
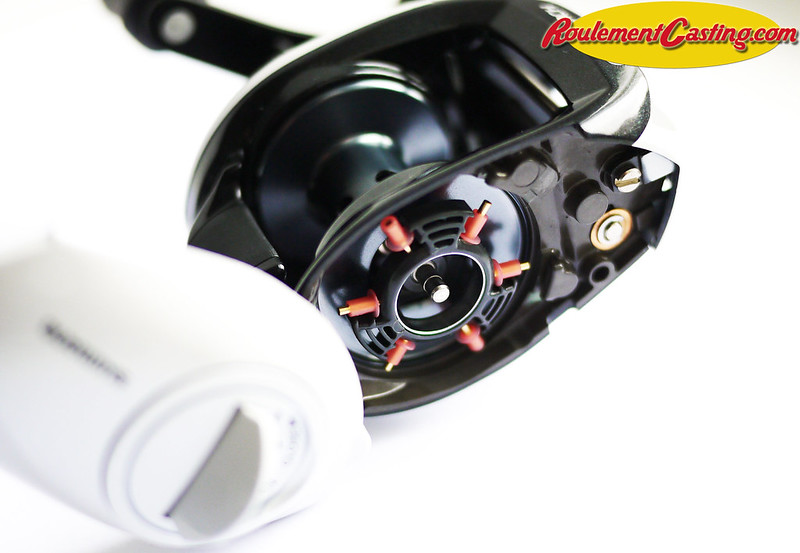
– Open the side plate to access the adjustment weights; the first bearing is located above it. To remove it, simply remove the metal clip holding it in place. You can use a precision screwdriver for this.
PLEASE NOTE: you should hold it in place with your finger to stop the part flying off when it comes loose!
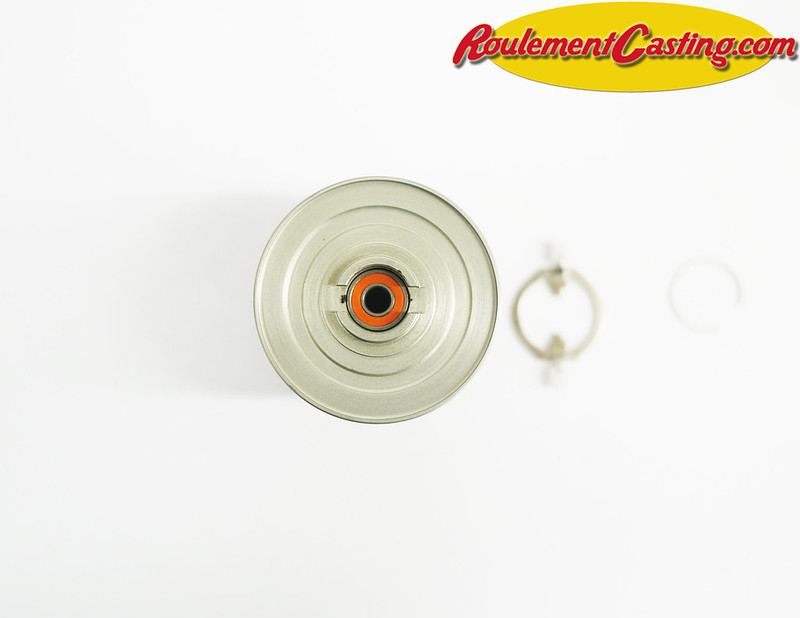
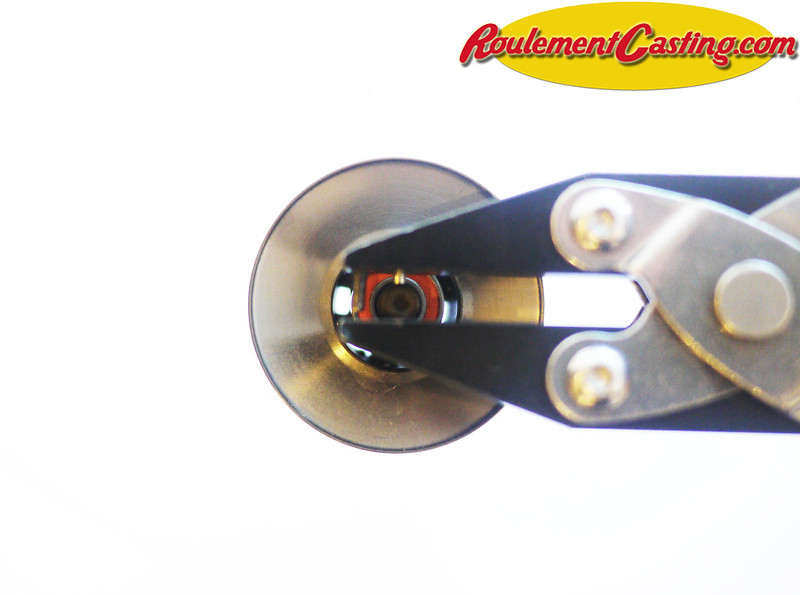
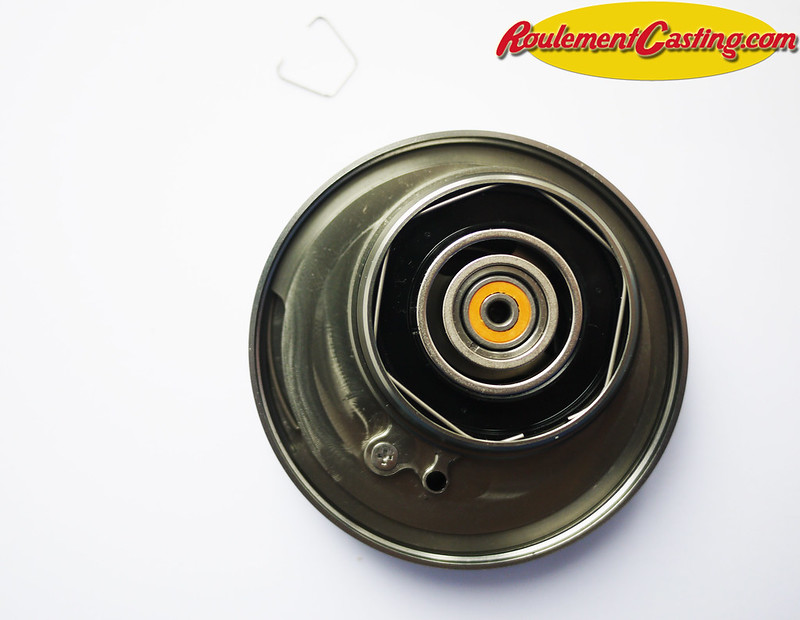
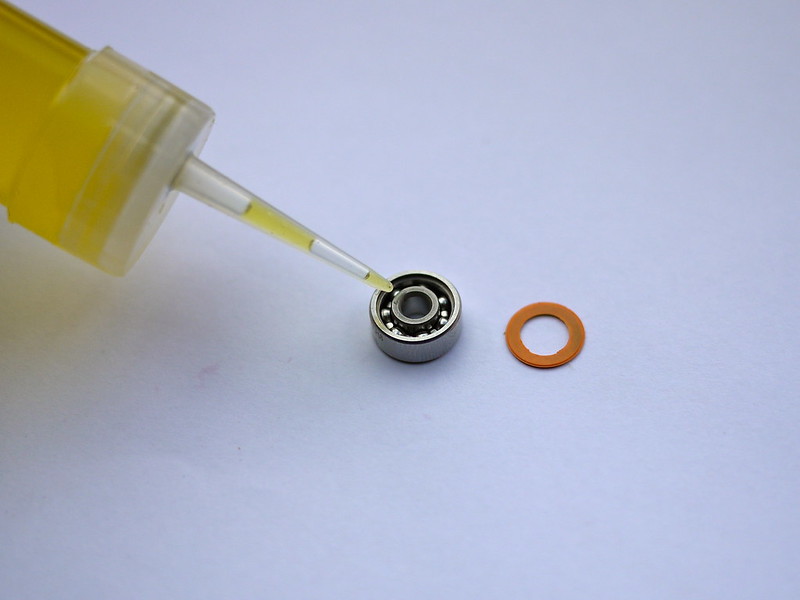
-Carefully remove the orange part (the seal) that protects the bearing using a sharp object (in this case, a fishhook). You can remove one or both – it’s up to you.
– Apply a drop of special bearing oil to the bearing. It’s then up to you whether or not to replace the seal. Fitting it protects the bearing from dirt but must be removed every time you want to oil the bearing, whereas leaving it off simplifies maintenance but leaves the mechanism more exposed. I opted for the second option.
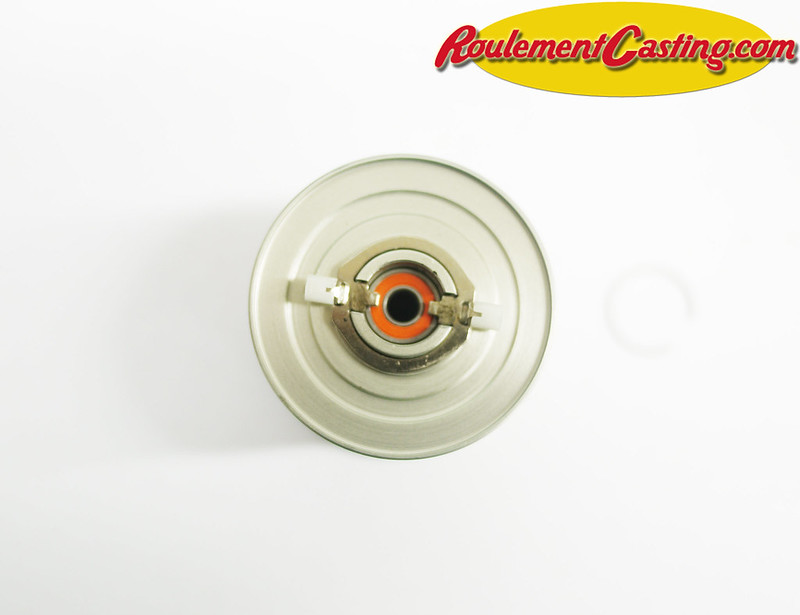
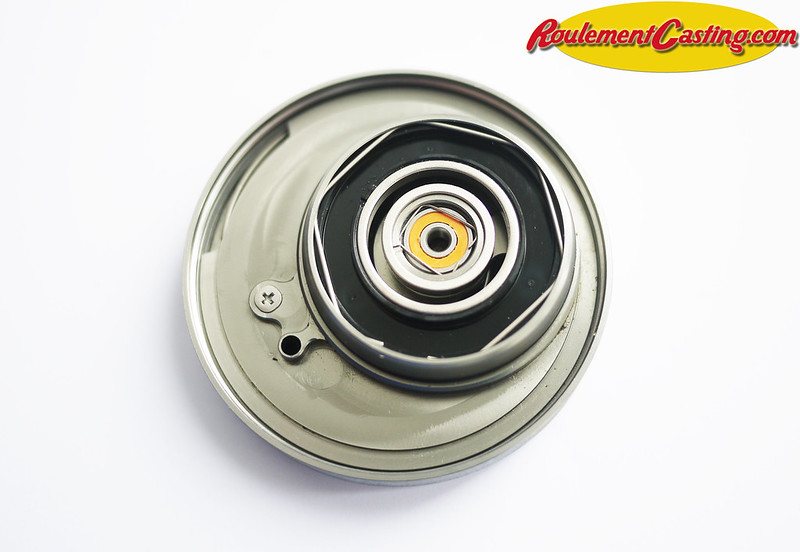
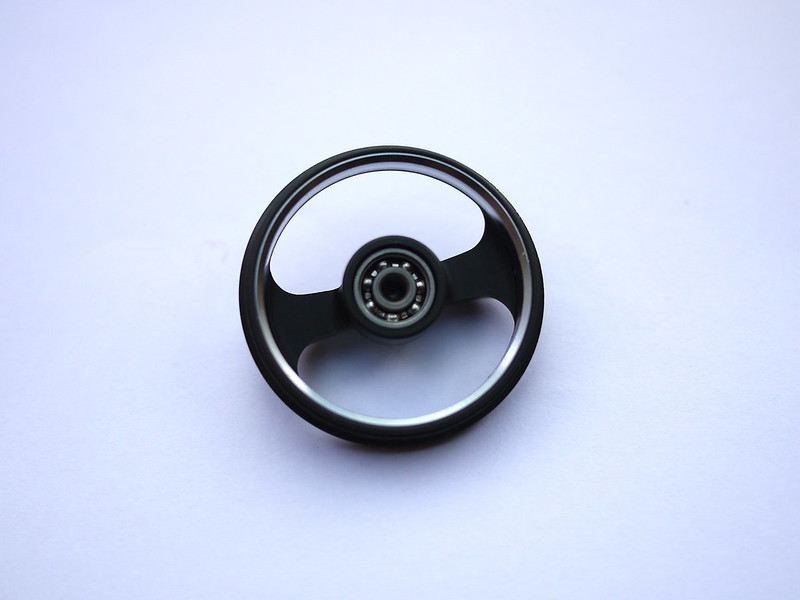
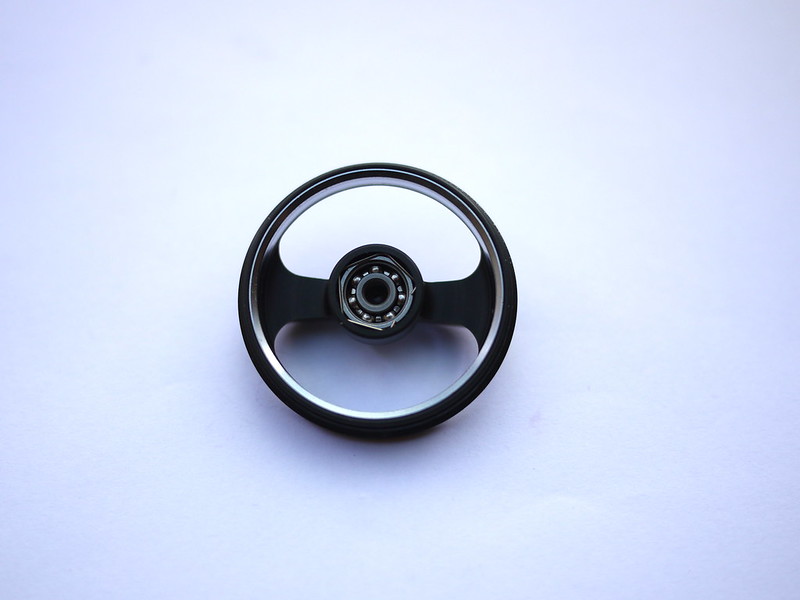
– Place the new bearing in its housing and put the small metal part back in place.
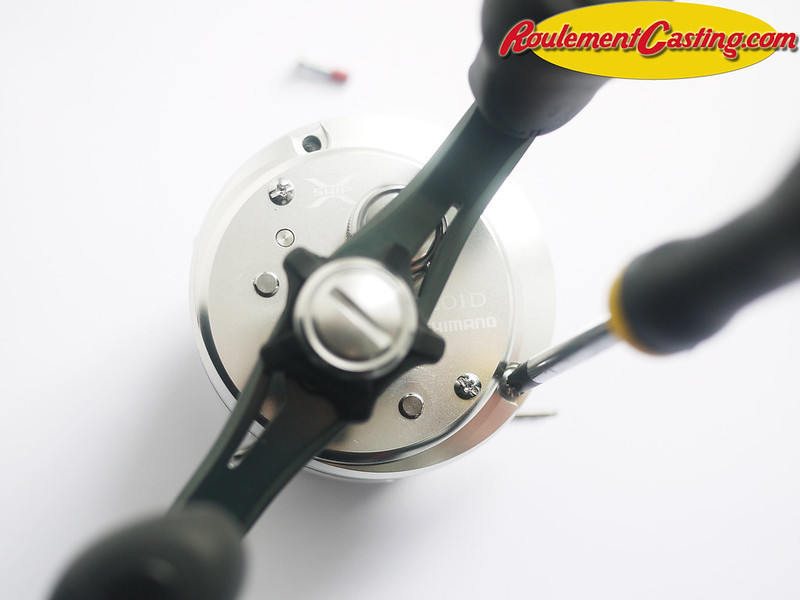
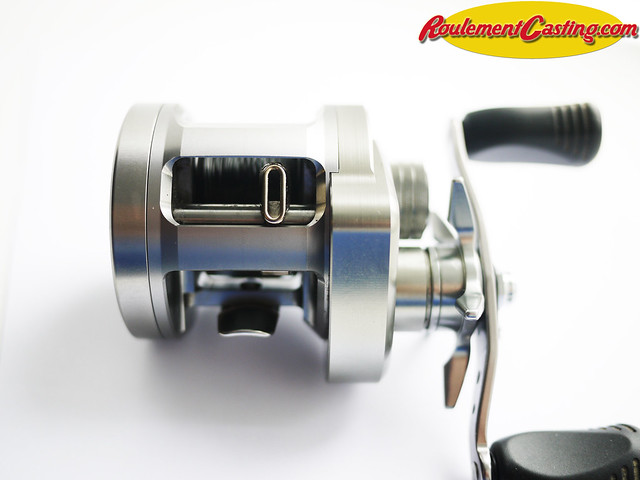
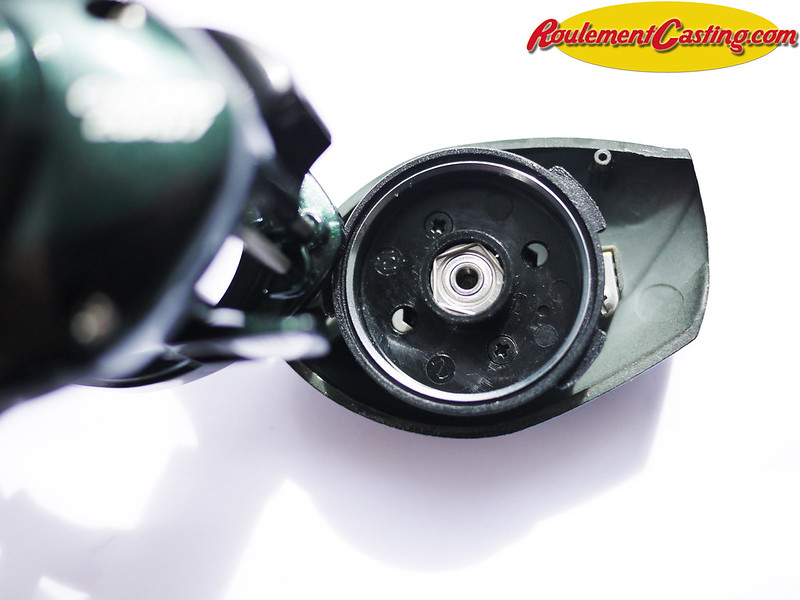
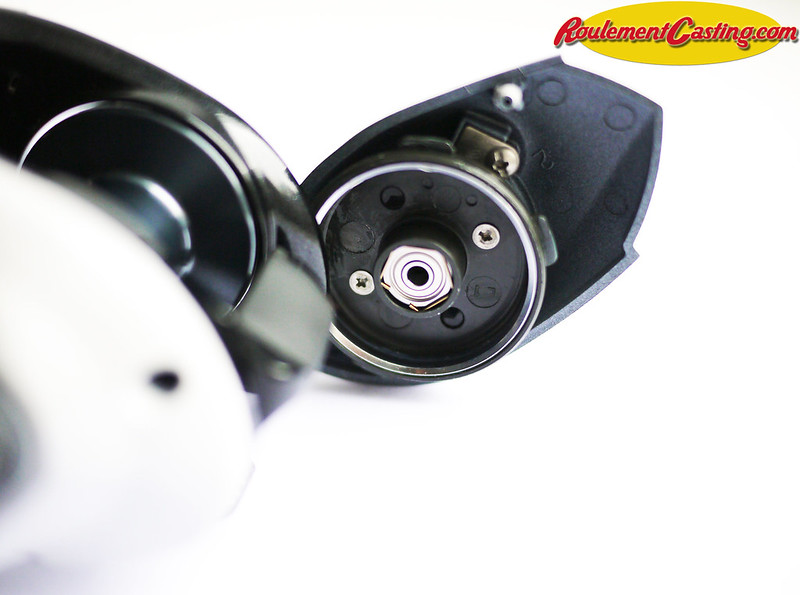
– You can close the sideplate. The second bearing is located in the friction brake lever at Shimano
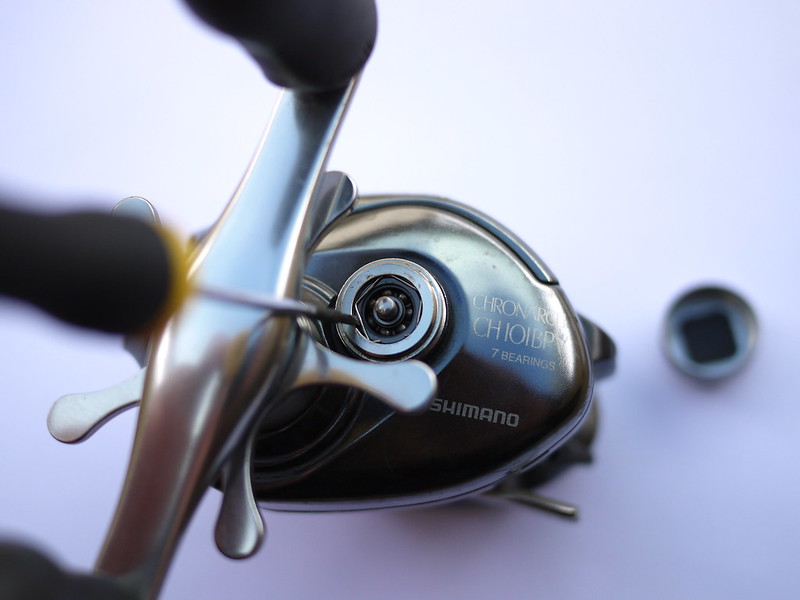
– Unscrew the knob
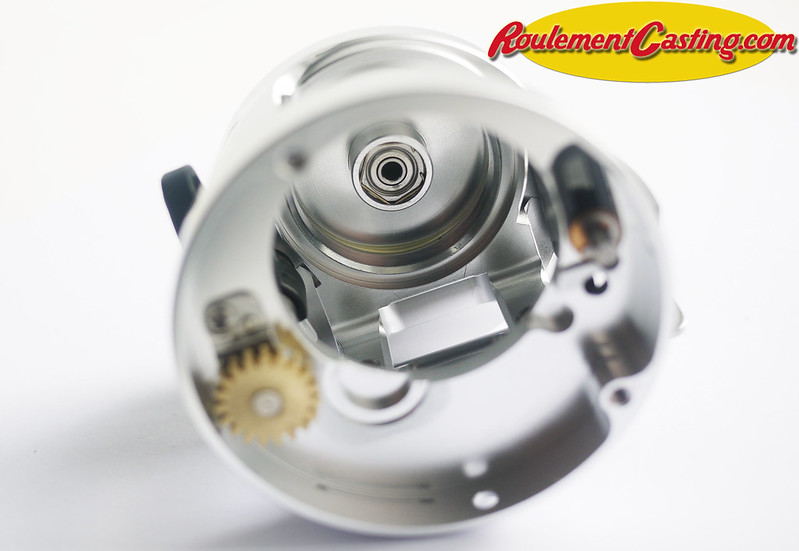
– Remove the bearing (if it is really stuck, removing the spool via the sideplate may make it easier to take out).
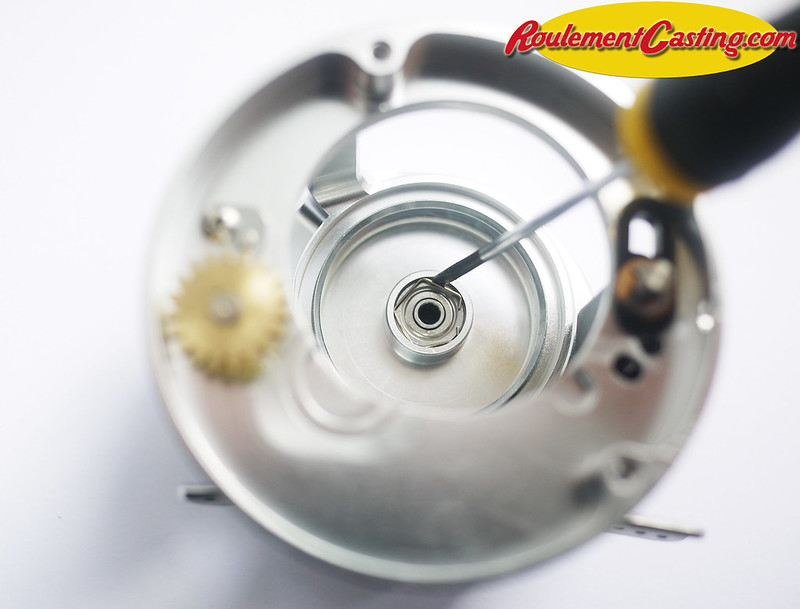
– Fit the new bearing after first oiling it as described above.
– Replace the small metal part and screw the knob back on.
It couldn't be simpler – it only takes two minutes! Ceramic bearings are a bit noisier than others, but don't worry, that's perfectly normal.
You can find our selection of parts for your Chronarch 101 BPV on the following page: Improvement Shimano Chronarch 101 BPV
– Open the side plate to access the adjustment weights; the first bearing is located above it. To remove it, simply remove the metal clip holding it in place. You can use a precision screwdriver for this.
PLEASE NOTE: you should hold it in place with your finger to stop the part flying off when it comes loose!
-Carefully remove the orange part (the seal) that protects the bearing using a sharp object (in this case, a fishhook). You can remove one or both – it’s up to you.
– Apply a drop of oil LBT High-speed oil on the bearing. It’s then up to you whether or not to replace the seal. Fitting it protects the bearing from dirt but must be removed every time you want to oil the bearing, whereas not refitting it makes maintenance easier but leaves the mechanism more exposed. I opted for the second option.
– Place the new bearing in its housing and put the small metal part back in place.
– You can close the sideplate. The second bearing is located in the friction brake lever at Shimano
– Unscrew the knob
– Remove the bearing (if it is really stuck, removing the spool via the sideplate may make it easier to take out).
– Fit the new bearing after first oiling it as described above.
– Replace the small metal part and screw the knob back on.
It couldn't be simpler – it only takes two minutes! Ceramic bearings are noisier than other types, but don't worry, that's perfectly normal.
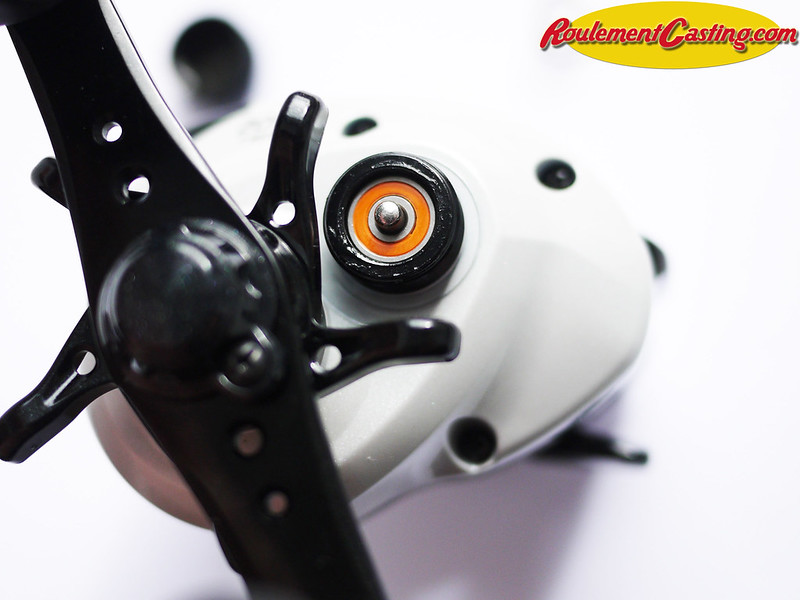
– Open the side plate to access the adjustment weights; the first bearing is located above it. To remove it, simply remove the metal clip holding it in place. You can use a precision screwdriver for this.
PLEASE NOTE: you should hold it in place with your finger to stop the part flying off when it comes loose!
-Carefully remove the orange part (the seal) that protects the bearing using a sharp object (in this case, a fishhook). You can remove one or both – it’s up to you.
– Apply a drop of special bearing oil to the bearing. It’s then up to you whether or not to replace the seal. Fitting it protects the bearing from dirt but must be removed every time you want to oil the bearing, whereas not refitting it simplifies maintenance but leaves the mechanism more exposed. I opted for the second option.
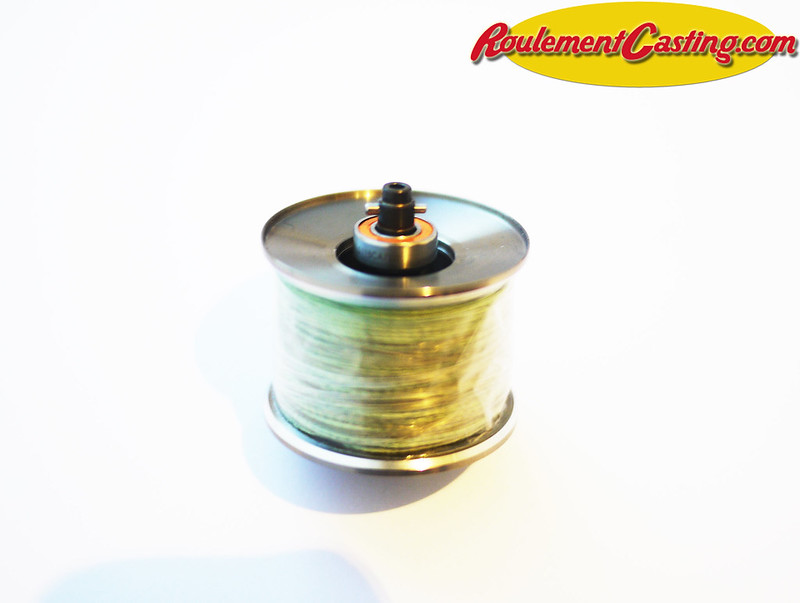
– Place the new bearing in the housing and put the small metal part back in position. For the photo, I put the orange seal back on the bearing.
– You can close the sideplate. The second bearing is located in the friction brake lever at Shimano
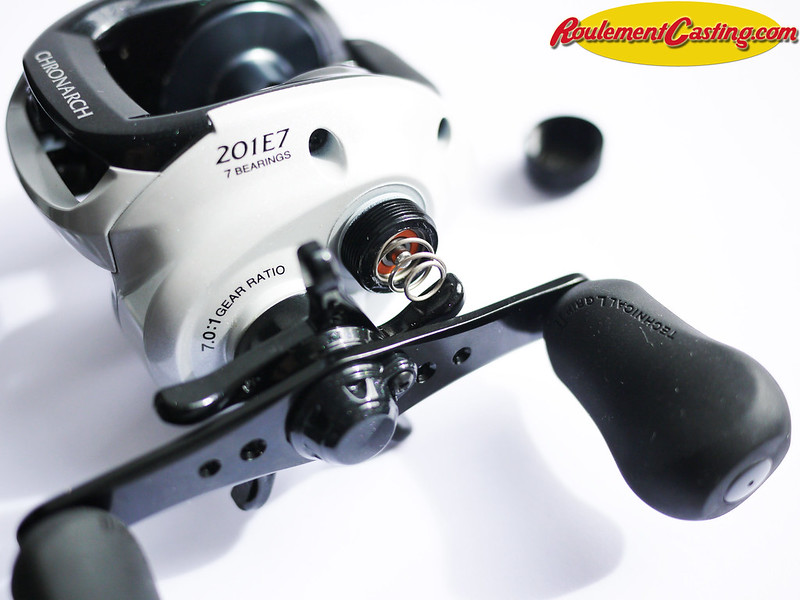
– Unscrew the knob and remove the spring located between the knob and the bearing
– Remove the bearing (if it is really stuck, removing the spool via the sideplate may make it easier to take out).
– Fit the new bearing after oiling it as described above. In this case, I put the orange seal back in place on the bearing for the photo.
– Replace the spring and screw the knob back on.
It couldn't be simpler – it only takes two minutes! The ceramic bearings are a bit noisier than the originals, but don't worry, that's perfectly normal.
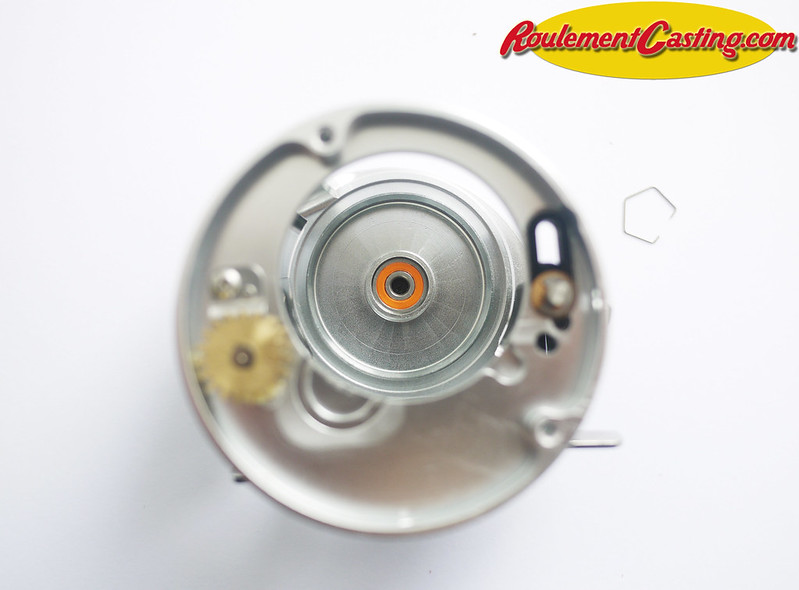
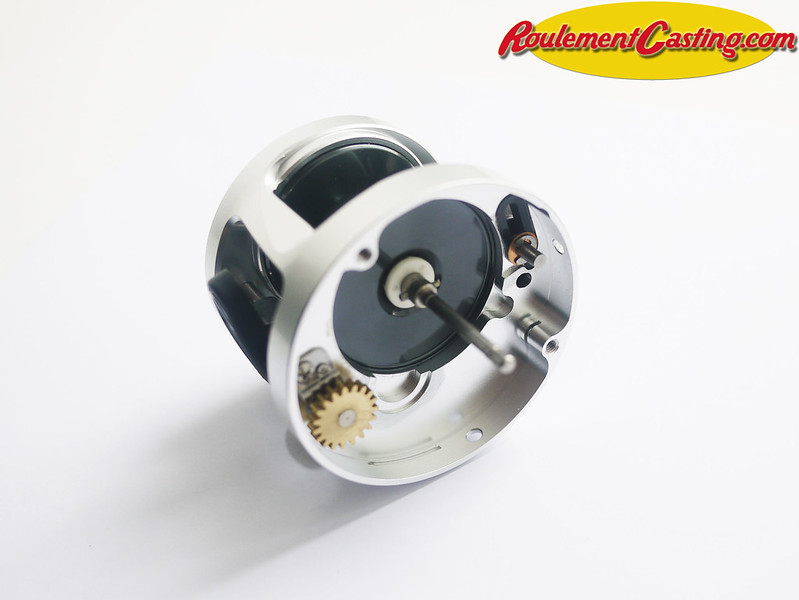
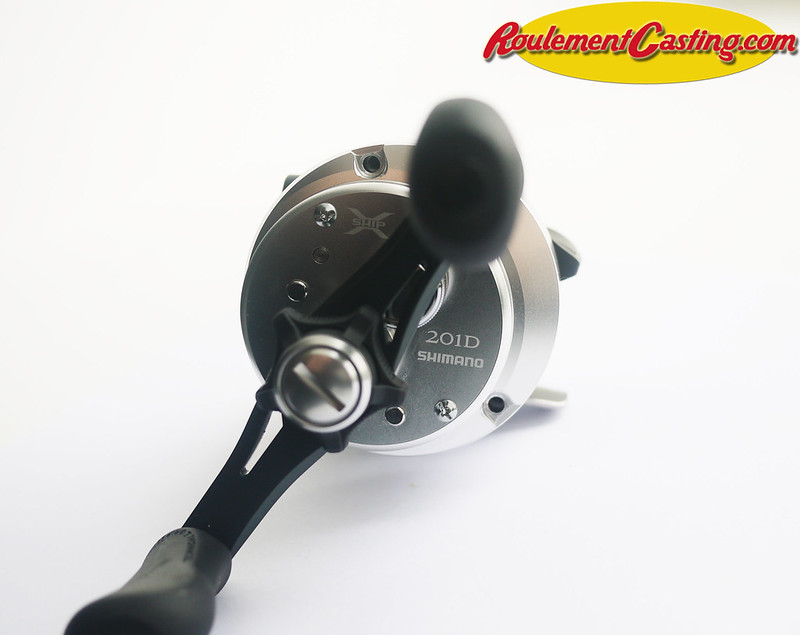
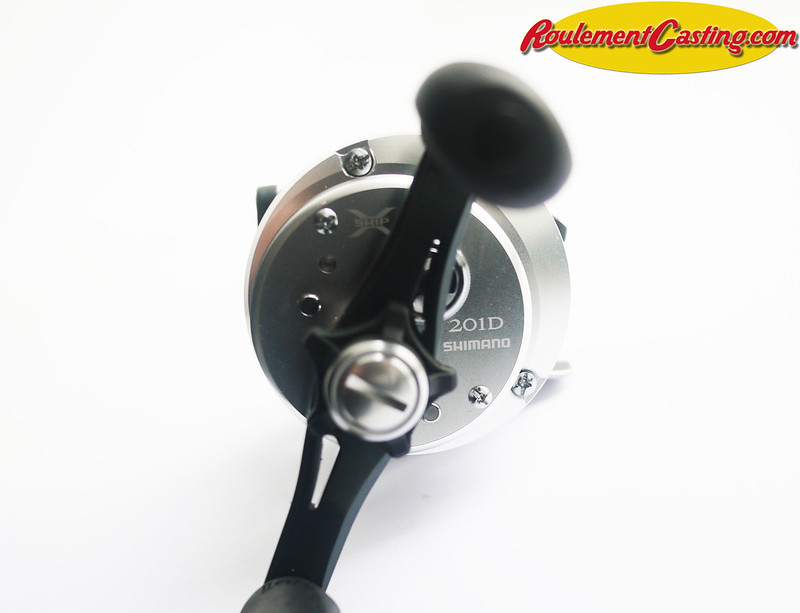
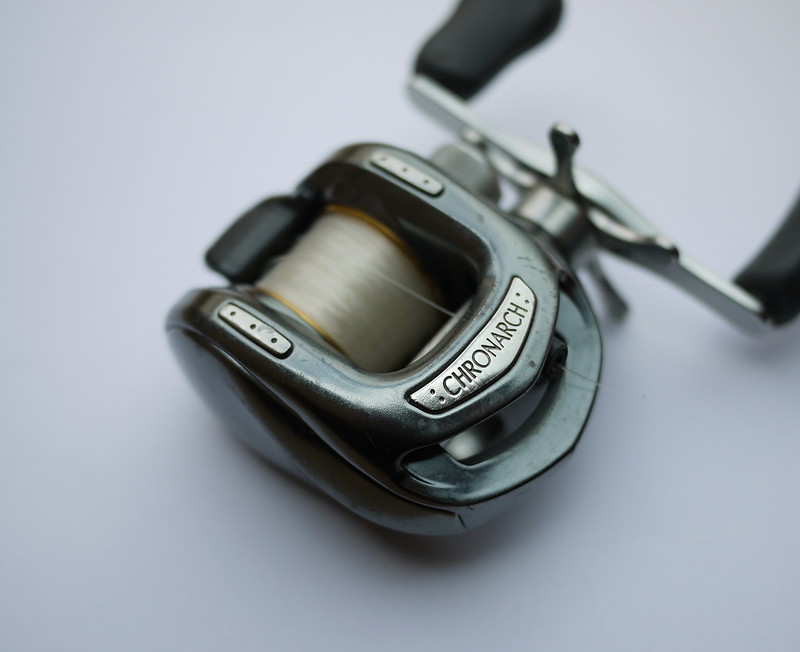
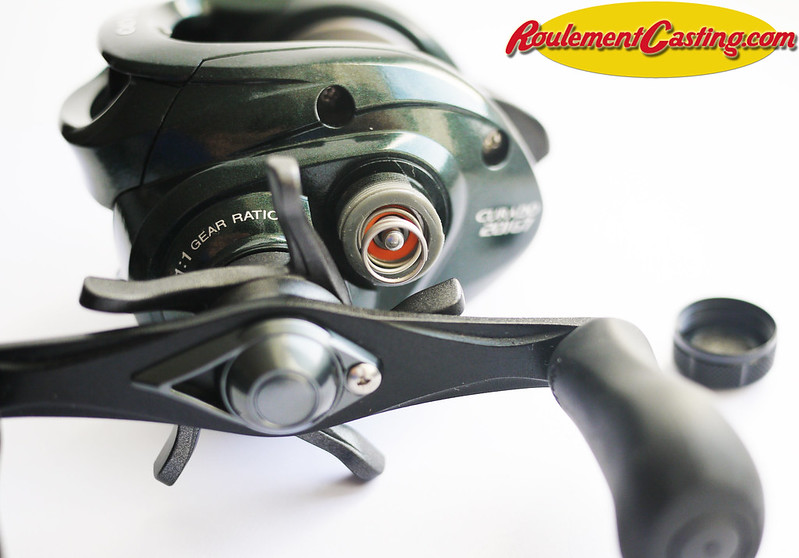
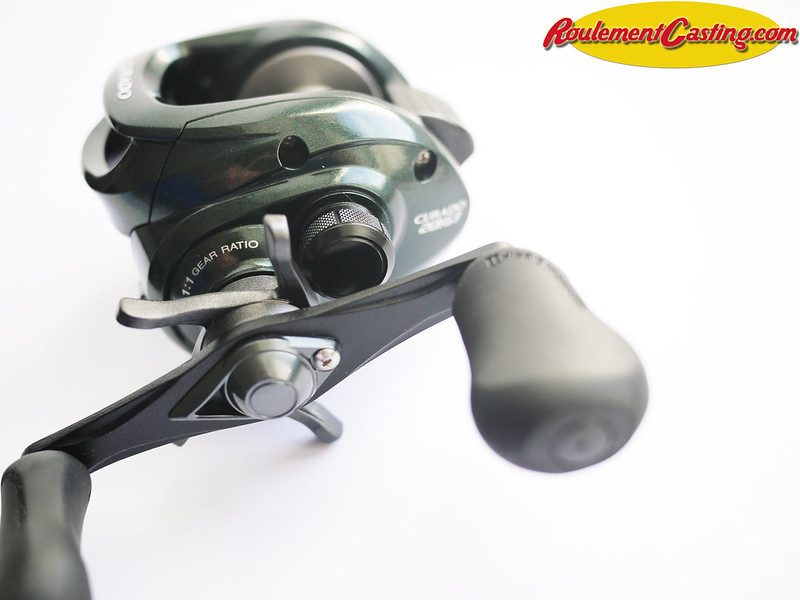
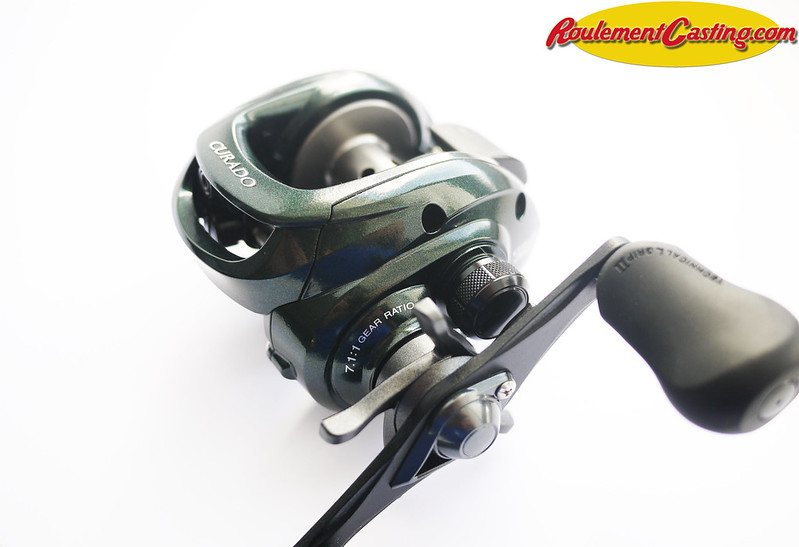
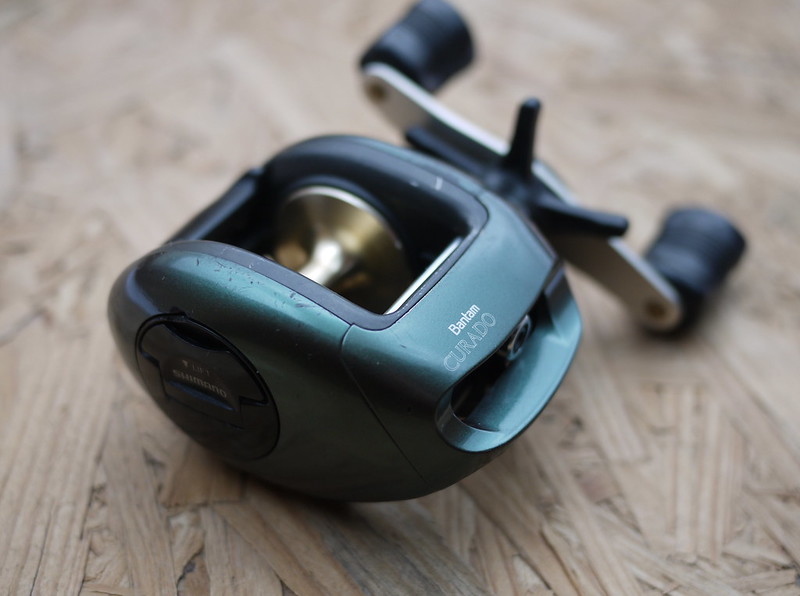
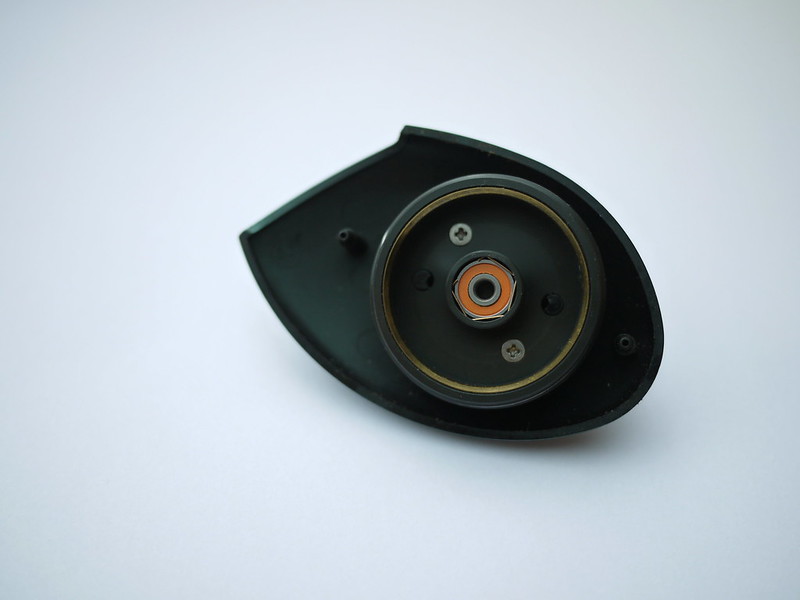
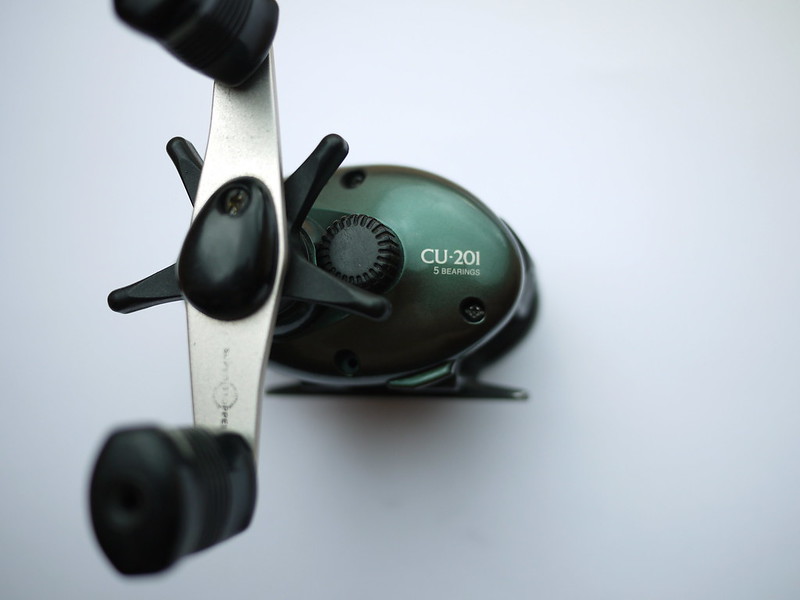
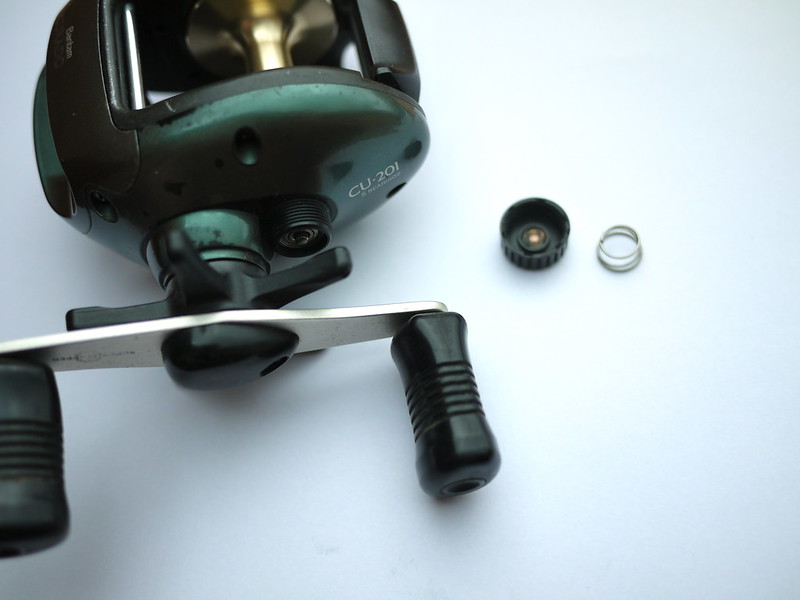
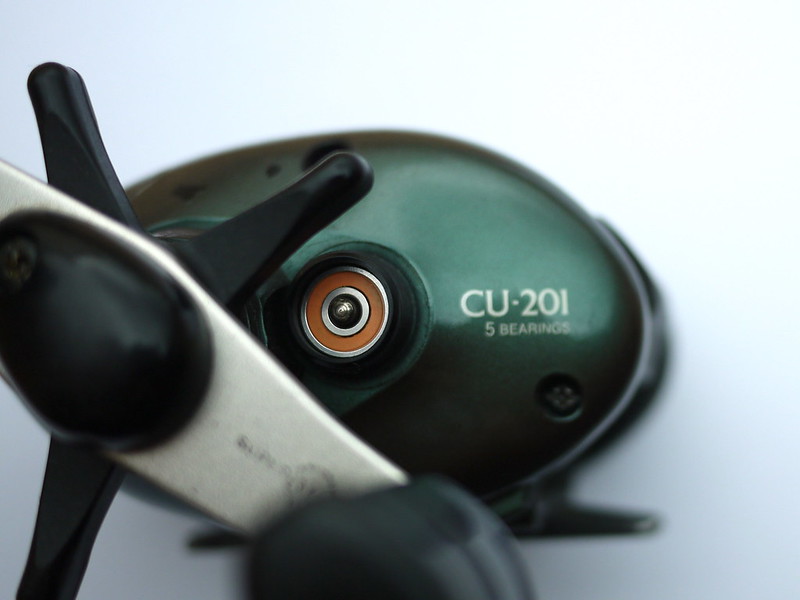
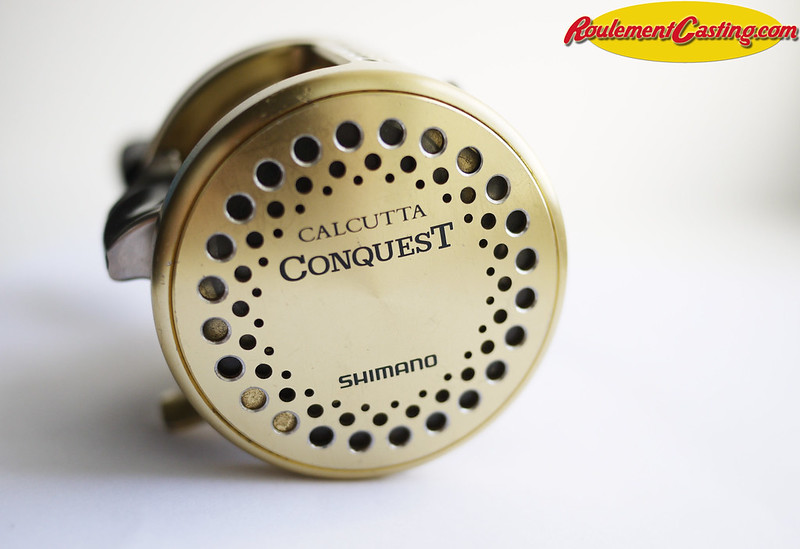
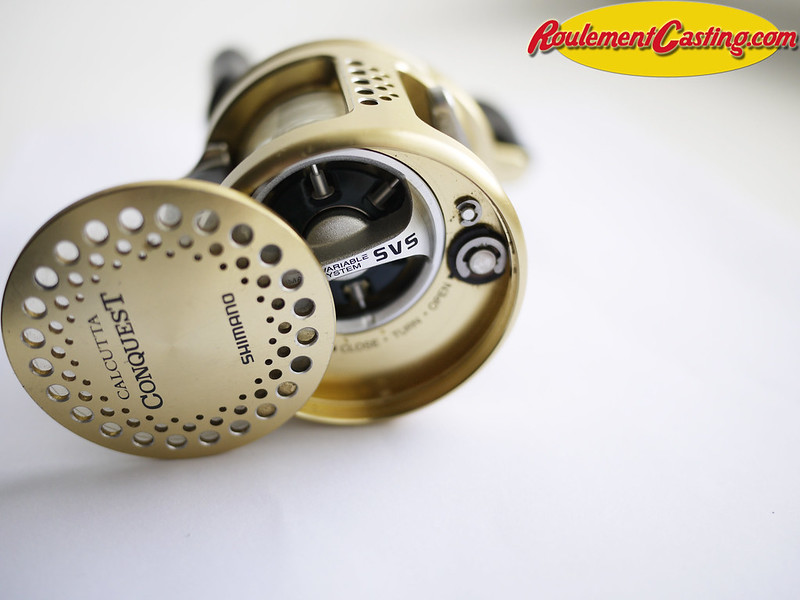
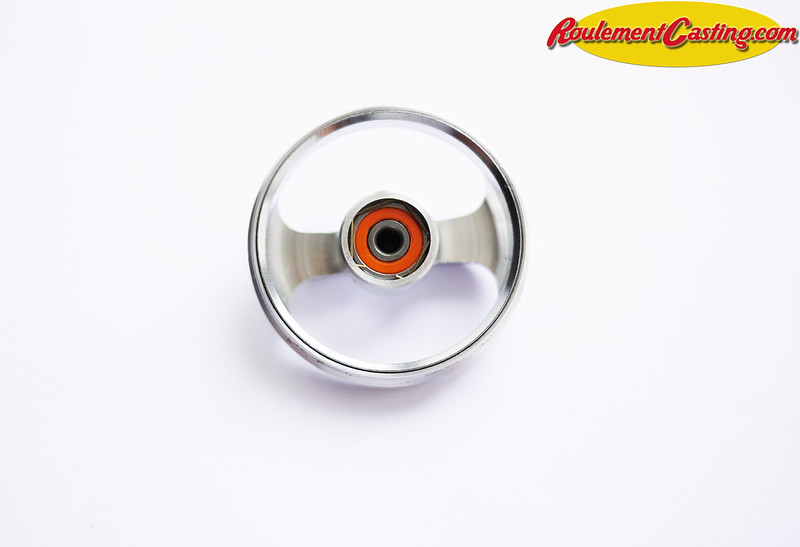
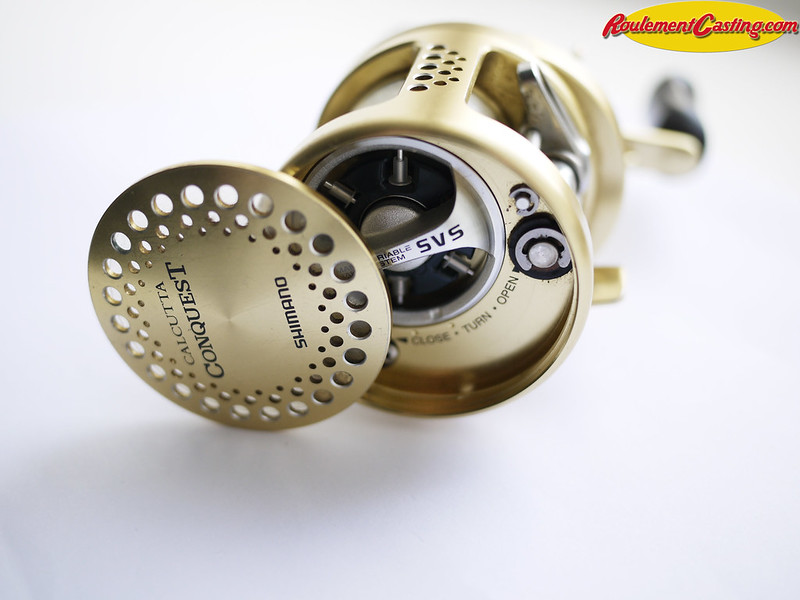
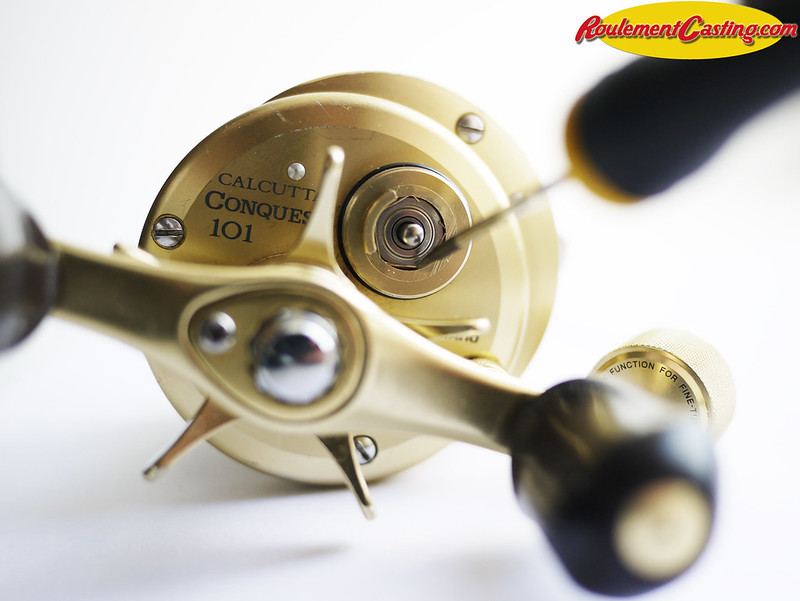
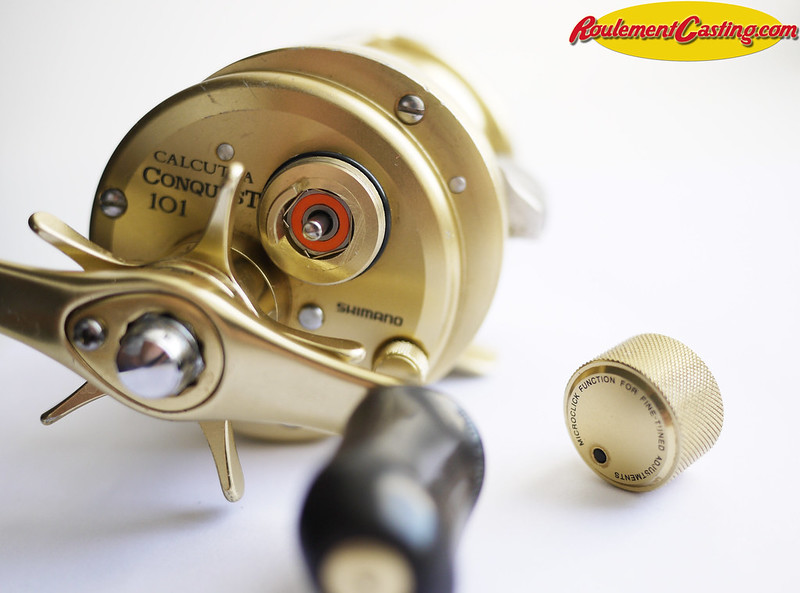
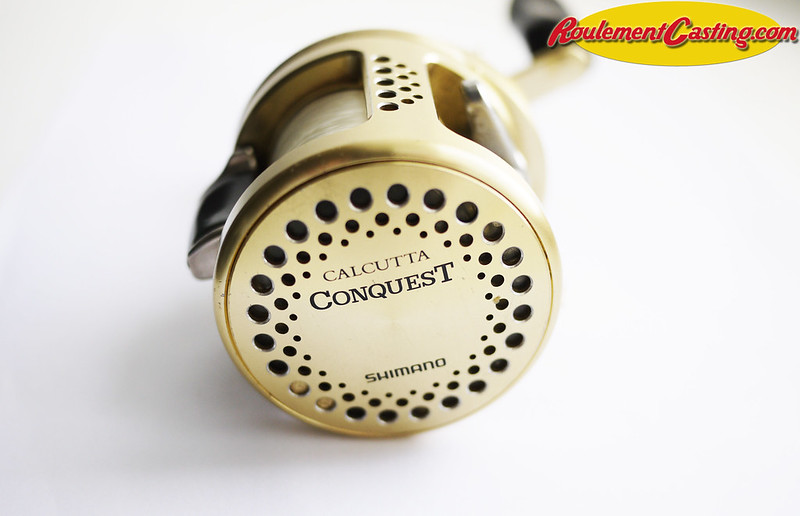
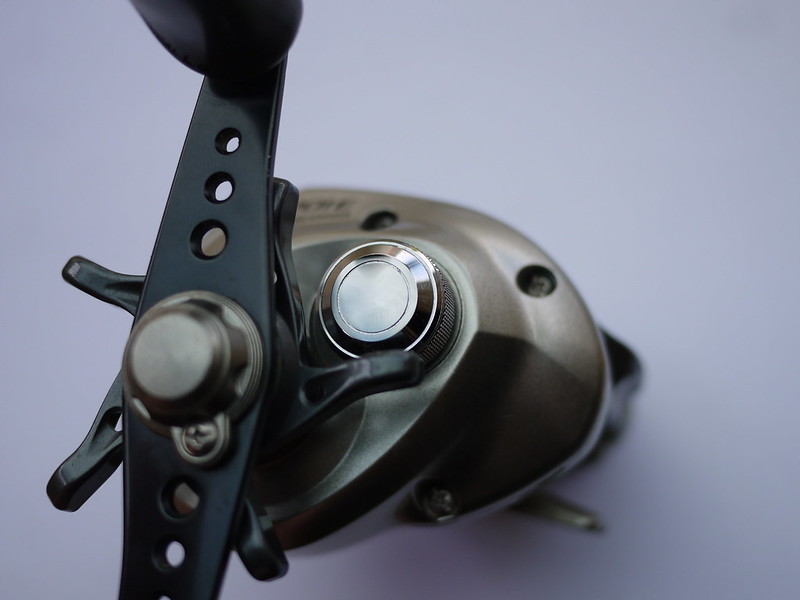
We’re going to look at how to quickly and easily replace the ball bearings on a Shimano Calcutta 101 Conquest to significantly improve its performance.
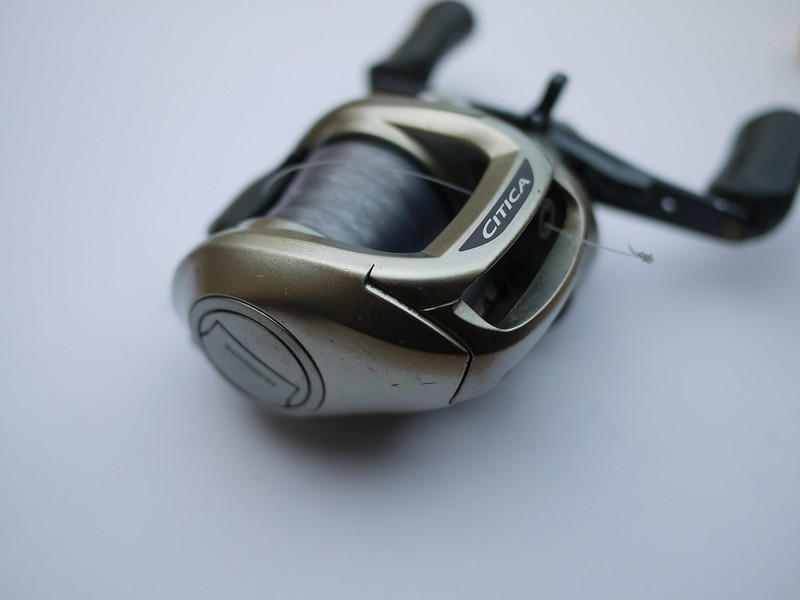
You can find our selection of parts for your Citica E on the following page: Shimano Citica E Upgrade
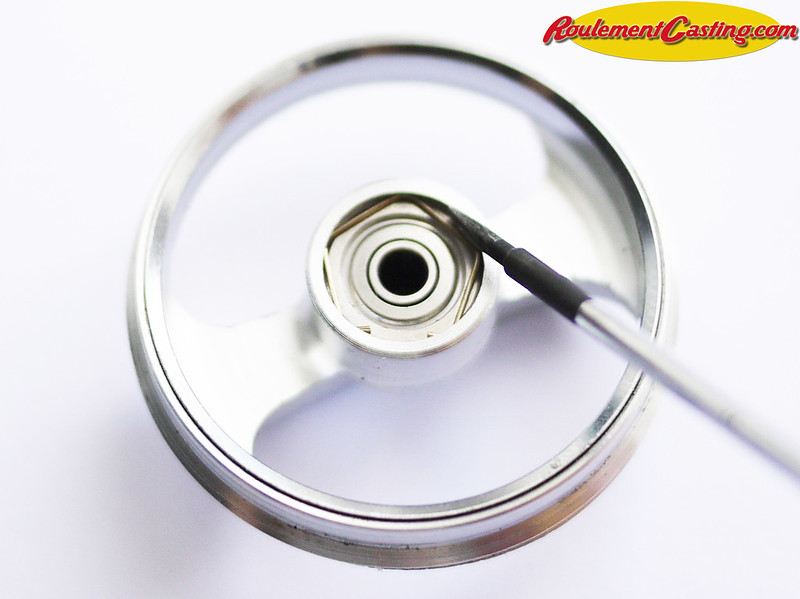
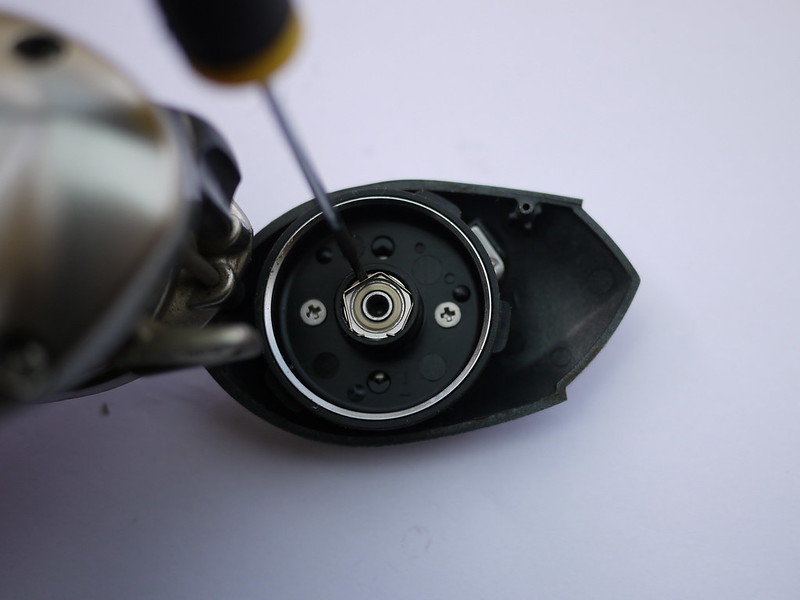
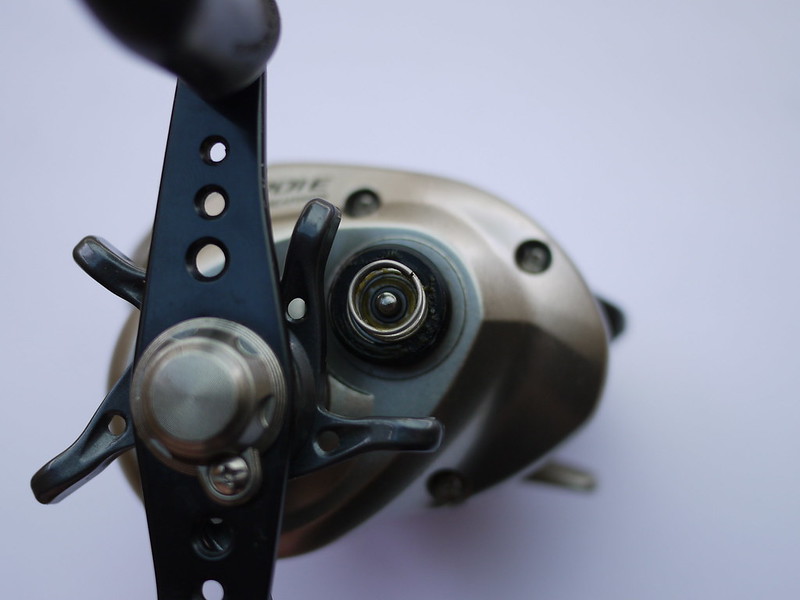
– Open the side plate to access the adjustment weights; the first bearing is located above it. To remove it, simply remove the metal clip holding it in place. You can use a precision screwdriver for this.
PLEASE NOTE: you should hold it in place with your finger to stop the part flying off when it comes loose!
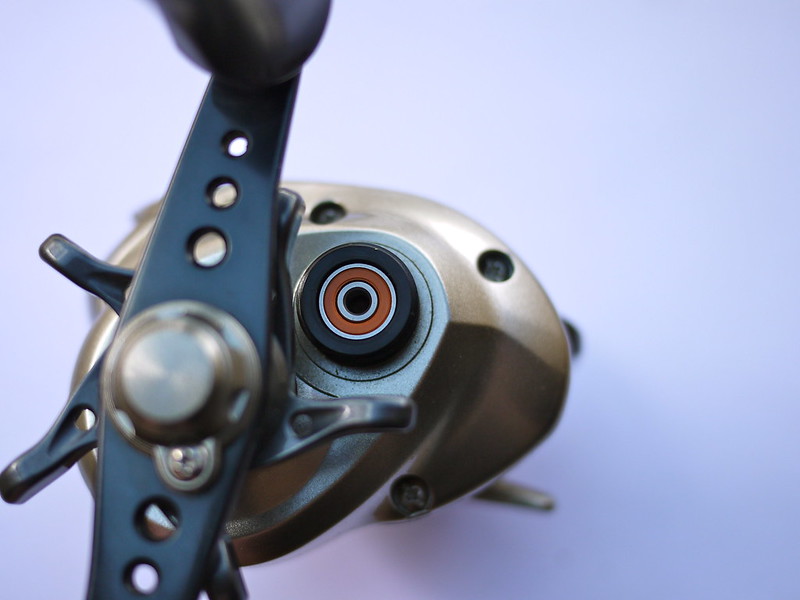
-Carefully remove the orange part (the seal) that protects the bearing using a sharp object (in this case, a fishing hook). You can remove just one or both – it’s up to you.
– Apply a drop of special bearing oil to the bearing. It’s then up to you whether or not to replace the seal. Fitting it protects the bearing from dirt but must be removed every time you want to oil the bearing, whereas leaving it off simplifies maintenance but leaves the mechanism more exposed. I opted for the second option.
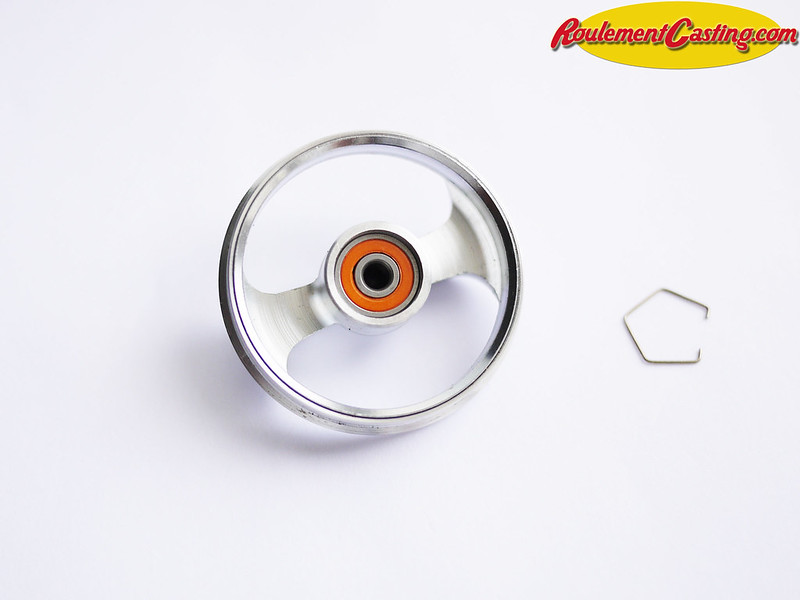
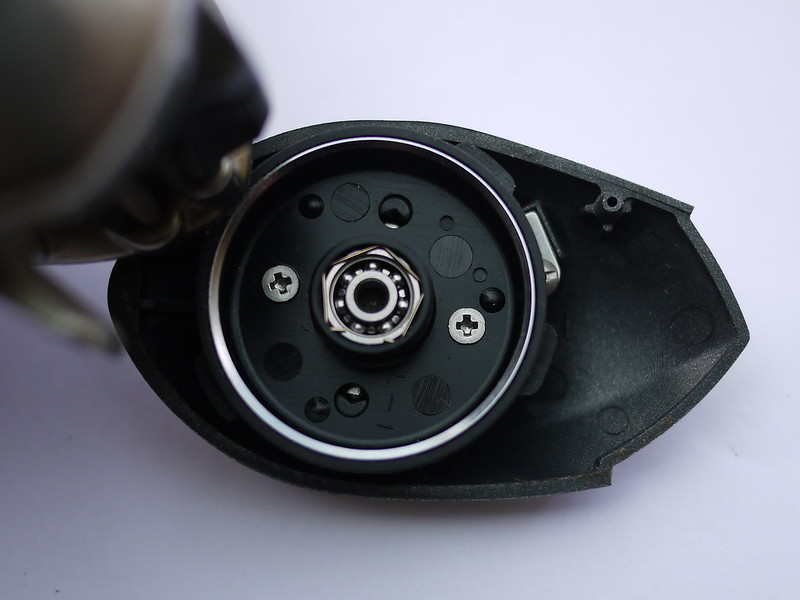
– Place the new bearing in its housing and put the small metal part back in place.
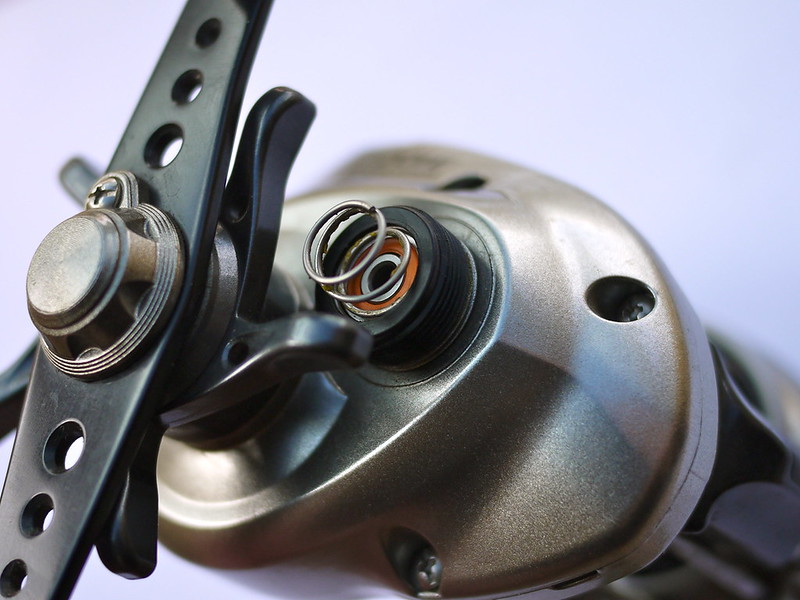
– You can close the sideplate. The second bearing is located in the friction brake lever at Shimano
– Unscrew the knob and remove the spring located between the knob and the bearing
– Remove the bearing (if it is really stuck, removing the spool via the sideplate may make it easier to take out).
– Fit the new bearing after oiling it as described above. In this case, I put the orange seals back on the bearing for the photo.
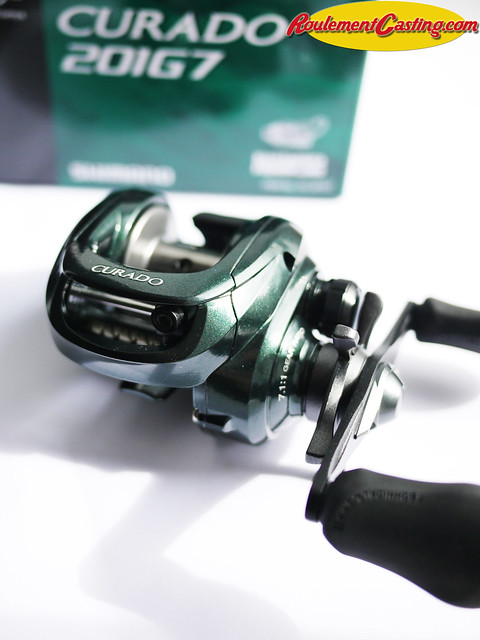
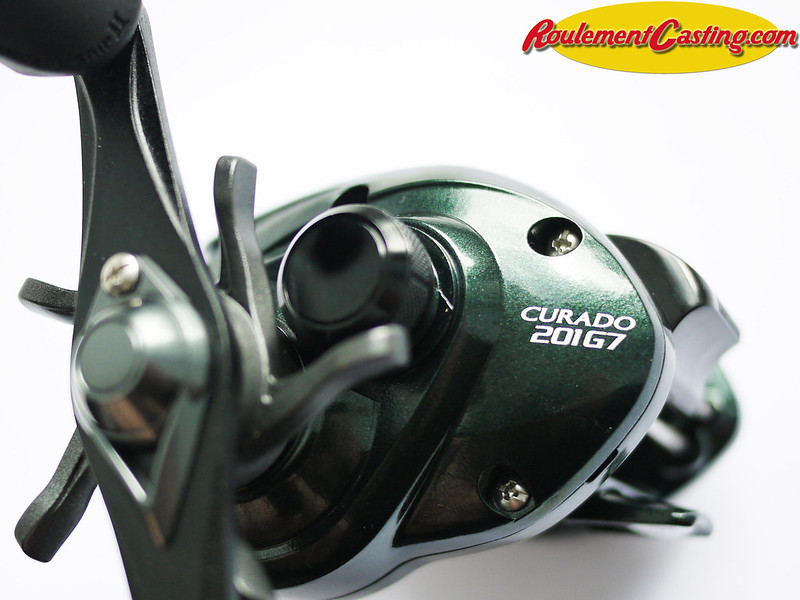
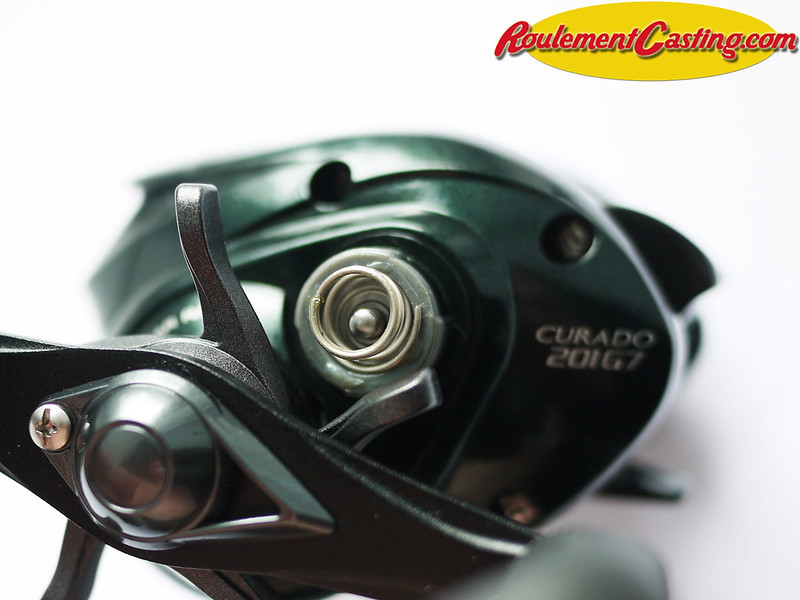
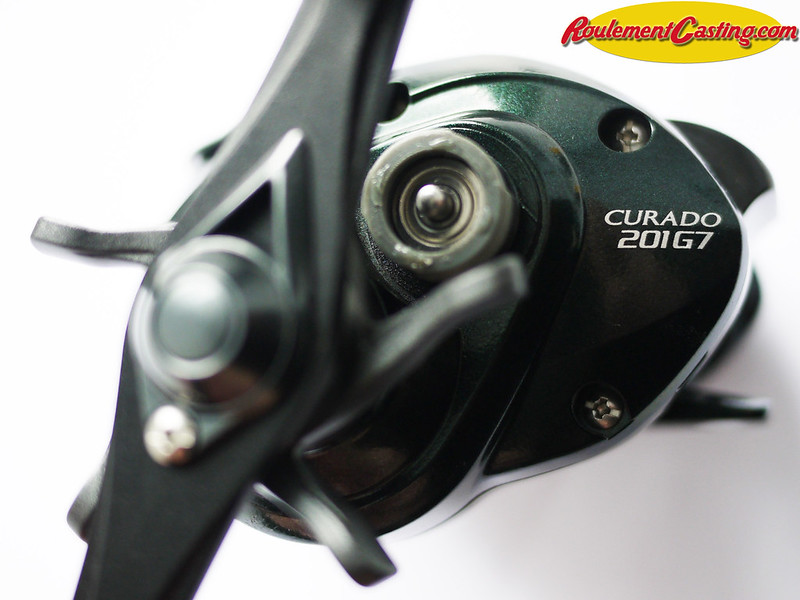
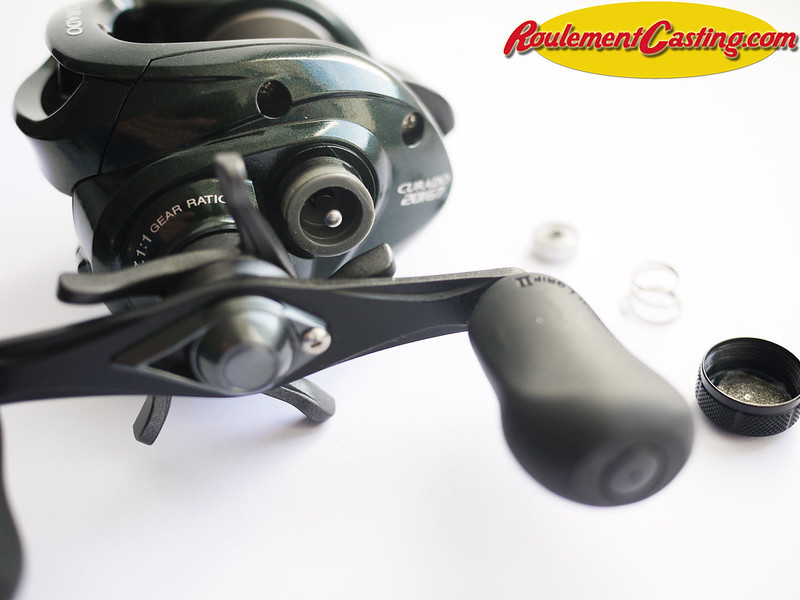
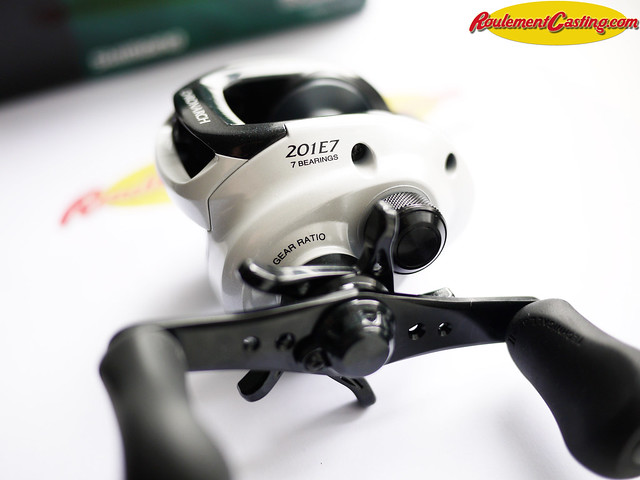
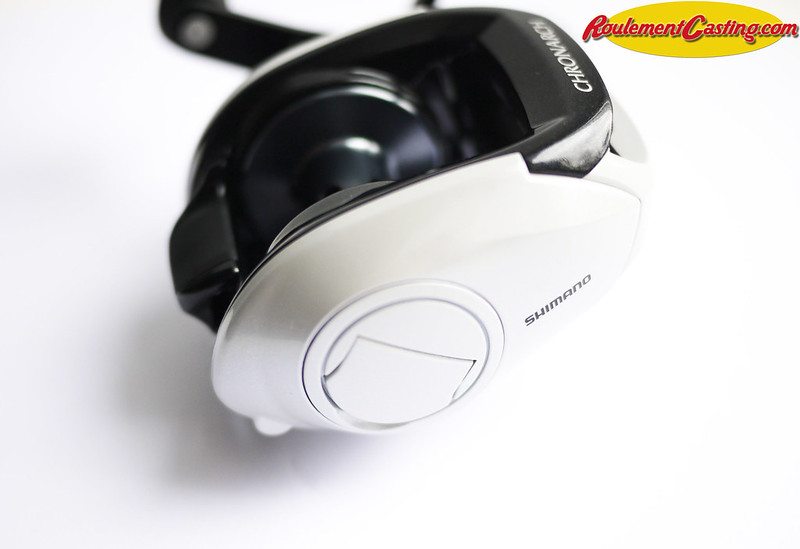
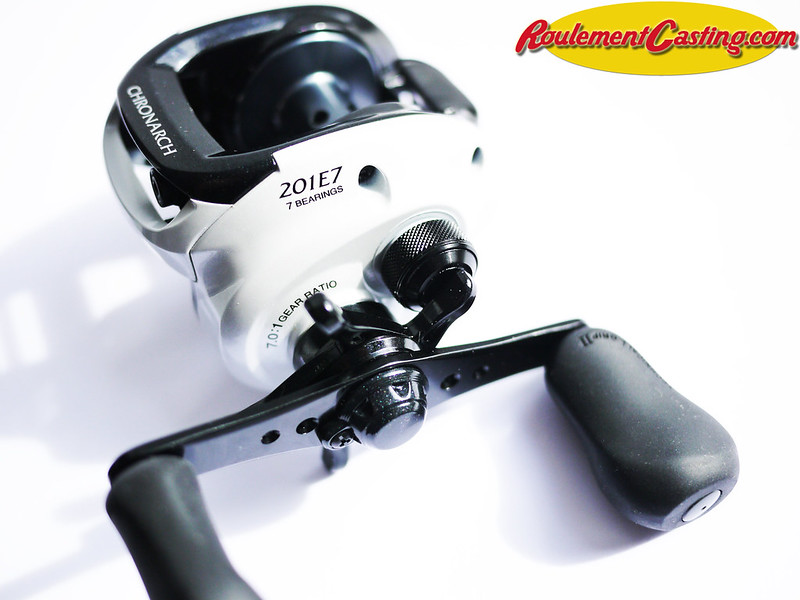
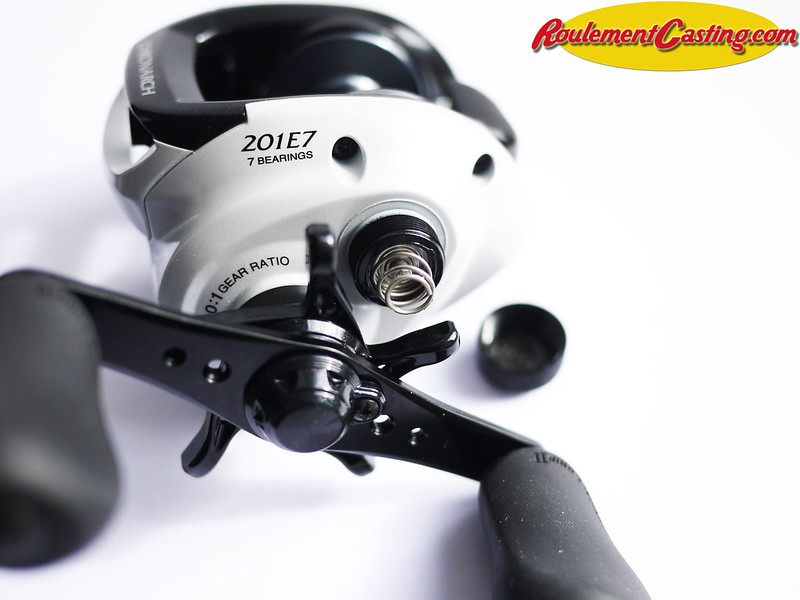
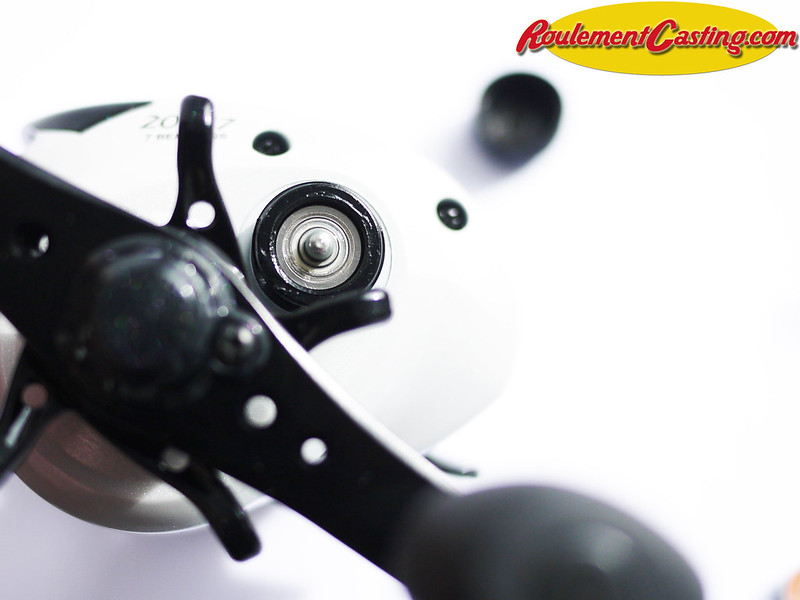
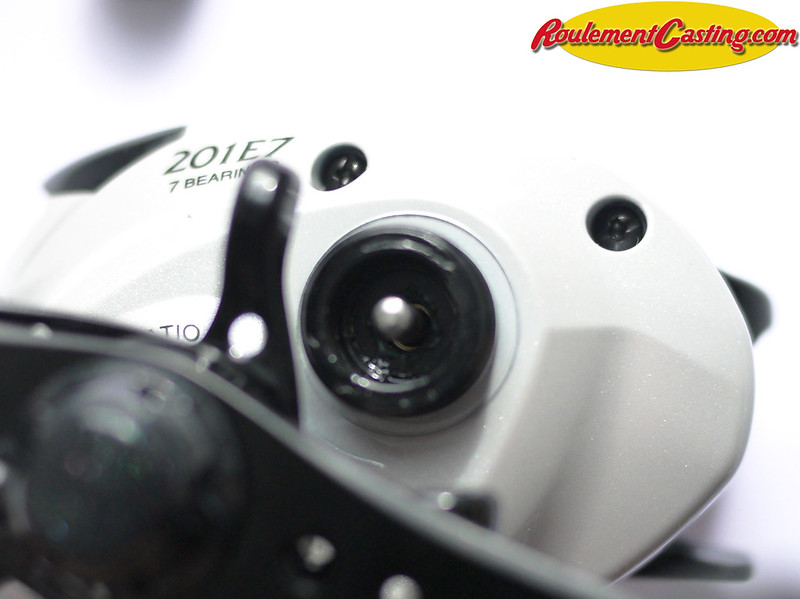
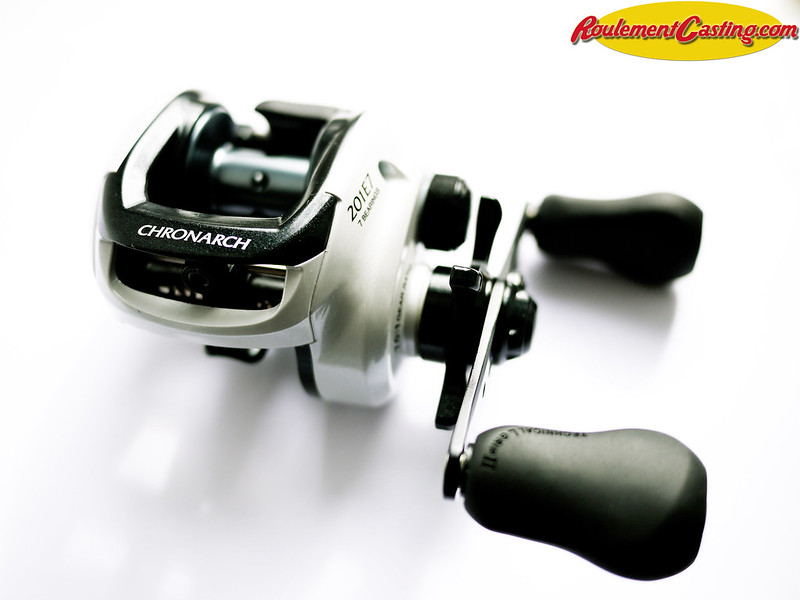
We’re going to look at how to quickly and easily replace the original ball bearings on a Shimano Chronarch 201E7 with hybrid ceramic bearings to significantly improve its performance. You can find our selection of parts for your Chronarch E7 on the following page: Shimano Chronarch E7 Upgrade